22r head gasket replacement
 03-26-2012, 10:29 AM
#1
Registered User
Thread Starter

Join Date: Mar 2012
Location: Pittsburgh PA
Posts: 40
Likes: 0
Received 0 Likes
on
0 Posts
22r head gasket replacement
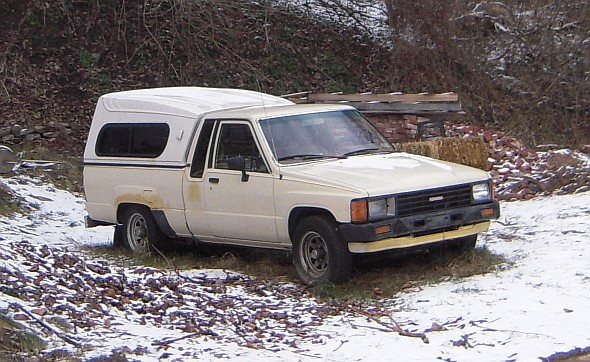
Hello everyone... been reading these threads here for years, but haven't ever posted. A friend donated their 1985 pickup (22r late model) to me, and I've decided to try to "fix" it. Do I know what's wrong? Not really! I'm not a mechanic, and I don't know what I'm doing... learning on the fly.
My friend's mechanic told me that the head gasket was blown and I should try some ceramic product to seal it without HG removal. I decided I wanted to learn how to fix a truck and have invested in some tools and parts.
Here is a google album of pictures from the head-dismantling:
https://plus.google.com/photos/11093...44258529424401
Background:
- Muffler+cat fell off (welded joint rusted through and broke) while driving into mechanic's shop (bad omen) in October 2011 --> mechanic diagnosed blown HG --> friend gave up on truck and gave it to me...
- Truck turned on and ran in November 2011, drove it about 500 feet.
- Left it sitting out in the cold with a tank full of gas all winter. Battery was too dead to start engine in early March 2012. Siphoned gas tank and began engine dis-assembly in nice weather.
Problems:
- Coolant has spurted around under the hood and is pooled in odd places. Coolant appears to be in the oil. Oil in the head is tan-colored.
- Water pump appears to be recently replaced. Three of the WP bolts contained string (as in, cotton thread) through them and the gasket. See photo album.
- Flexy-hose connecting underside of air intake (...to I-don't-know-what) was disconnected.
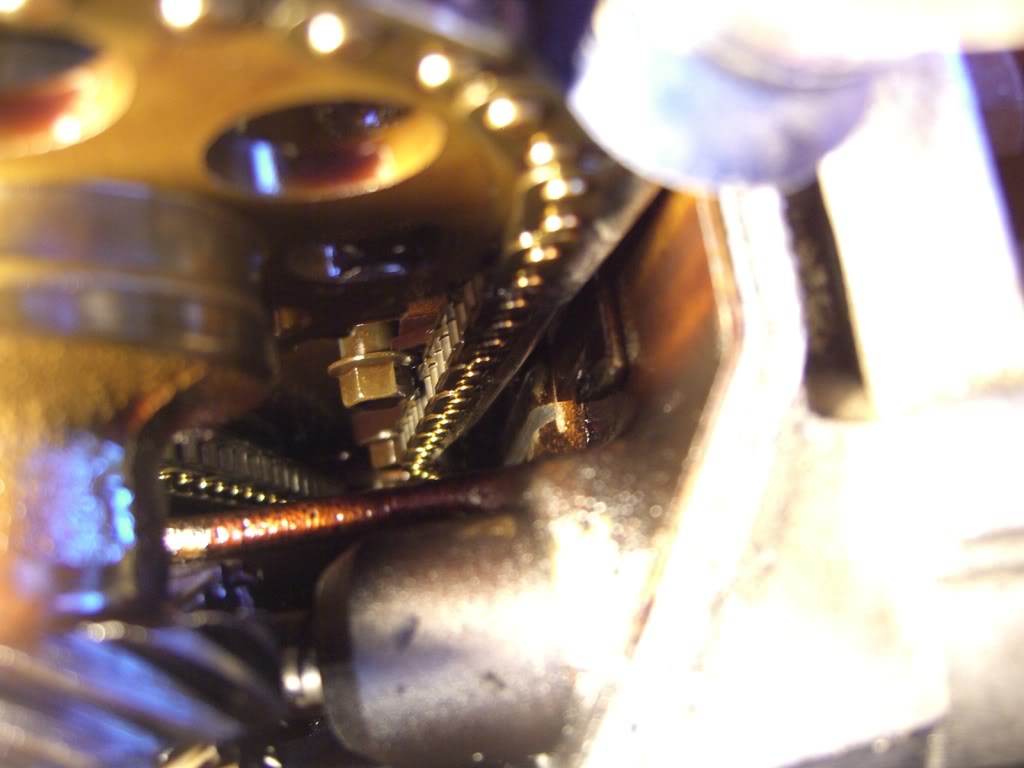
- Right-hand plastic timing chain guide is broken, missing a chunk.
- Everything under the hood is coated in oil. I know this truck and it's been like this for at least four years. This truck has "disappeared" oil and coolant at a moderate rate for years.
More observations:
- Numbered in order of extraction: head bolts 1, 3, 9, 10, 4 came out bathed in black oil. Others were dry/ashy, #8 was the hardest to get out. None were loose. Nothing broke!
- Spark plug terminals #2 and #4 had debris in them. Ground electrodes: #1 is fouled with brownish granular stuff and is oily, #3 and #4 have ashy scale built up on them, #2 is cleanish. All gaps are clear and center electrodes intact, no damaged plugs.
- Piston #1 is oily and dirty, #2 is dark and dry, #3 is pretty clean, #4 is carboned up and dirty. I wasn't very careful taking the head off, oil and coolant dripped on the pistons, and again I left this truck sitting all winter.
- Exhaust ports #1 and #2 are very carboned up and oily. #3 and #4 are less carboned and ashy. Exhaust valves #1 and #4 are caked in scale, #2 and #3 less so. Same exact story on intake side.
- Cam shaft moves freely with finger pressure. Rocker assembly and valve springs look fine visually.
- I think I got the engine to top dead center on the #1 piston, but the crankshaft pully notch is about two inches ahead of the marking gauge at the bottom of the timing cover... what does this mean?
- I took the distributor drive gear out before setting TDC#1... whoops? Don't really know what this means yet.
- HG itself looks beat up but no obvious tears / chunks missing.

If I had to guess I'd say the HG leaked somewhere around #1 piston, leaking oil and coolant. I hope the head bolts being bathed in oil isn't some kind of sign that the block is cracked.
I bought the OEM HG + non-OEM gasket set and head bolts from 22RE-Performance, and the $146 "front end kit" from Engnbldr. Looking at how carboned up the valves are, I think I might just by the $348 "fully assembled" head from Engnbldr -- to resurface the head I have is ~$70, and new valves and fixings and tools and labor for valve replacement/grinding/lapping looks like $150+, soooo....
Block deck looks fine, hope pistons, rods, etc, are fine. Any other engine component (and who sells the part?) that I should replace now to prevent future oil / coolant / temperature related problems? Again, I'm a total noob, have no auto-repair experience at all. If you want to look through the photos I've posted, and comment here on what you see, please do! I can use all the advice you can throw at me.

My friend's mechanic told me that the head gasket was blown and I should try some ceramic product to seal it without HG removal. I decided I wanted to learn how to fix a truck and have invested in some tools and parts.
Here is a google album of pictures from the head-dismantling:
https://plus.google.com/photos/11093...44258529424401
Background:
- Muffler+cat fell off (welded joint rusted through and broke) while driving into mechanic's shop (bad omen) in October 2011 --> mechanic diagnosed blown HG --> friend gave up on truck and gave it to me...
- Truck turned on and ran in November 2011, drove it about 500 feet.
- Left it sitting out in the cold with a tank full of gas all winter. Battery was too dead to start engine in early March 2012. Siphoned gas tank and began engine dis-assembly in nice weather.
Problems:
- Coolant has spurted around under the hood and is pooled in odd places. Coolant appears to be in the oil. Oil in the head is tan-colored.
- Water pump appears to be recently replaced. Three of the WP bolts contained string (as in, cotton thread) through them and the gasket. See photo album.
- Flexy-hose connecting underside of air intake (...to I-don't-know-what) was disconnected.
- Right-hand plastic timing chain guide is broken, missing a chunk.
- Everything under the hood is coated in oil. I know this truck and it's been like this for at least four years. This truck has "disappeared" oil and coolant at a moderate rate for years.
More observations:
- Numbered in order of extraction: head bolts 1, 3, 9, 10, 4 came out bathed in black oil. Others were dry/ashy, #8 was the hardest to get out. None were loose. Nothing broke!
- Spark plug terminals #2 and #4 had debris in them. Ground electrodes: #1 is fouled with brownish granular stuff and is oily, #3 and #4 have ashy scale built up on them, #2 is cleanish. All gaps are clear and center electrodes intact, no damaged plugs.
- Piston #1 is oily and dirty, #2 is dark and dry, #3 is pretty clean, #4 is carboned up and dirty. I wasn't very careful taking the head off, oil and coolant dripped on the pistons, and again I left this truck sitting all winter.
- Exhaust ports #1 and #2 are very carboned up and oily. #3 and #4 are less carboned and ashy. Exhaust valves #1 and #4 are caked in scale, #2 and #3 less so. Same exact story on intake side.
- Cam shaft moves freely with finger pressure. Rocker assembly and valve springs look fine visually.
- I think I got the engine to top dead center on the #1 piston, but the crankshaft pully notch is about two inches ahead of the marking gauge at the bottom of the timing cover... what does this mean?
- I took the distributor drive gear out before setting TDC#1... whoops? Don't really know what this means yet.
- HG itself looks beat up but no obvious tears / chunks missing.
If I had to guess I'd say the HG leaked somewhere around #1 piston, leaking oil and coolant. I hope the head bolts being bathed in oil isn't some kind of sign that the block is cracked.
I bought the OEM HG + non-OEM gasket set and head bolts from 22RE-Performance, and the $146 "front end kit" from Engnbldr. Looking at how carboned up the valves are, I think I might just by the $348 "fully assembled" head from Engnbldr -- to resurface the head I have is ~$70, and new valves and fixings and tools and labor for valve replacement/grinding/lapping looks like $150+, soooo....
Block deck looks fine, hope pistons, rods, etc, are fine. Any other engine component (and who sells the part?) that I should replace now to prevent future oil / coolant / temperature related problems? Again, I'm a total noob, have no auto-repair experience at all. If you want to look through the photos I've posted, and comment here on what you see, please do! I can use all the advice you can throw at me.
Last edited by AJ Tarnas; 03-26-2012 at 10:35 AM.
 03-26-2012, 10:38 AM
#2
1) good luck!
2)
nothing new, completely normal. i broke #8.
3)https://www.yotatech.com/forums/f116...d-pics-232381/
4)welcome to yotatech! you've come to the right place for doing this repair
2)
- Numbered in order of extraction: head bolts 1, 3, 9, 10, 4 came out bathed in black oil. Others were dry/ashy, #8 was the hardest to get out. None were loose. Nothing broke!
3)https://www.yotatech.com/forums/f116...d-pics-232381/
4)welcome to yotatech! you've come to the right place for doing this repair
 03-29-2012, 04:04 AM
#4

i don't know what's up with the string

the tic-mark on the pulley should be lined up with the zero. the other numbers are for timing it while the engine is running. and it does look a bit off. you'll need to take that off; that bolt in the front is the only one holding it on, and then the pulley slides off. i wouldn't be surprised if the key-way is messed up
and the oil everywhere suggests that your front-main oil seal went bad. it happens, and you'll be replacing it anyway, so no worries.
03-30-2012, 07:02 AM
#6
Registered User
Thread Starter
Join Date: Mar 2012
Location: Pittsburgh PA
Posts: 40
Likes: 0
Received 0 Likes
on
0 Posts
By RTV, you mean silicone? No, they're definitely fiber threads! Almost certainly created gaps in the water pump seal.
Glad to hear the oil everywhere might just be an old front main oil seal.
I didn't use the starter + breakerbar method of loosening the crackshaft pulley nut... without a good impact wrench, how best to get that nut off? My only idea is a bunch of clamps and a friction-grip to hold the pulley in place while torquing the nut with a wrench and cheater bar.
Trending Topics
03-31-2012, 07:24 AM
#9
Registered User

Join Date: Apr 2011
Posts: 12
Likes: 0
Received 0 Likes
on
0 Posts
Did you do a compression check on the motor before pulling the head? valve seals probably need to be replaced too. as far as taking the distributor out before hitting TDC you would just need to get the motor at TDC (on compression stroke) and stab the gear in so it's firing at #1.
when i pulled the main pulley bolt i just put it in gear with e-brake on and a block on the tires to stop them from moving. did not need a ratcheting strap.
steve
when i pulled the main pulley bolt i just put it in gear with e-brake on and a block on the tires to stop them from moving. did not need a ratcheting strap.
steve
04-03-2012, 10:11 AM
#10
Registered User
Thread Starter
Join Date: Mar 2012
Location: Pittsburgh PA
Posts: 40
Likes: 0
Received 0 Likes
on
0 Posts
Like a dummy, I did not do a compression test before disassembly. Testing with the head off, valve/seat interfaces are not liquid-tight. I've got the truck in neutral on a slight slope with e-brake on and wheels blocked -- can I put in in gear while stationary (it's an automatic) even after having taken so many engine components out of it?
Does this look like a reputable parts website?
http://toyota-parts.toyotapart.com/s...-45014&x=0&y=0
Does this look like a reputable parts website?
http://toyota-parts.toyotapart.com/s...-45014&x=0&y=0
04-04-2012, 09:21 PM
#12
Registered User
Join Date: Apr 2012
Location: yucaipa Ca
Posts: 7
Likes: 0
Received 0 Likes
on
0 Posts
any other parts
i would also replace your timing chain and tensioner when you have her torn down, my tensioner broke on my 22re and the chain was slapping around the inside of the block until it wore a hole that aloud all my coolant to drain into my oil pan. PITA
04-05-2012, 05:29 PM
#13
Registered User
Thread Starter
Join Date: Mar 2012
Location: Pittsburgh PA
Posts: 40
Likes: 0
Received 0 Likes
on
0 Posts
Yep, I got engnbldr's "front end kit" -- my driver-side plastic timing guide is broken, but I haven't taken off the cover yet so I don't know if there's any real damage. If your chain created a hole in the block... was that engine block finished?
 04-11-2012, 10:45 AM
#15
Registered User
Thread Starter
Join Date: Mar 2012
Location: Pittsburgh PA
Posts: 40
Likes: 0
Received 0 Likes
on
0 Posts
I've got all the components now, going to dive into this as the weather clears up in the days ahead.
I bought the $348 assembled head from engnbldr and the front #1 camshaft bearing "saddle" is pitted (the casting has tony airholes which were revealed during machining).

I set my old cam into the head and it moves freely without distortion in the three bearing "saddles". It shows .003" in lateral ("thrust clearance") play, which is standard. I bolted down the camshaft bearing caps and then the camshaft DOES NOT move as freely. I haven't checked for middle bearing journal runout. The cam bearing journals seem perfectly round with diameters of 1.300" +/- .001", which is standard. Is this normal behavior? I haven't measured for oil clearance. Any advice/insights for me?
Also, what sort of grease/lube would you use on these journals/bearings during final assembly?
I bought the $348 assembled head from engnbldr and the front #1 camshaft bearing "saddle" is pitted (the casting has tony airholes which were revealed during machining).
I set my old cam into the head and it moves freely without distortion in the three bearing "saddles". It shows .003" in lateral ("thrust clearance") play, which is standard. I bolted down the camshaft bearing caps and then the camshaft DOES NOT move as freely. I haven't checked for middle bearing journal runout. The cam bearing journals seem perfectly round with diameters of 1.300" +/- .001", which is standard. Is this normal behavior? I haven't measured for oil clearance. Any advice/insights for me?
Also, what sort of grease/lube would you use on these journals/bearings during final assembly?
04-11-2012, 03:56 PM
#16
I have dealt with many old school machine shop guys and i would ask about a pit or a scratch somewhere...and they would always tell me that it is just another place to capture some oil and lubricate the part better...
They were dead serious. And if it were MY engine... I would run it, so long as it was smooth turning. But it sounds like you need to get to that point first...
They were dead serious. And if it were MY engine... I would run it, so long as it was smooth turning. But it sounds like you need to get to that point first...
04-14-2012, 12:19 PM
#17
Registered User
Thread Starter
Join Date: Mar 2012
Location: Pittsburgh PA
Posts: 40
Likes: 0
Received 0 Likes
on
0 Posts
I got the crankshaft bolt, pulley/flywheel, and timing cover off today before it started raining here. I was despairing last night, trying to think up a way of gripping the pulley, and I decided to boil down the common "strap wrench" design into a simpler one-off version. Tadaa!

The key was covering the pully in double-sided duct-tape (wrap in tape, then wrap in rolled-and-flattened-straws of tape, sticky side facing out). I nailed some strapping onto a 9" piece of 2x4, creating a non-adjustable loop big enough to fit snugly as shown. The sticky tape surface did the rest as it bound against the truck frame while racheting counter-clockwise. 4' breaker bar on end of ratchet, bolt didn't put up any fight, was very relieved. The keyway looks completely fine. Now I need to build a tent/canopy thing so I can work outside on warm but rainy days like this!
The key was covering the pully in double-sided duct-tape (wrap in tape, then wrap in rolled-and-flattened-straws of tape, sticky side facing out). I nailed some strapping onto a 9" piece of 2x4, creating a non-adjustable loop big enough to fit snugly as shown. The sticky tape surface did the rest as it bound against the truck frame while racheting counter-clockwise. 4' breaker bar on end of ratchet, bolt didn't put up any fight, was very relieved. The keyway looks completely fine. Now I need to build a tent/canopy thing so I can work outside on warm but rainy days like this!
04-14-2012, 12:22 PM
#18
Registered User
Thread Starter
Join Date: Mar 2012
Location: Pittsburgh PA
Posts: 40
Likes: 0
Received 0 Likes
on
0 Posts
 04-16-2012, 06:40 AM
#19
Registered User
Thread Starter
Join Date: Mar 2012
Location: Pittsburgh PA
Posts: 40
Likes: 0
Received 0 Likes
on
0 Posts
A revolutionary new way to get the oil pan off a 2WD late model 22R! The freaking FSM would have me remove a bunch of cotter pins, castle nuts, and use a puller to pop out arms and what have you. I didn't have a puller so I gave up on that idea after failing to improvise with several C-clamps. BUT! Turns out you can just remove the three bolts holding the idler arm (passenger side companion to the pitman arm) and that's it!

The front of my truck is up on stands, with wheels hanging free, so once the three bolts are out of the idler arm, it sags freely, bringing the relay rod and steering damper (the two components which block oil pan clearance) downwards with it. I removed the front frame crossmember first (pink dashed lines). Then I tried to get one of the tie-rods out (yellow ball joint). Gave up on that, then unbolted the idler arm (blue). This gave enough clearance to shimmy the oil pan off without hitting the oil pickup. I don't know yet if there's enough space to cleanly replace the oil pan with RTV on its flange, but the steering damper (teal) can easily be freed to prove a little more wiggle room.

Also, was somewhat unsure of whether this was a 4WD truck or not up until this point (has a 4WD plastic decal on the cab). Well, no front axle = no 4WD! Learning by doing.
The front of my truck is up on stands, with wheels hanging free, so once the three bolts are out of the idler arm, it sags freely, bringing the relay rod and steering damper (the two components which block oil pan clearance) downwards with it. I removed the front frame crossmember first (pink dashed lines). Then I tried to get one of the tie-rods out (yellow ball joint). Gave up on that, then unbolted the idler arm (blue). This gave enough clearance to shimmy the oil pan off without hitting the oil pickup. I don't know yet if there's enough space to cleanly replace the oil pan with RTV on its flange, but the steering damper (teal) can easily be freed to prove a little more wiggle room.
Also, was somewhat unsure of whether this was a 4WD truck or not up until this point (has a 4WD plastic decal on the cab). Well, no front axle = no 4WD! Learning by doing.


