Punkelbergs 1997 4Runner budget build
 01-03-2012, 10:47 AM
#1
Registered User
Thread Starter
Join Date: Jun 2009
Location: Peoria, AZ
Posts: 284
Likes: 0
Received 0 Likes
on
0 Posts
Punkelbergs 1997 4Runner budget build
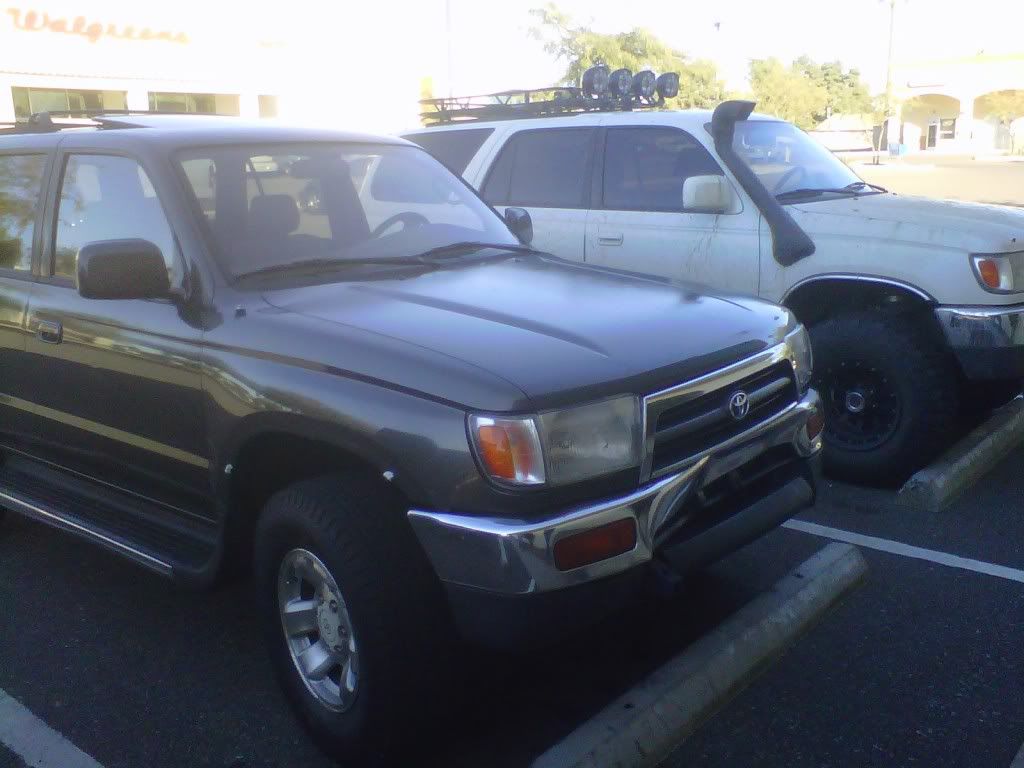
Bought this Anthracite 3.4l 5speed 4x4 because my lady decided she likes my supercharged 4runner more than I do!
So, this one will be a mild build, cheap as I can but still useable and dependable. Many of the mods done to this one will be practice for the SC'd truck as it is our main wheeling rig and mamma'd be PISSED if I went at her truck with a grinding wheel before trying it on mine....
Picked it up cheap, 207k on the clock. Did all the basics 1st few days. (plugs, filters, fluids and PCV valve etc)
So, here we go!
Last edited by punkelberg; 02-10-2012 at 11:30 AM.

 01-03-2012, 11:03 AM
#6
Registered User
Thread Starter
Join Date: Jun 2009
Location: Peoria, AZ
Posts: 284
Likes: 0
Received 0 Likes
on
0 Posts
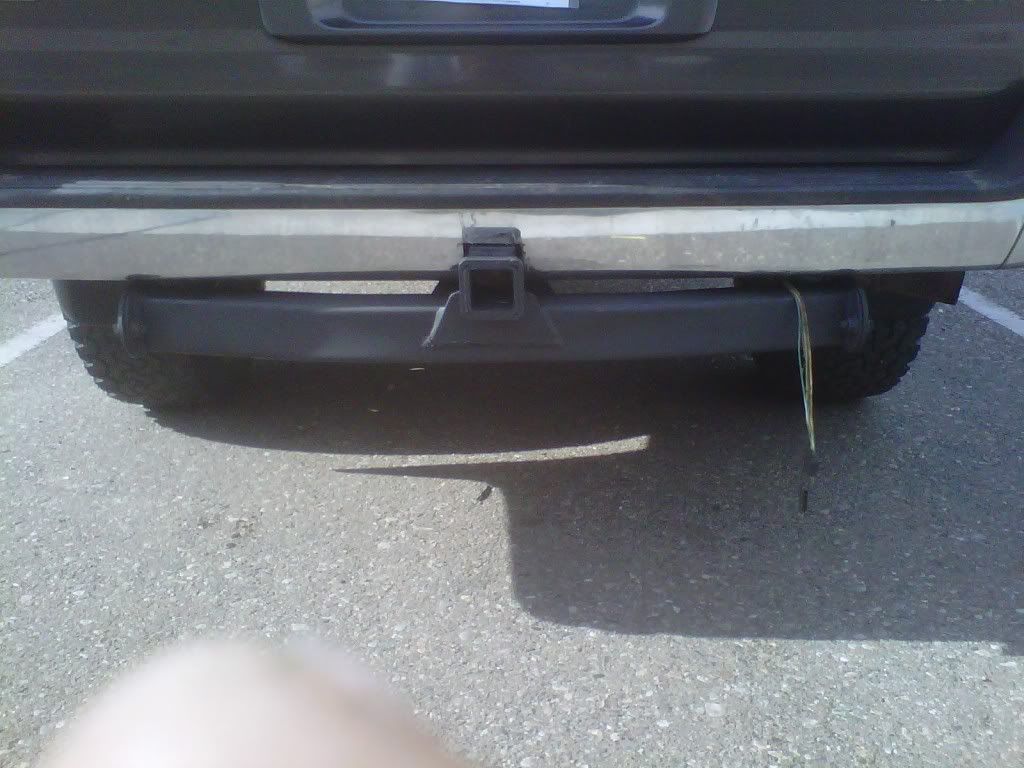
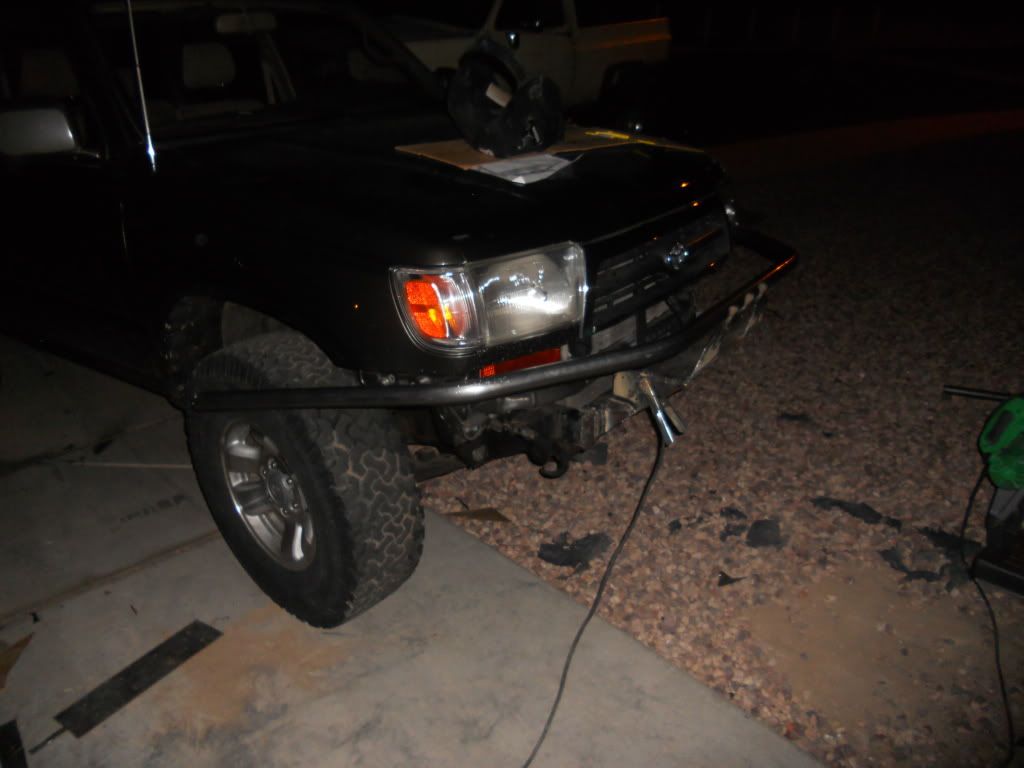
Got my "new" BFG's for $120 installed at my local L'lantera on NYE, gave 'em my old streets to knock the cost down a bit.
New tube bumper installed too! (kidding, little joke between my fab guy and 12 or so PBR's...)
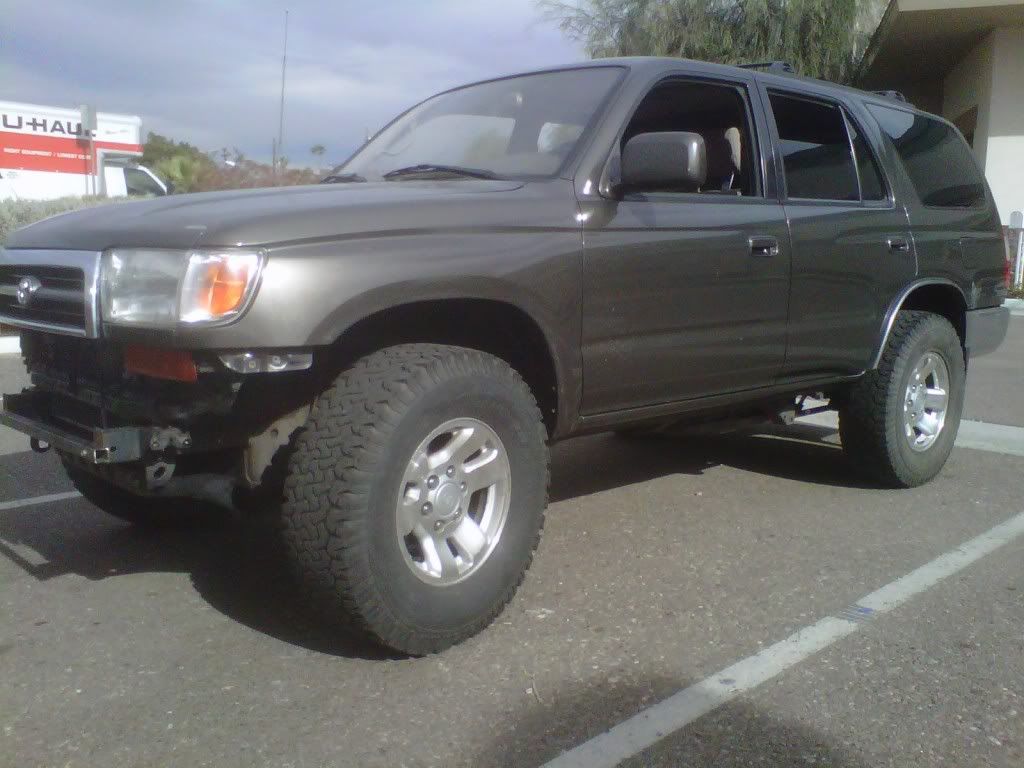
New tube bumper installed too! (kidding, little joke between my fab guy and 12 or so PBR's...)
01-03-2012, 11:07 AM
#7
Registered User
Thread Starter
Join Date: Jun 2009
Location: Peoria, AZ
Posts: 284
Likes: 0
Received 0 Likes
on
0 Posts
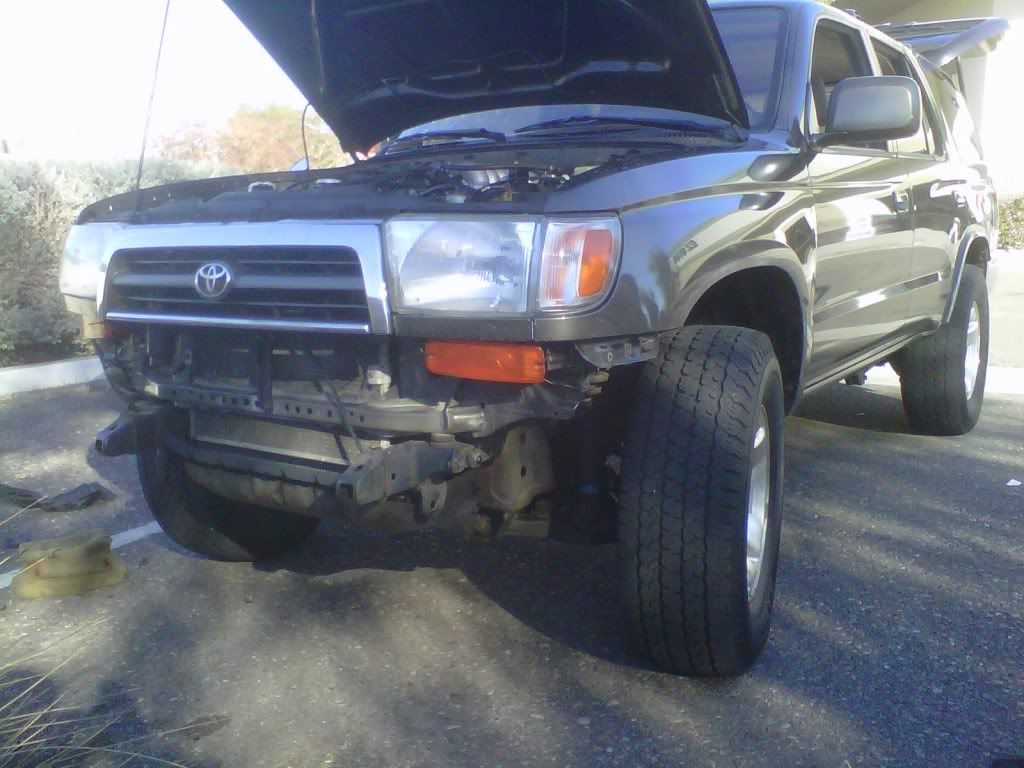
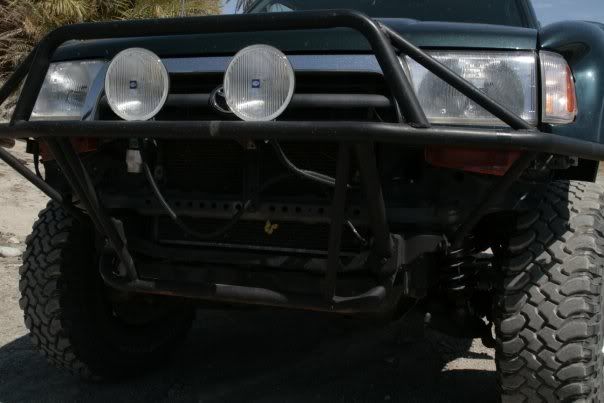
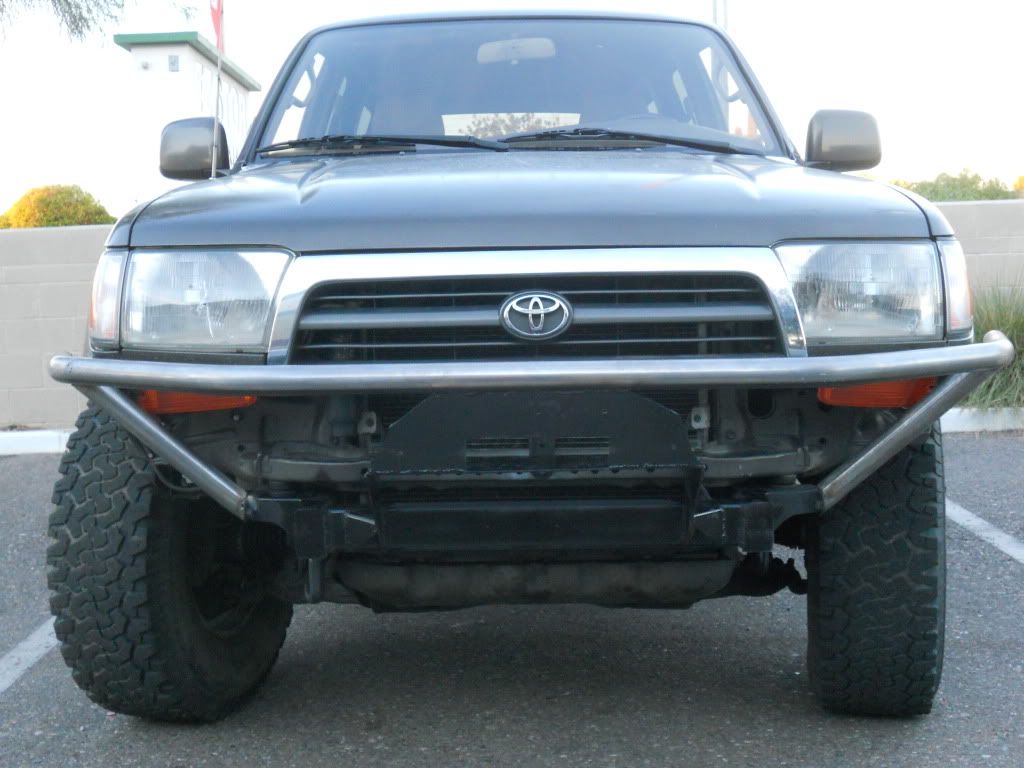
Next on the list is suspension and the real bumper....on the fence between a winch mount or just pre-runner style. I built this one with some guys at a muffler shop a few years back for my old 96 4Runner. Ugly welds, but it was strong as hell! Had an aluminum skid on it when it was all done. Sold the truck to a friend of mine who ran a red light and totaled it. Dumb ass.
Trending Topics
 01-03-2012, 11:42 PM
#11
Registered User
Join Date: Nov 2007
Location: Gilbert, Az.
Posts: 680
Likes: 0
Received 0 Likes
on
0 Posts
Subscribed...wanna see what you do...check out the Az roll call....trying to put a wheeling trip together...it'd be good for a shake down run too.
I have part no.s if you need em for the rear 5125's...also the new 5100 1st.gen tundras to. Just pulled the trigger last night on the front 5100's...waiting for the front coils though. I have a discount code for shockwarehouse.com, free shipping and 10% off. Sweetness.
-Ted
I have part no.s if you need em for the rear 5125's...also the new 5100 1st.gen tundras to. Just pulled the trigger last night on the front 5100's...waiting for the front coils though. I have a discount code for shockwarehouse.com, free shipping and 10% off. Sweetness.
-Ted
01-04-2012, 06:03 AM
#12
Registered User
Thread Starter
Join Date: Jun 2009
Location: Peoria, AZ
Posts: 284
Likes: 0
Received 0 Likes
on
0 Posts
Nice! I'm juggling maintaining both trucks right now, the SC'd truck needs shocks as well so it will probably get 'em 1st. But I'm planning on running 5125's front and back so the hook up is appreciated!
Still wondering on your thoughts regarding RevTek lift...
Sundays are good for me and wheeling, but the clutch on the new truck is....not long for this world. Have to be mild wheeling for me!
Still wondering on your thoughts regarding RevTek lift...
Sundays are good for me and wheeling, but the clutch on the new truck is....not long for this world. Have to be mild wheeling for me!
Last edited by punkelberg; 02-10-2012 at 11:33 AM.
01-05-2012, 06:38 AM
#13
Registered User
Thread Starter
Join Date: Jun 2009
Location: Peoria, AZ
Posts: 284
Likes: 0
Received 0 Likes
on
0 Posts
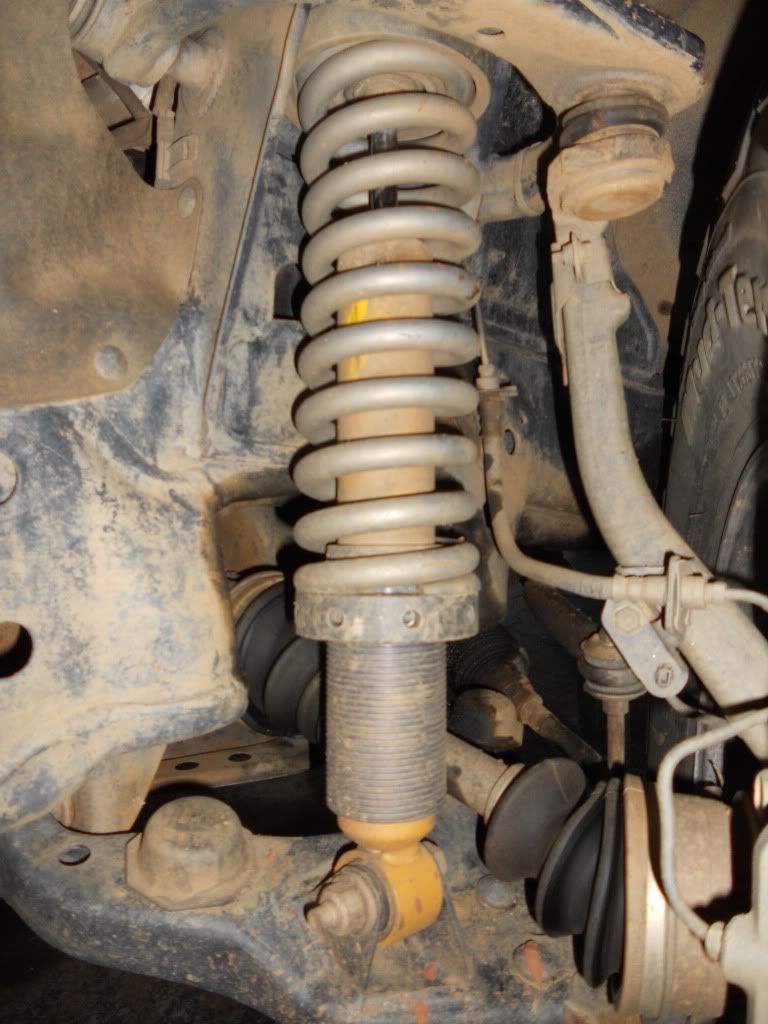
So I think I'm going to replace the shocks in these and put them in the Anthracite truck as soon as I get new ICONs or SWAY AWAYs for the SC'd truck. Just need to figure out what shock goes in there....
01-06-2012, 10:11 AM
#14
Registered User
Thread Starter
Join Date: Jun 2009
Location: Peoria, AZ
Posts: 284
Likes: 0
Received 0 Likes
on
0 Posts
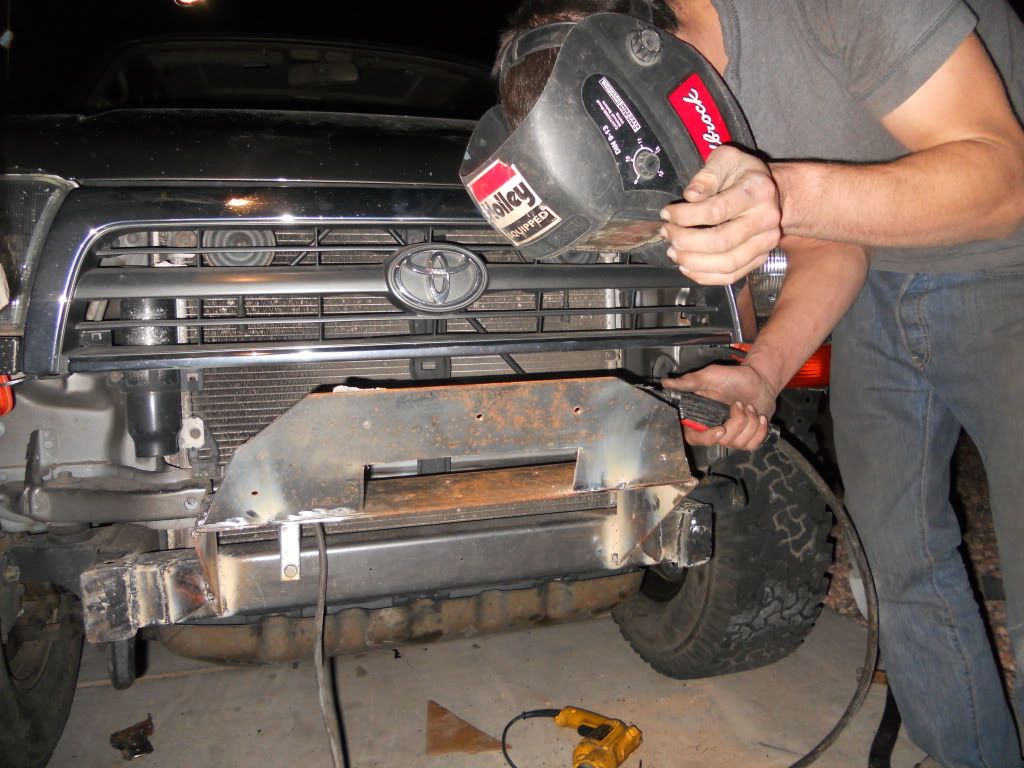
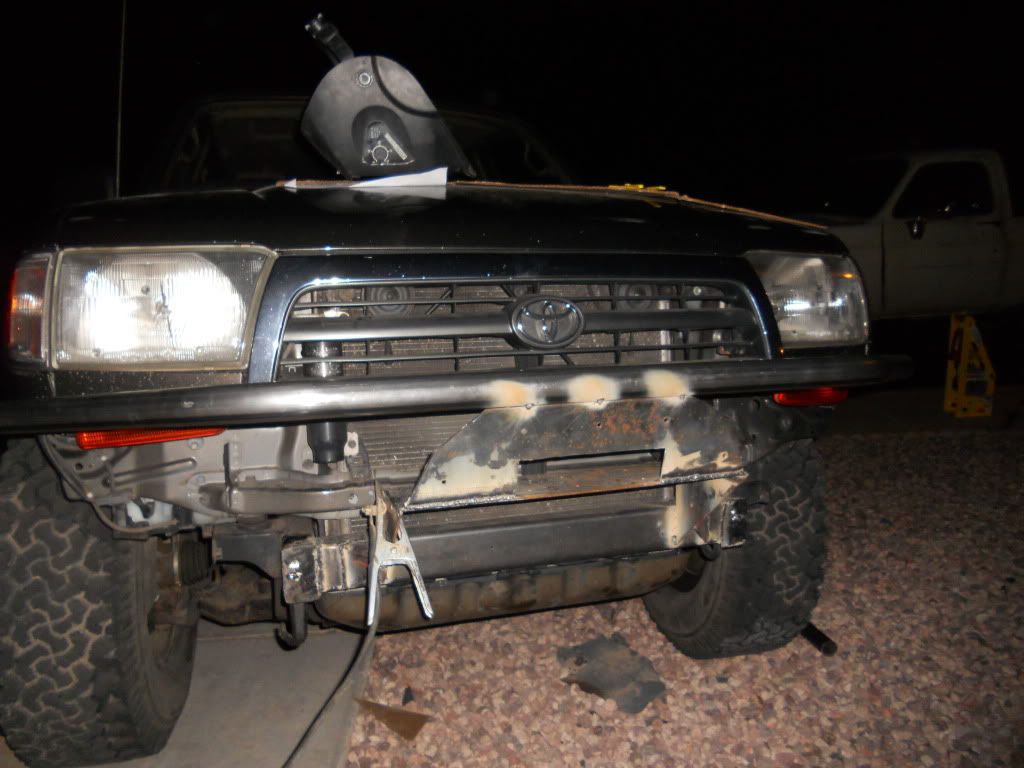
Just confirmed with my fab guy, going to start the bumper on Monday. Mocked the base out of coroplast yesterday and dropped it off to him, should be a pretty quick build, I'll be sure to snap pic's!
01-06-2012, 02:59 PM
#15
I ran the Revtek lift for many years, it was great and rode nice. I had to upgrade because of the extra weight of my new rear bumper, it was causing my stock springs to sag. The spacers also didn't provide the flex that I wanted. If you don't plan on throwing a ton of weight on the back, then go for it!
Never seen the hitch flip mod before, but I like it. I'd be afraid of hacking up my stock bumper!
Never seen the hitch flip mod before, but I like it. I'd be afraid of hacking up my stock bumper!
Last edited by stockwell45; 01-06-2012 at 03:01 PM.
01-07-2012, 06:22 AM
#16
Registered User
Thread Starter
Join Date: Jun 2009
Location: Peoria, AZ
Posts: 284
Likes: 0
Received 0 Likes
on
0 Posts
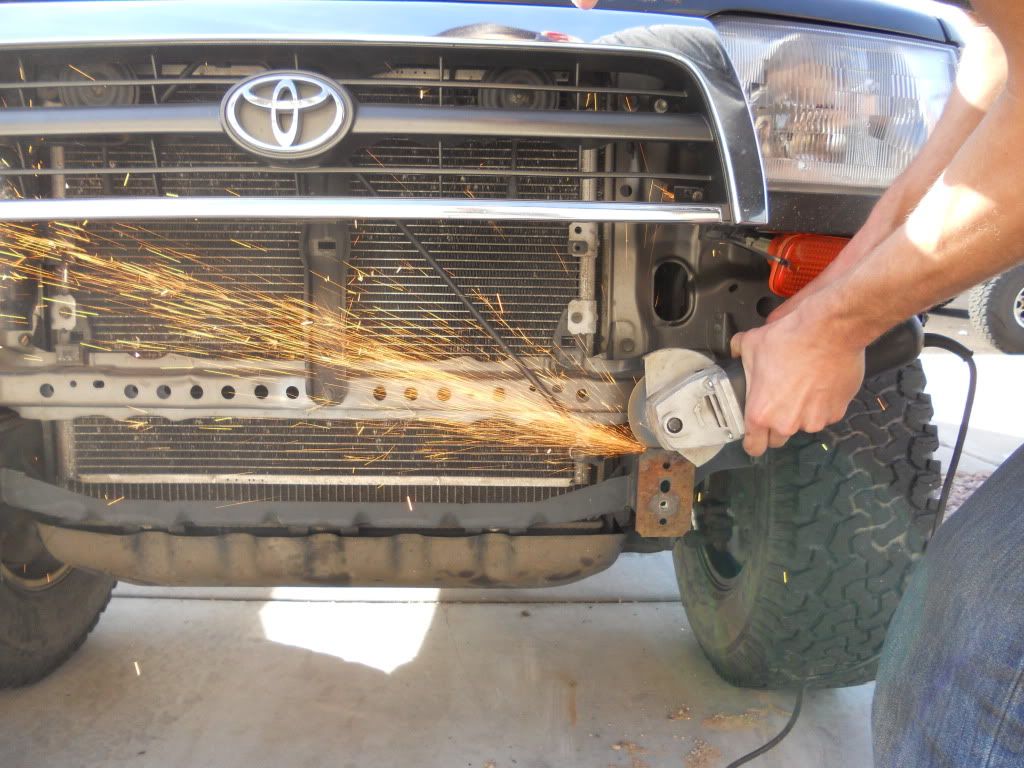
It's such an easy mod, I used a grinder... (sloppy) I'm doing the same mod to my SC'd truck this weekend but I'm going to use a jigsaw on it. Only lose about a 4" square of chrome. And no more scraping!
01-10-2012, 06:54 AM
#17
Registered User
Thread Starter
Join Date: Jun 2009
Location: Peoria, AZ
Posts: 284
Likes: 0
Received 0 Likes
on
0 Posts
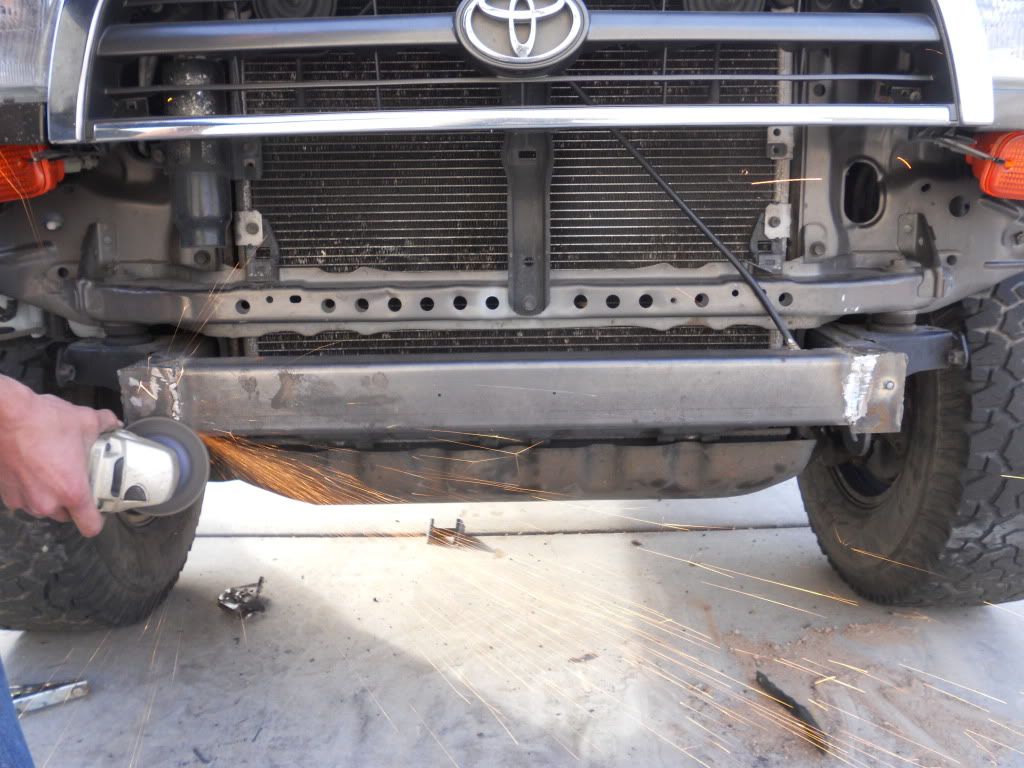
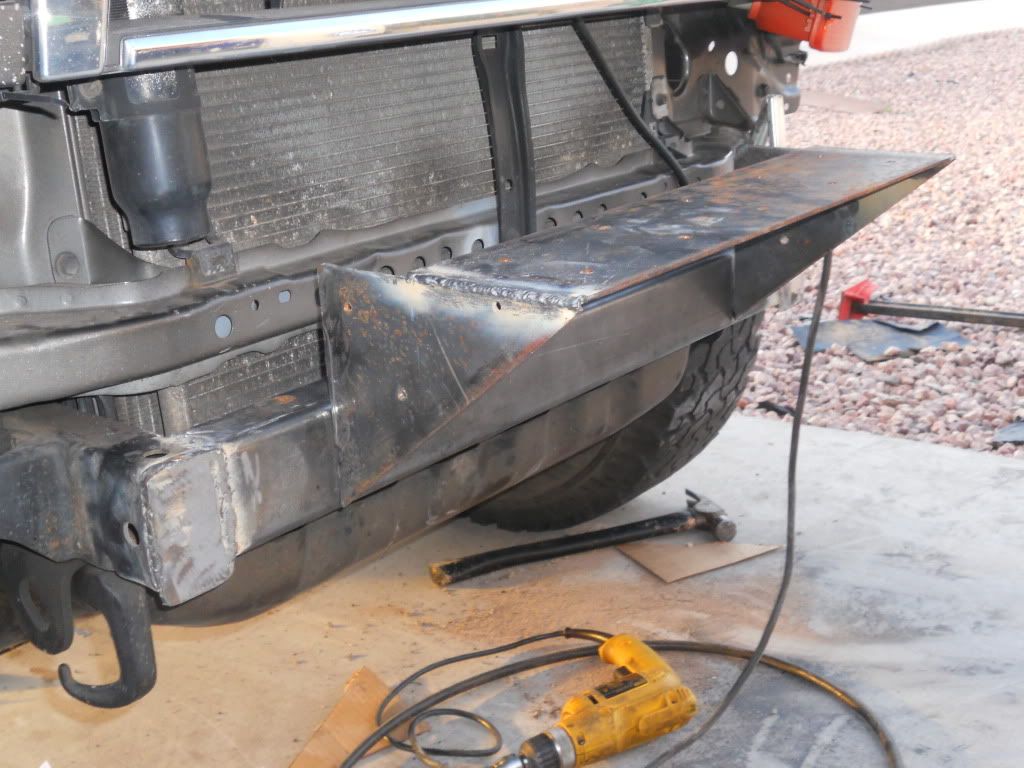
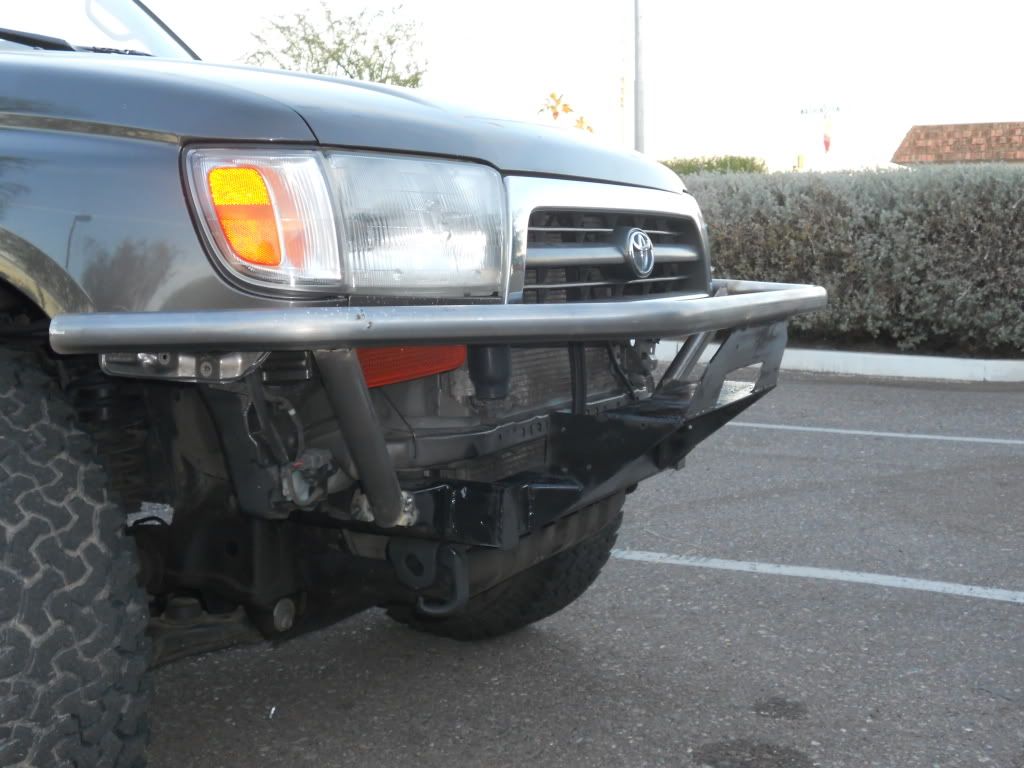
Got started on the bumper yesterday. About 6 hours invested so far. Still have a feww bends and gussets to do but so far it's turning out well.
Cut the factory horns offf. They were damaged from a prior bumper bender and I wanted some stronger welds anyway.
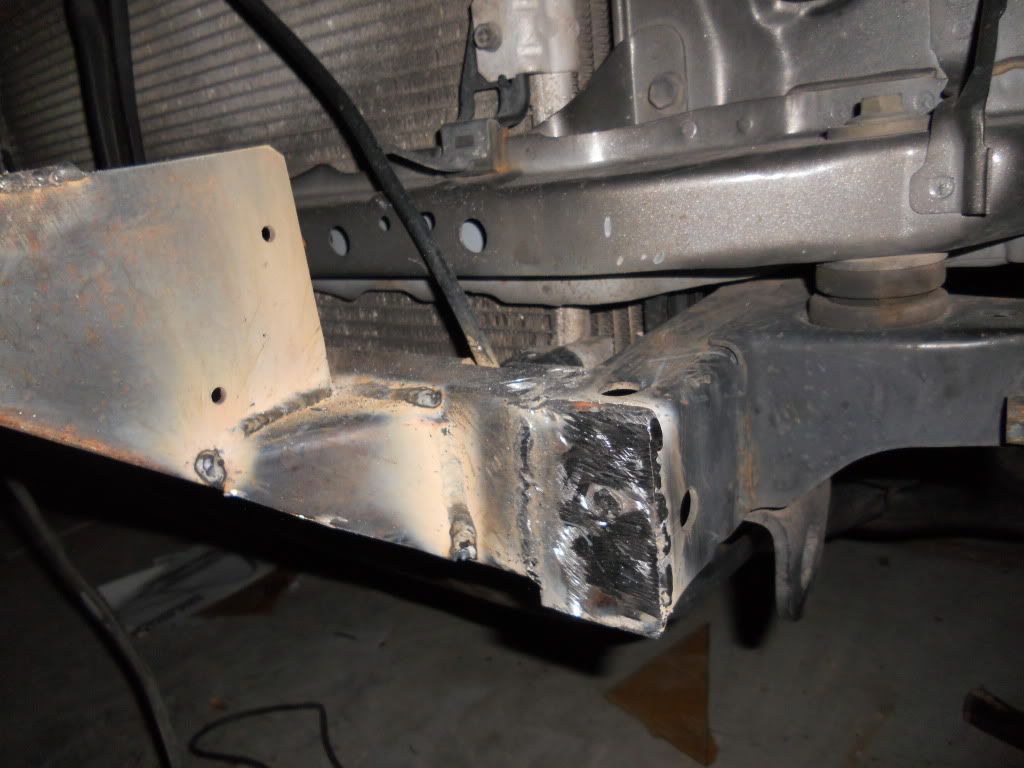
Added a 2x3 for cross support.
fabbed out the winch-mount
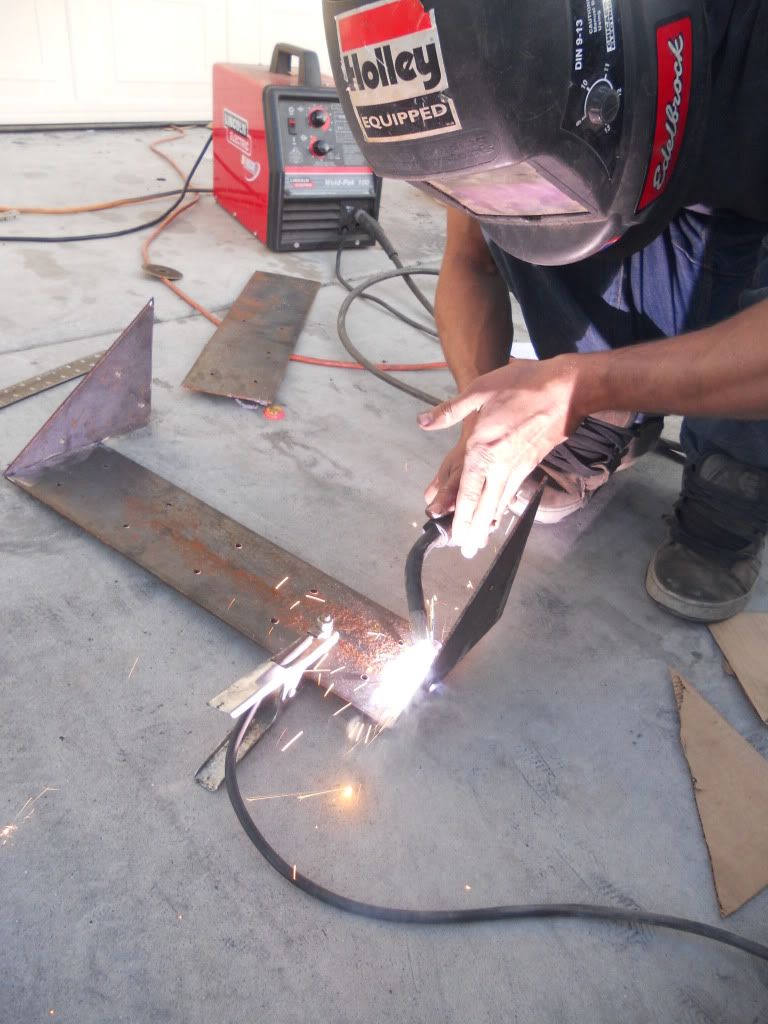
Tacked it on
Some "Tacos" for support
Front plate in-place
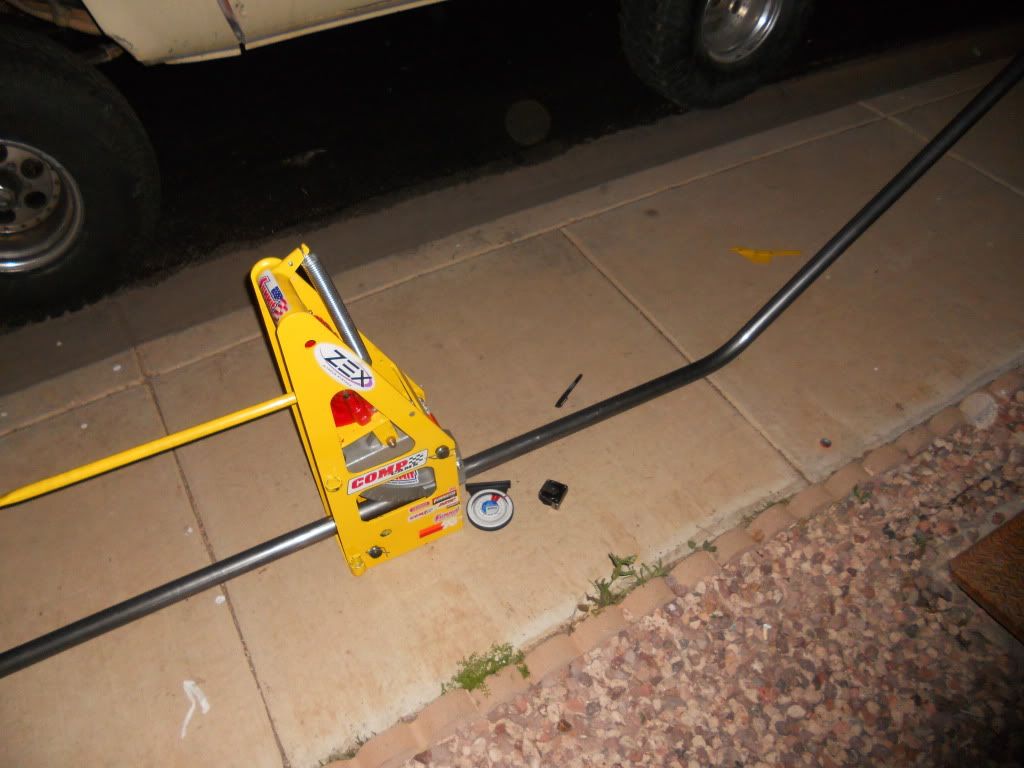
Bender
Main bar tacked in
Done for the night!
A bit of paint in the morning light
Still have a few more hours to put in, should be wrapped up by the weekend.
Cut the factory horns offf. They were damaged from a prior bumper bender and I wanted some stronger welds anyway.
Added a 2x3 for cross support.
fabbed out the winch-mount
Tacked it on
Some "Tacos" for support
Front plate in-place
Bender
Main bar tacked in
Done for the night!
A bit of paint in the morning light
Still have a few more hours to put in, should be wrapped up by the weekend.
 01-10-2012, 07:44 AM
#19
Registered User
Join Date: Nov 2007
Location: Gilbert, Az.
Posts: 680
Likes: 0
Received 0 Likes
on
0 Posts
Nice...For the hoop side of things...cause it looks like you're using 1.75" tubing. Go 46" and cut then measure 12" in from each end and start the bend. Go to 60 deg. from the outside to inside for the notch at 30deg. That should be the perfect height to fit 6" lights from just about any supplier. Light tabs on top in the rear of the hoop or on the main cross bar in the front. Looking good. Is there a reason you didn't want to do a bolt on style? Blind side nuts could've easily been welded in place before the cross member support was firmed up. And what kind of bender is your buddy using? I've seen a couple that look similar...also, what's the wall thickness and is that a 110v flux core? Nice progress in a short time span.
-Ted
-Ted


