TURBOrunnerNM's 86 4runner turbo build-up
 05-28-2012, 08:57 PM
#1
Registered User
Thread Starter

Join Date: May 2012
Location: Albuquerque, NM
Posts: 69
Likes: 0
Received 0 Likes
on
0 Posts
TURBOrunnerNM's 86 4runner turbo build-up
You need to fix your picture link.
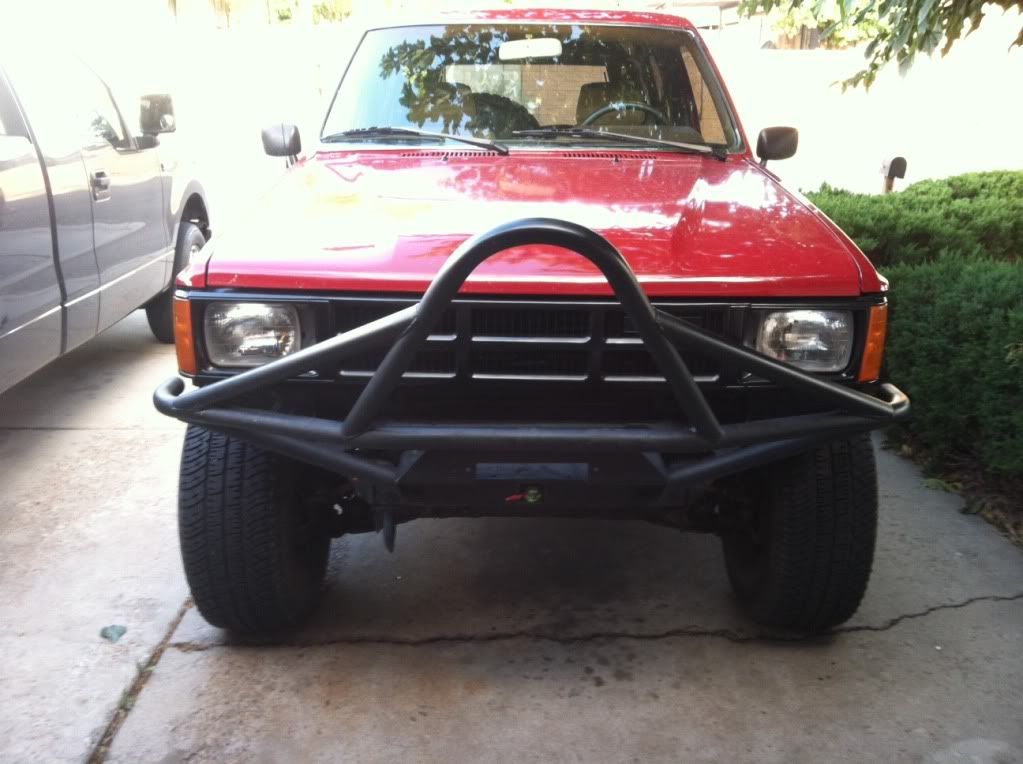
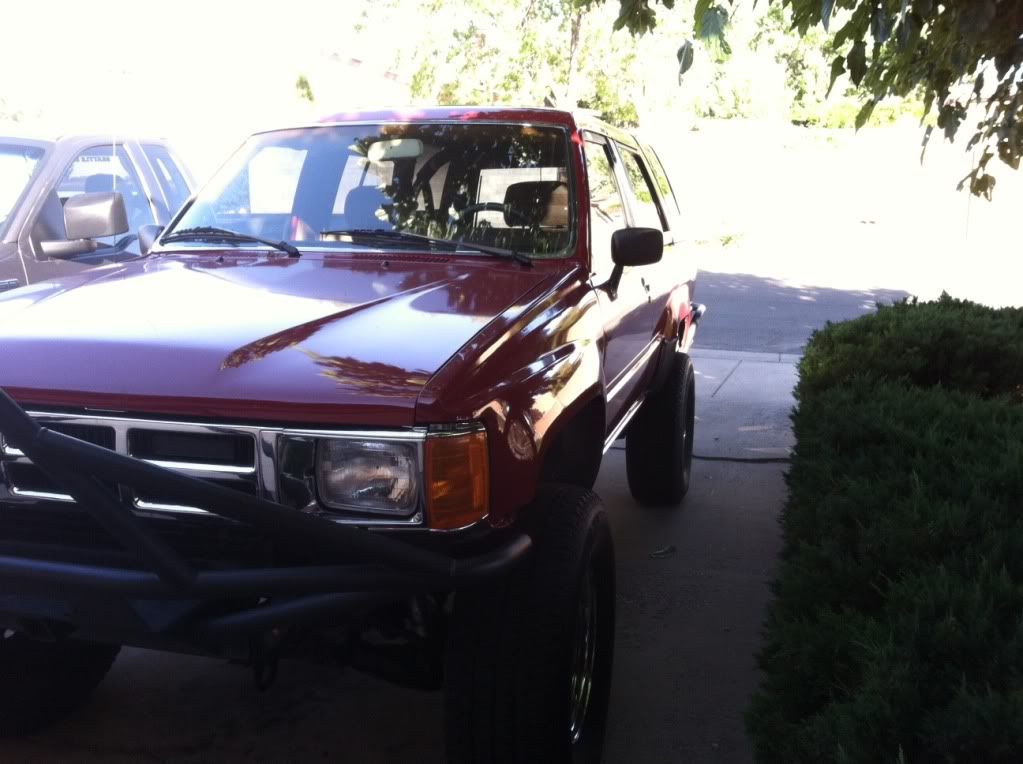
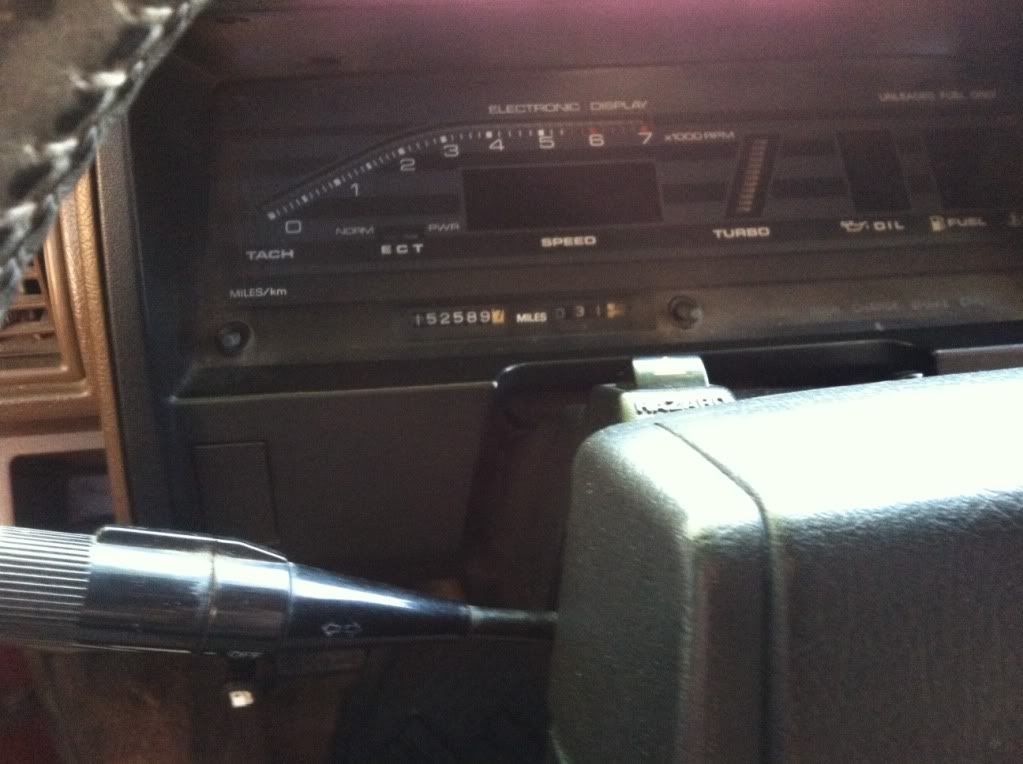
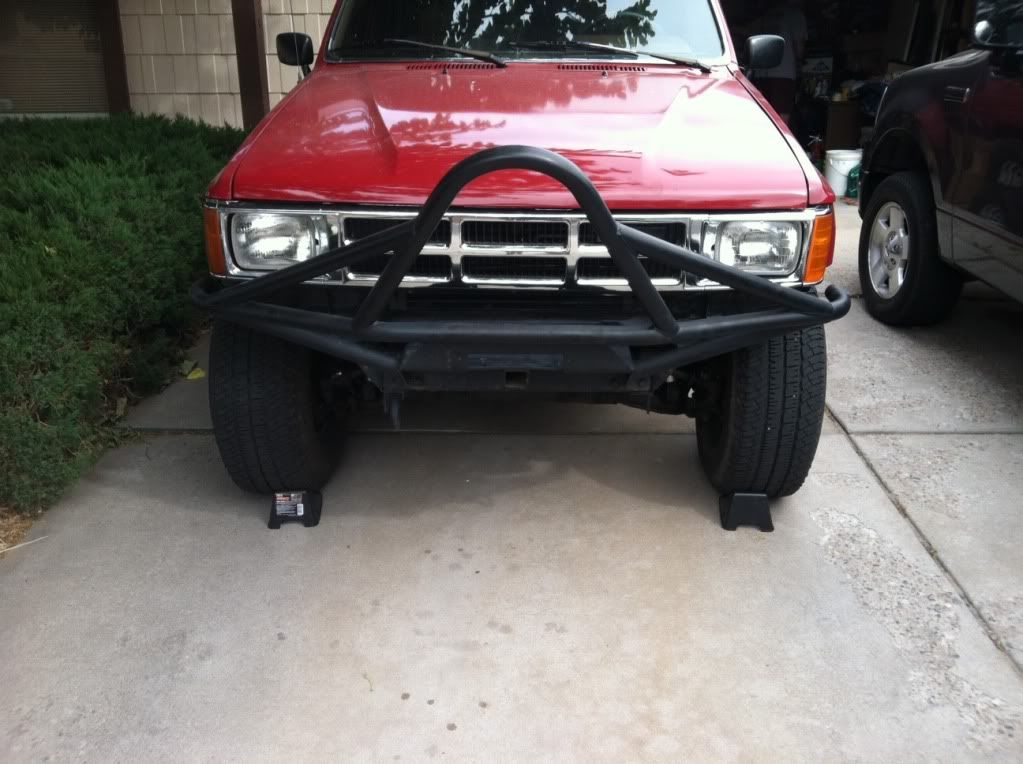
getting my runner ready for the big leagues!
getting my runner ready for the big leagues!
Last edited by waskillywabbit; 05-29-2012 at 07:17 PM.
 05-28-2012, 09:19 PM
#2
That's a nice clean looking 4Runner, looks really straight and rust free! What are you planning to do to it? (Just a tip, if you want your pics to show up in your thread, just copy and paste the [IMG] code and your pics will show up) Look forward to seeing more of your 4runner!
05-29-2012, 06:58 PM
#3
Registered User
Thread Starter
Join Date: May 2012
Location: Albuquerque, NM
Posts: 69
Likes: 0
Received 0 Likes
on
0 Posts
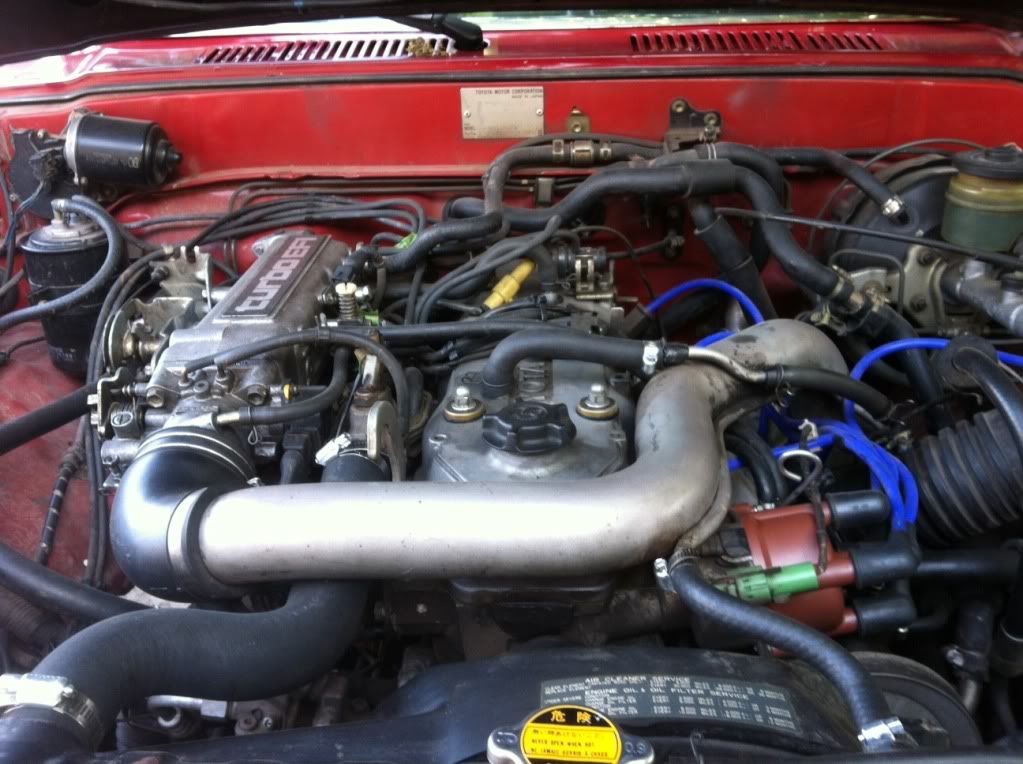
Thanks! I appreciate the tech help as well, I tried to figure out that picture thing last night but I gave up after my mind melted. I bought the runner about a year ago and have been working on cleaning it up and getting it to run right. Here's a list of upgrades the runner already has (including the work I've done to it):
Bilstein 5100 shocks
Helper springs in the rear
31" Michelin LTX tires
E3 spark plugs
Taylor Volt ignition wires
New valve cover gasket
New pulsation damper (what a PITA!)
K and N air filter
Touch screen CD/DVD player
Optima RedTop battery
Trail gear Rock Defense front and rear bumpers
1.5" body lift
And here's what I'm planning on getting done in the next year or so:
Spartan auto-lockers front and rear (keeping it IFS for now)
New CV axles
Re-routed exhaust (need more clearance)
Old Man Emu steering stabilizer
Front and rear differential armor
Trail Gear rock sliders
8000lb synthetic winch
Roof rack (tube) with tire holder
48" Hi Lift jack
33" tires (unsure what make I want to go with)
Rebuilt transmission
Chaos Fab idler arm
...TBD
I'm going to keep the 4.11's for now...maybe change gearing in the future. I dig the auto trans with the turbo. After tons of seafoam and oil stabilizer she runs pretty well! I'm planning on officially starting this weekend...more pics to come. I love your '86 BTW.
05-30-2012, 07:57 AM
#4
Hey, no problem, I can post pics, but still can't figure out how to make them bigger from my cellphone, lol. Looks like you've put in a lot of time and effort into your runner, look forward to see more pics as you work on your list of upgrades!
PS: I'm interested to see what your idea is for a roof rack/tire carrier. I been thinking of building one.
PS: I'm interested to see what your idea is for a roof rack/tire carrier. I been thinking of building one.
Last edited by rustED; 05-30-2012 at 08:06 AM.
05-30-2012, 01:48 PM
#5
Super Moderator
Staff
iTrader: (1)
Join Date: Aug 2008
Location: Anderson Missouri
Posts: 11,788
Likes: 0
Received 22 Likes
on
20 Posts
On my cell phone I go under resolution and have my settings at 960x1280. My phone is an LG if that helps. If so, before taking picture, move to the right one click and then hit "OK" and select which setting you want.
Trending Topics
 05-30-2012, 06:07 PM
#9
Registered User
Thread Starter
Join Date: May 2012
Location: Albuquerque, NM
Posts: 69
Likes: 0
Received 0 Likes
on
0 Posts
06-13-2012, 07:19 PM
#10
Registered User
Thread Starter
Join Date: May 2012
Location: Albuquerque, NM
Posts: 69
Likes: 0
Received 0 Likes
on
0 Posts
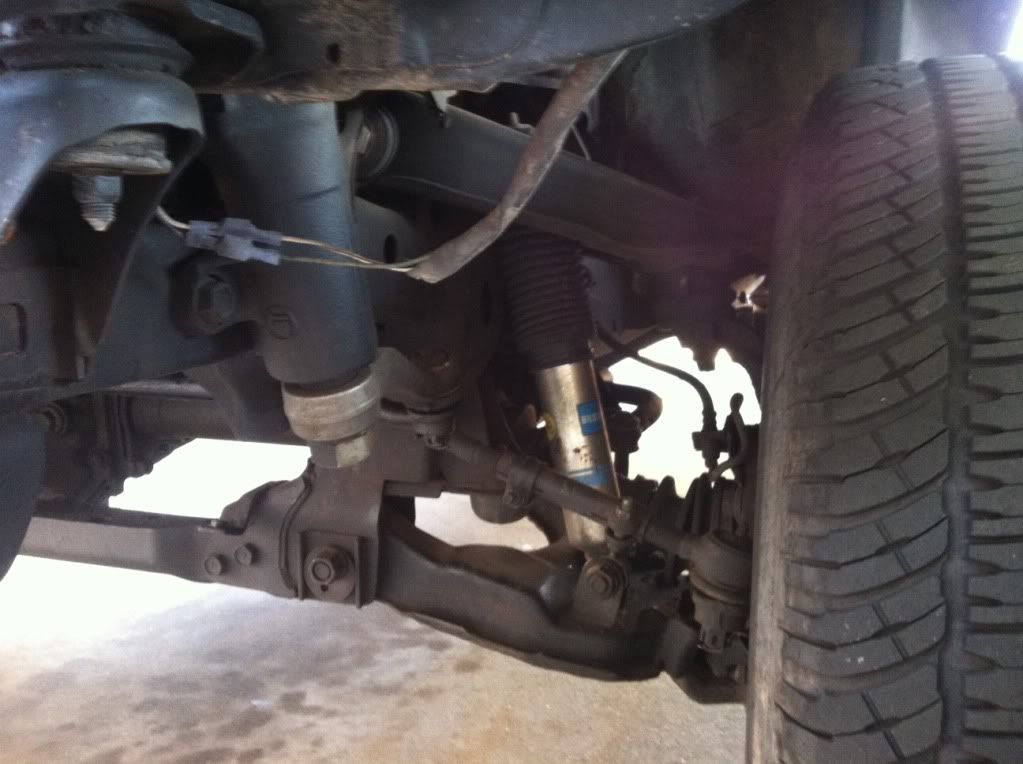
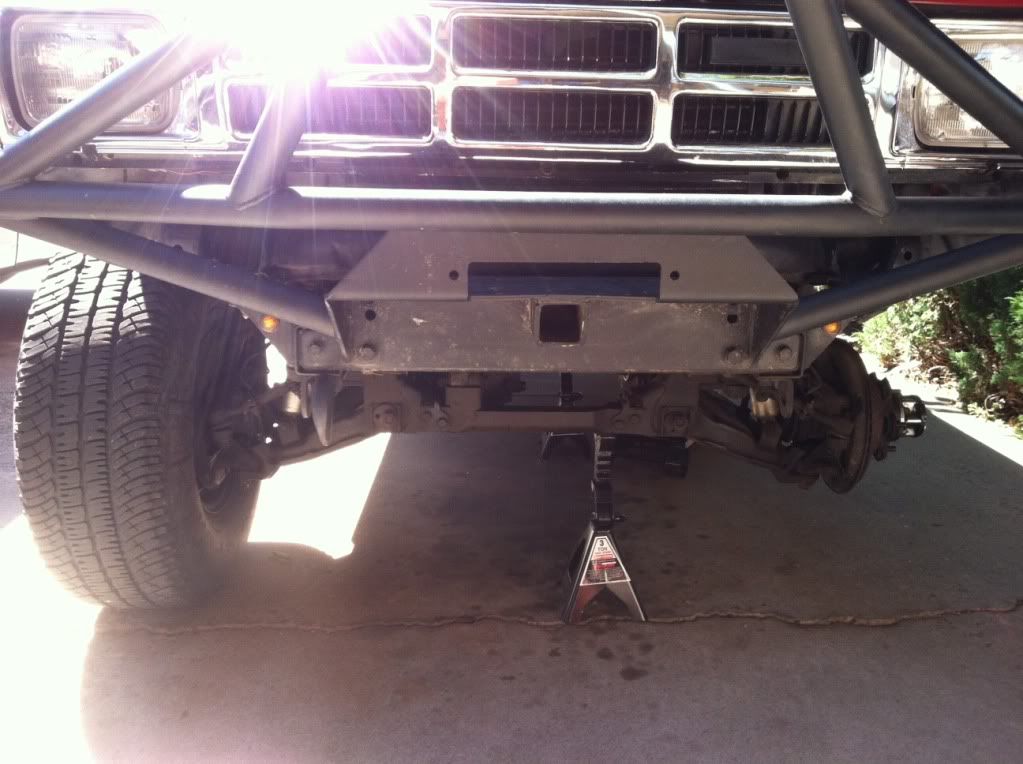
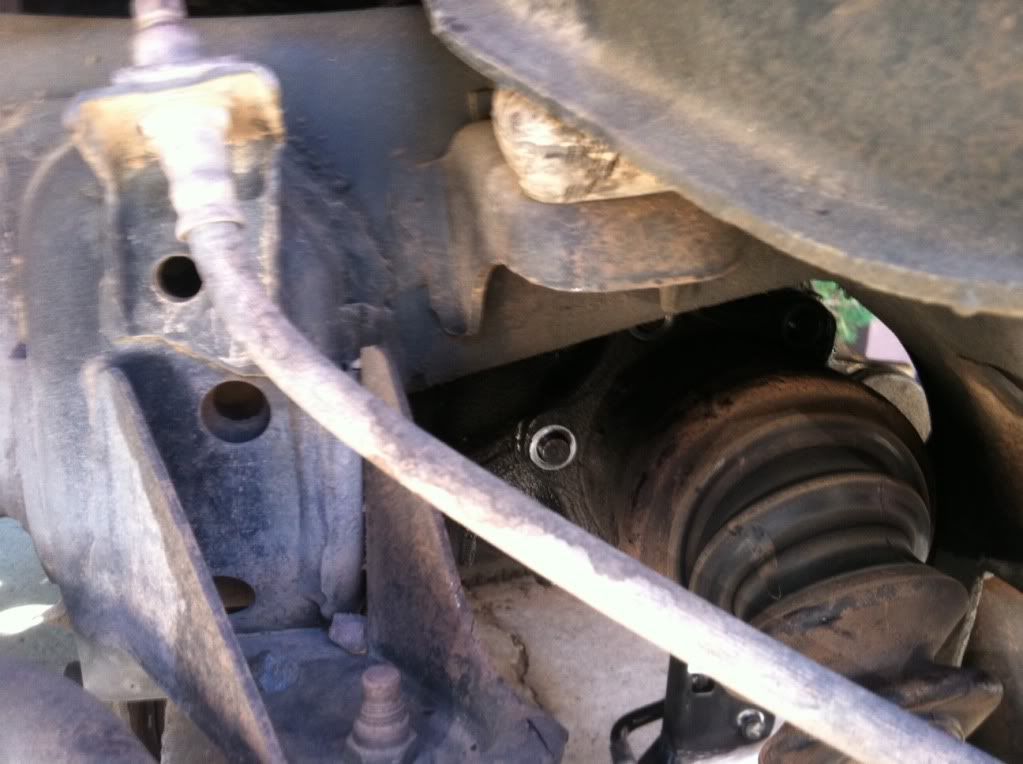
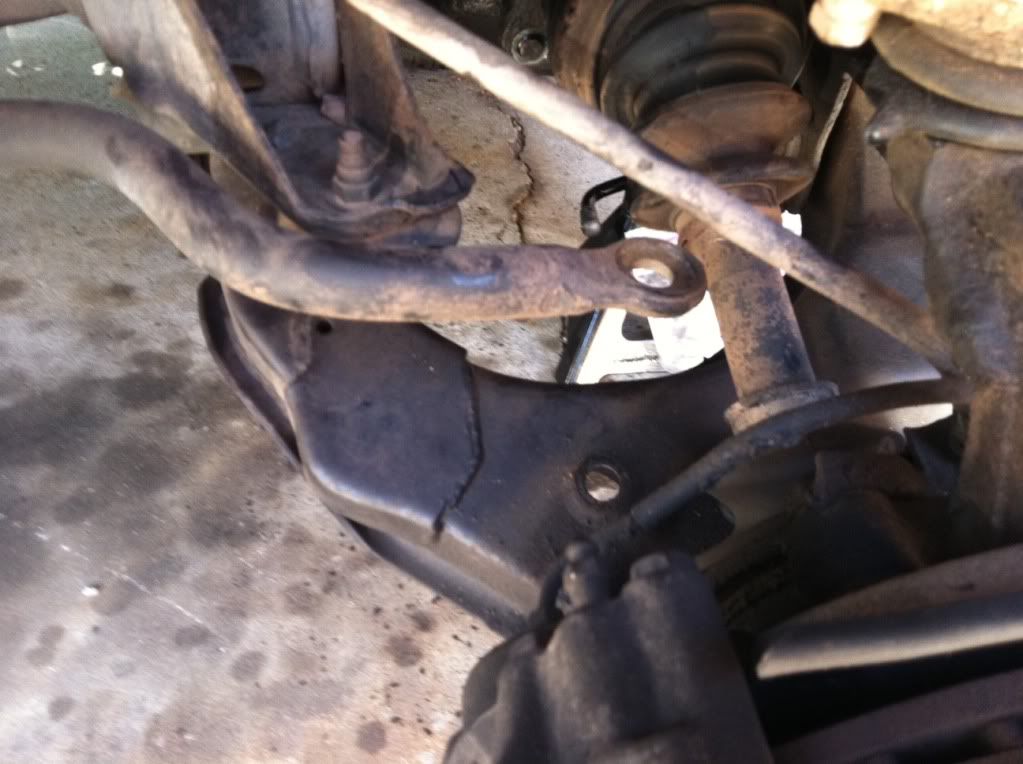
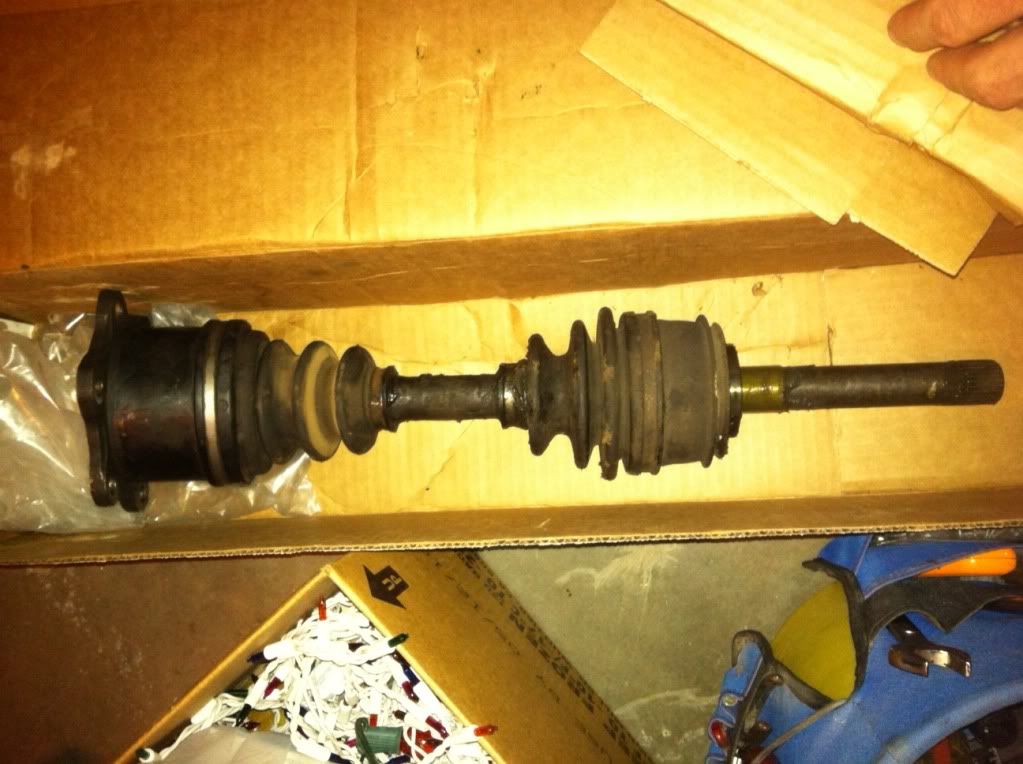
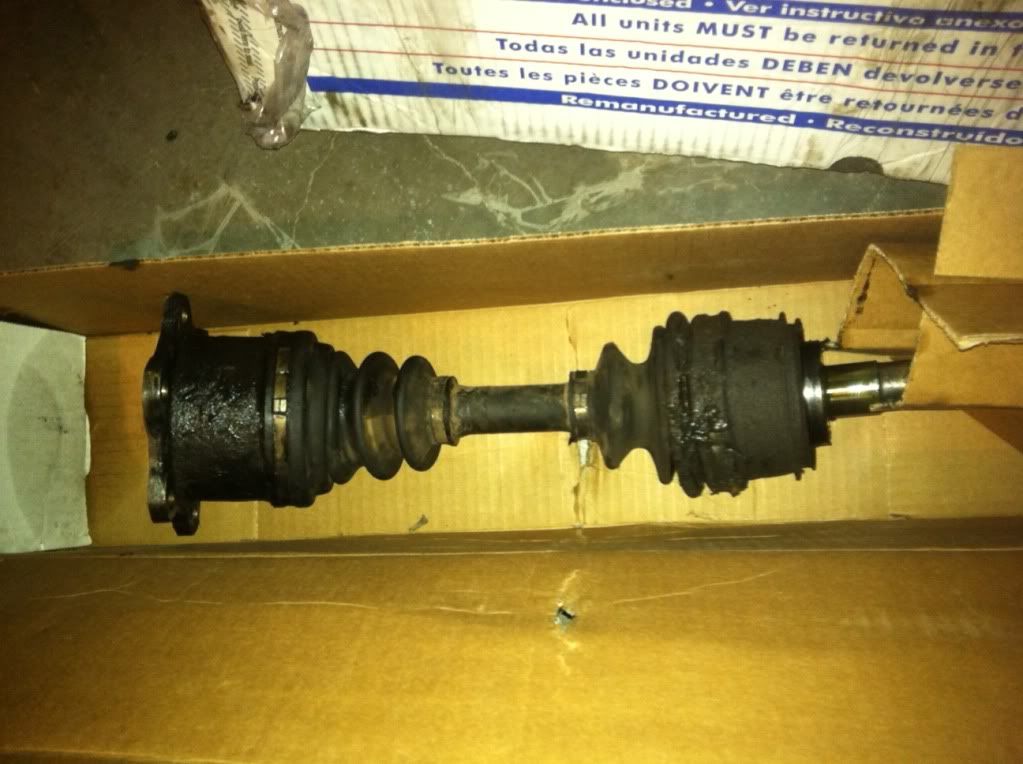
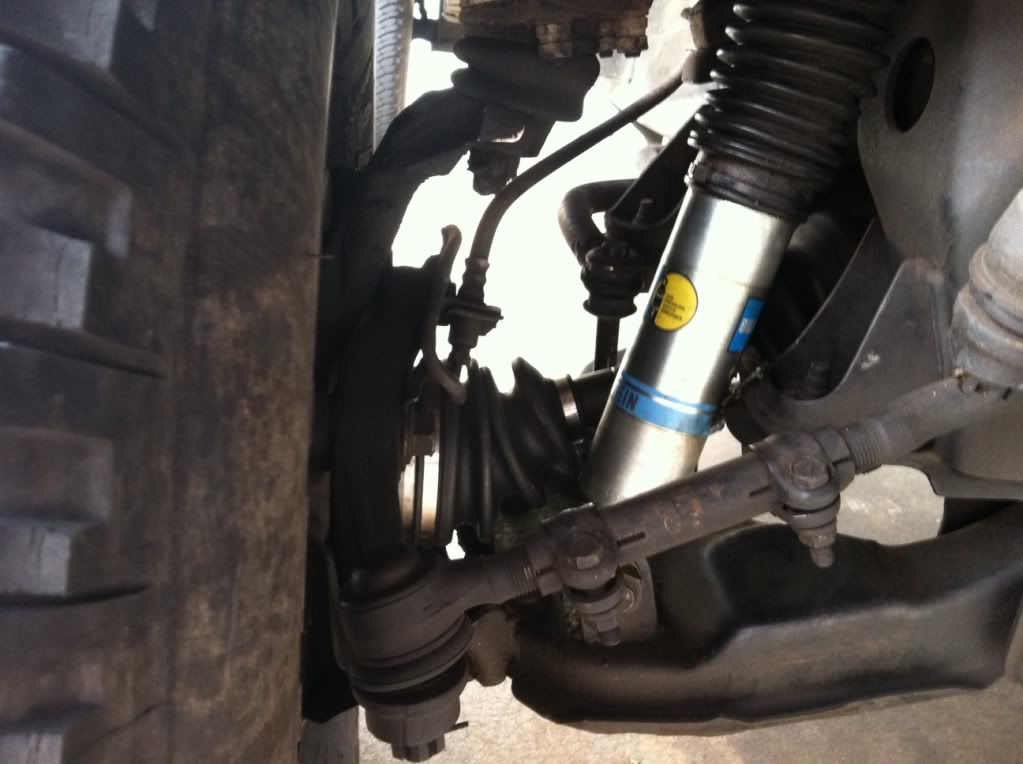
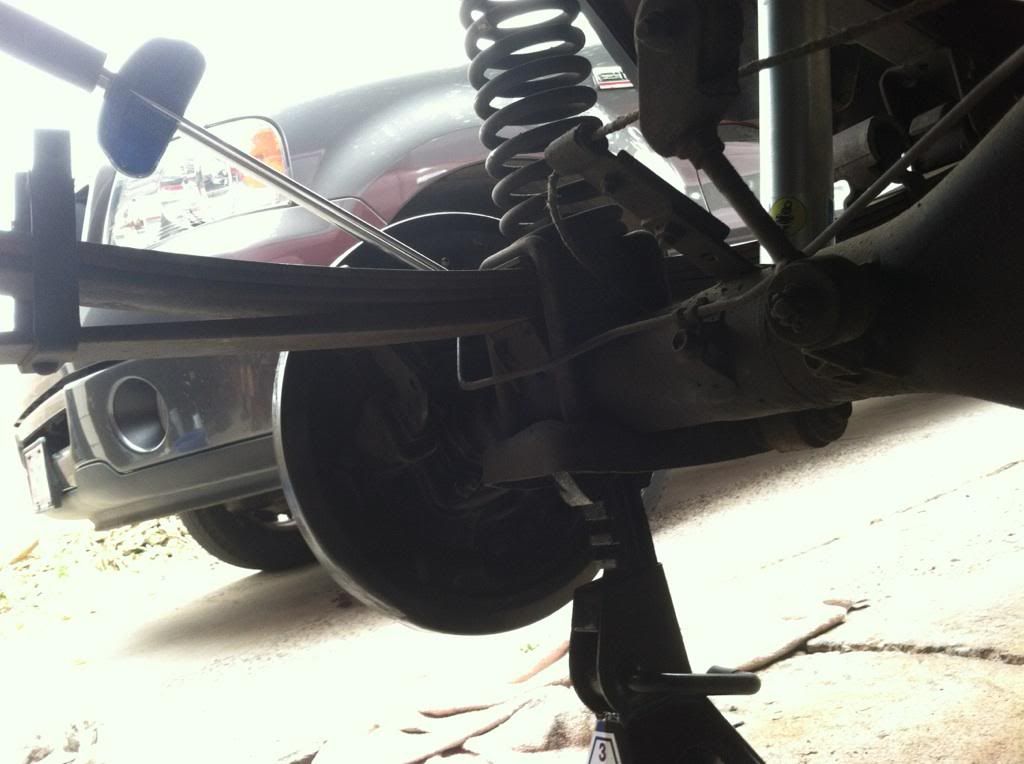
Finally found some...ok A LOT...of time this last weekend to replace both CVs with remans. the following pictures are mixed up from the both sides of the front end but you'll get the picture. the axles don't click and clack now when i engage the hubs and 4wd.
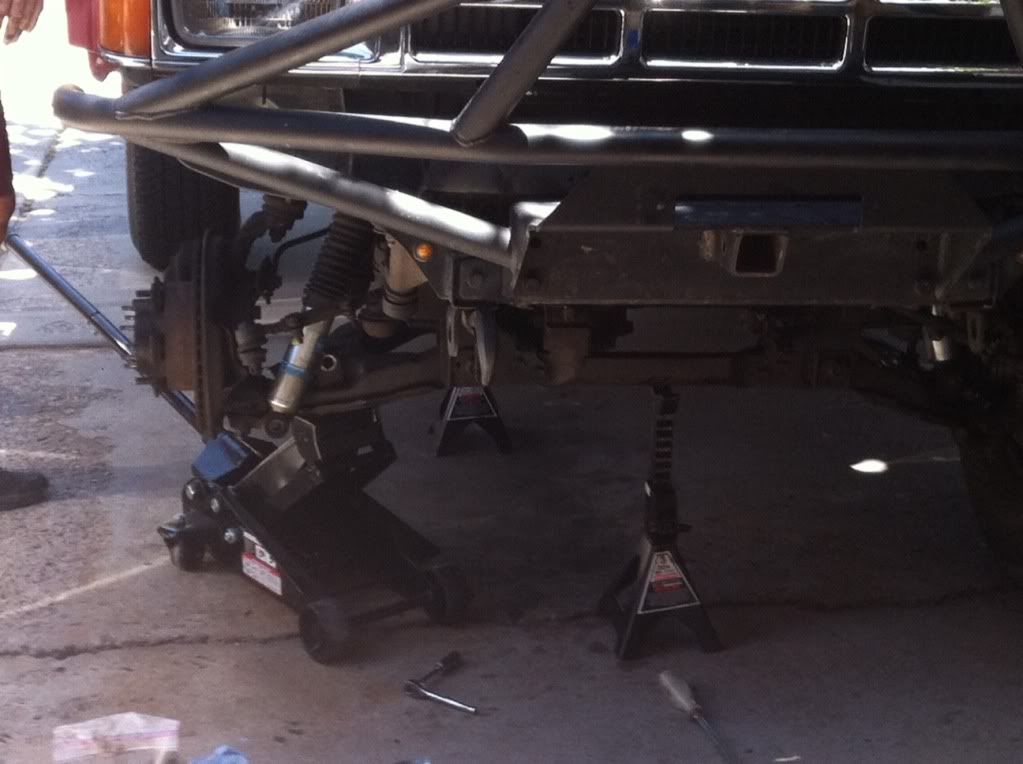
1) chalk the rear wheels. this may seem pretty obvious to everyone on here but it's easy to forget when you get pumped to do a job!
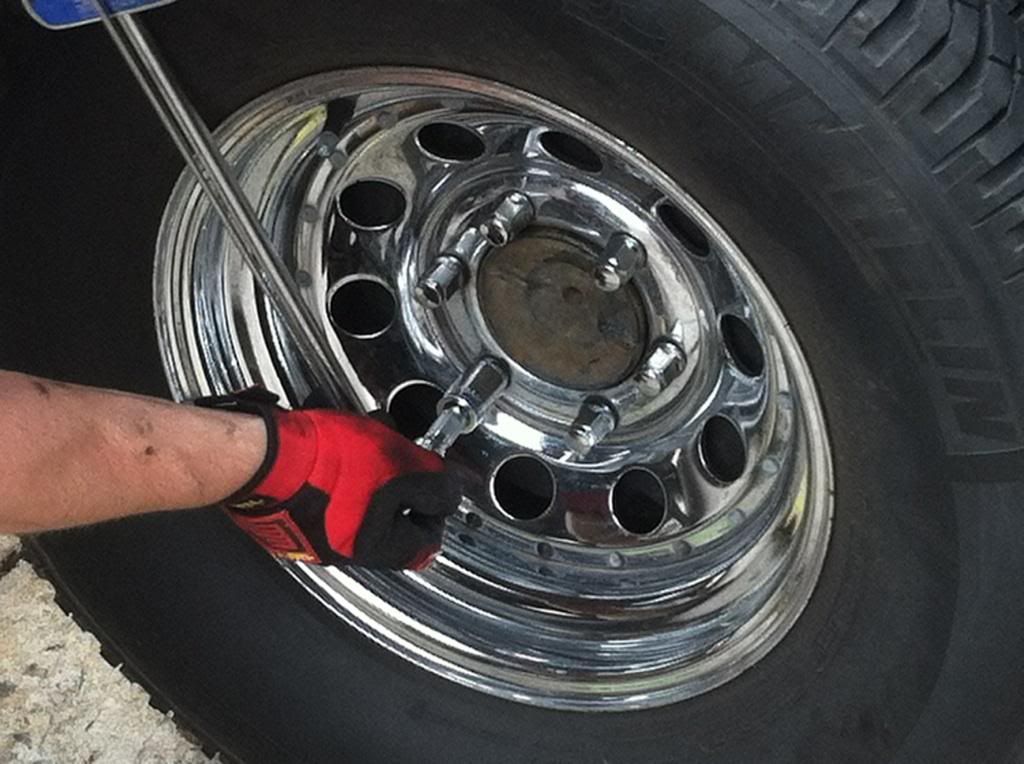
2) the next step is to loosen the lug nuts on the wheel you're taking off (i did one side at a time for the sake of stability)
3) jack the side you're working on up in the air (i used the crossmember for a main jacking and stand point) and place it securely on jack stands.
4) remove the wheel
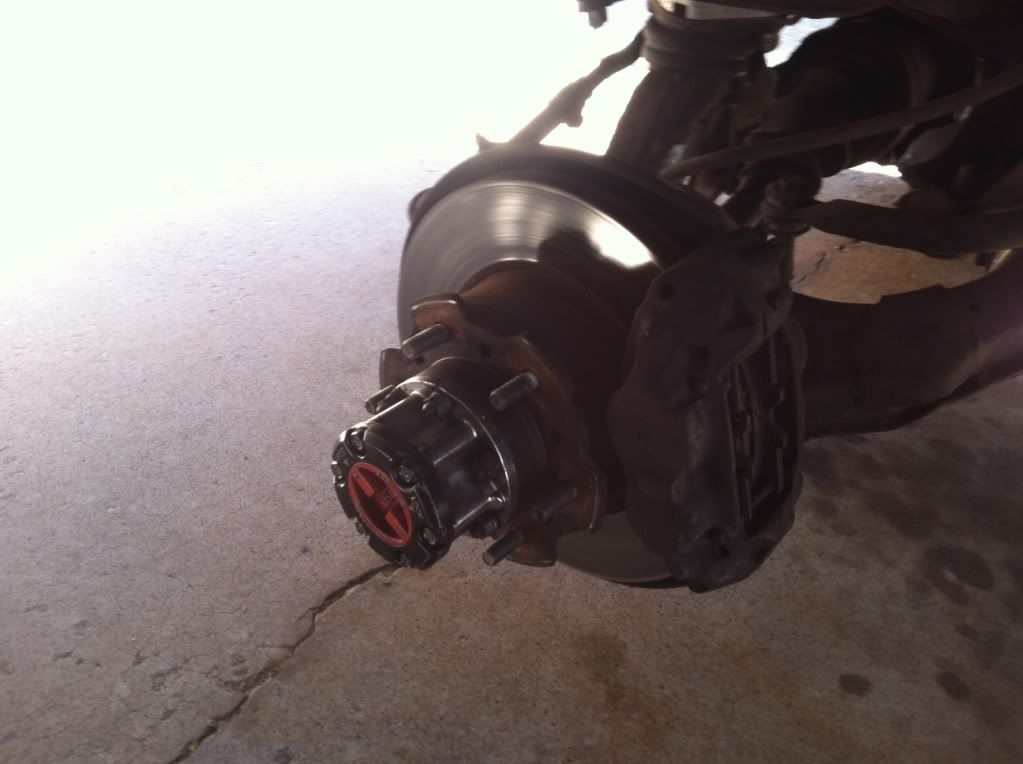
5) next step is to get a 10mm 1/4 inch wrench and loosen the hub selecting ring. slide it out carefully and make sure the dial is in the "free" position.
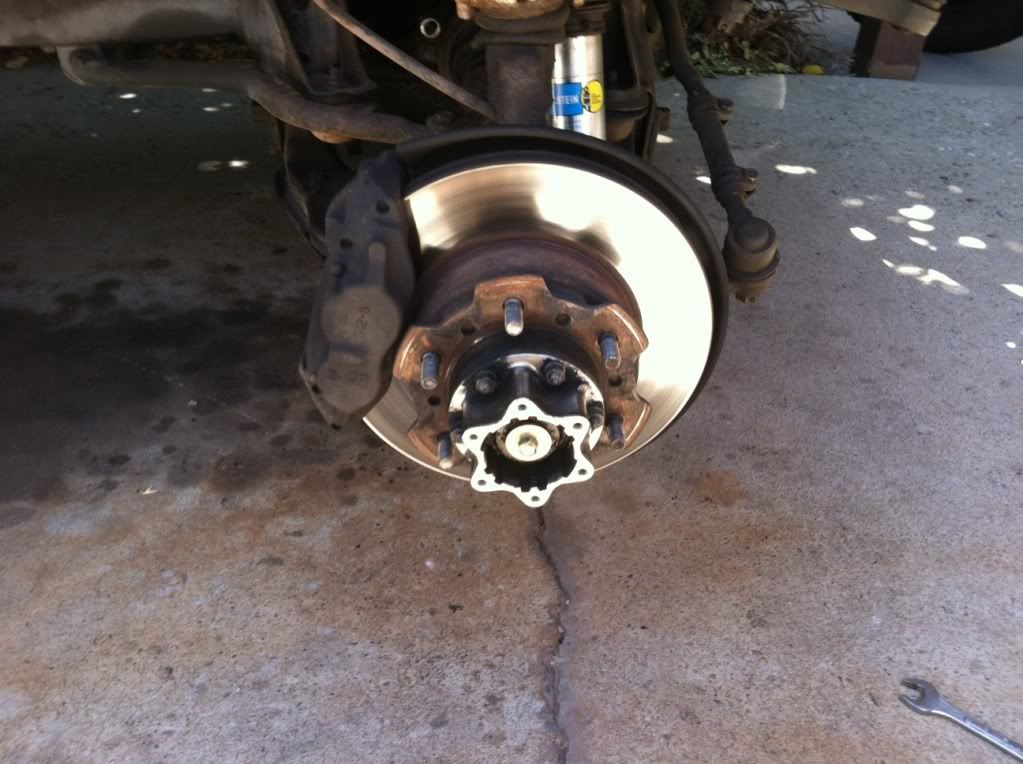
6) next use a 12mm 1/4 wrench to loosen up the main hub assembly bolts. HINT: don't take the nuts all the way off. just loosen them enough that they lay flush with the stud end.
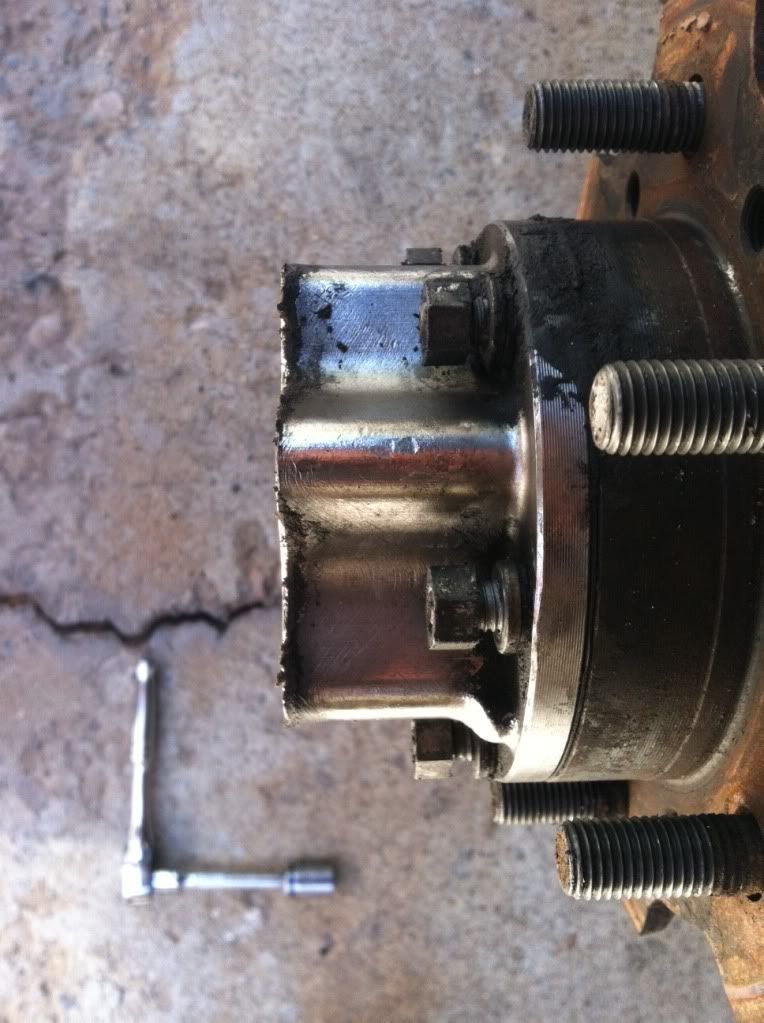
7) once those nuts are loosened get yourself a 1/2 wrench butt and a rubber mallet. place the butt of the wrench up against the front of each stud/nut and give it a few good whacks. do this all the way around until you see the cone washers come loose. i then used some snub nose pliers to grab the cone washers and remove them. a lot of people have trouble with getting them off and I promise you this is the easiest way. once they're off you'll see the CV axle spindle and snap ring+washer.
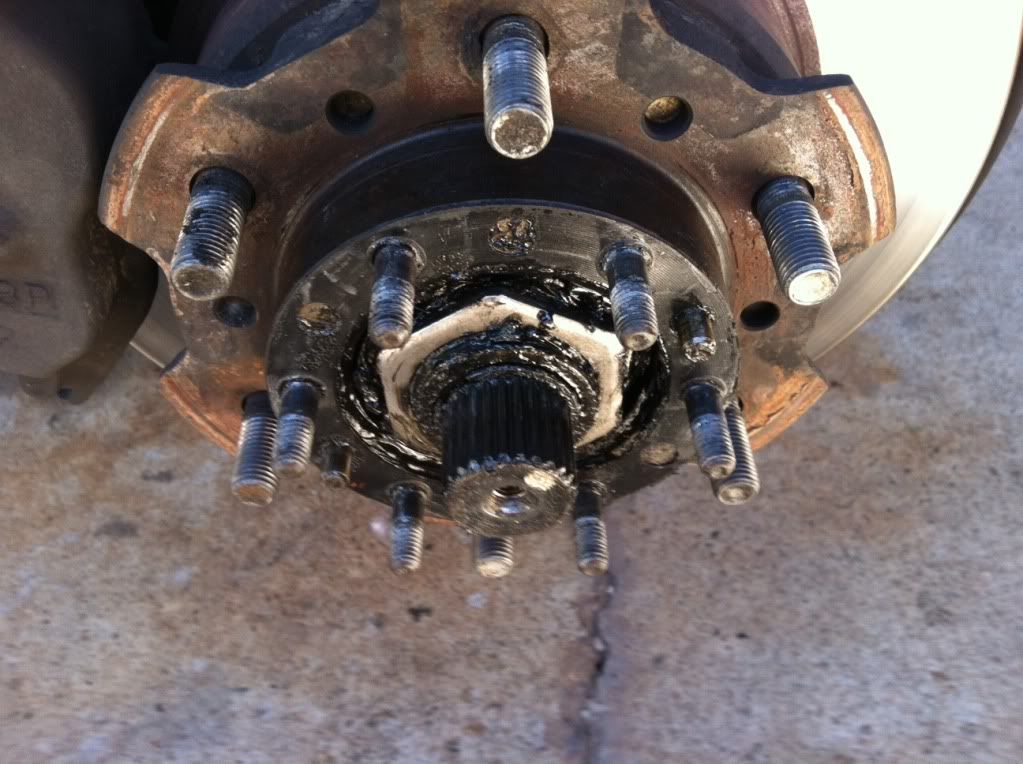
8) use a pair of snap ring pliers to get the snap ring off then slide off the washer. i found the snap ring to be a pain because i was using a pair of pliers with the rounded grabbers (if you can use the duck nose pliers, MUCH easier). after a few minutes of fiddling i got the ring off with the washer. now the CV spindle is free to move back and forth.
9) the next step on the job is to loosen the CV flange nuts that connect the CV axle to the differential flange. for me these were a PITA!!!! super greasy and hard as nails to loosen up. i had my dad use a 11/16 open ended wrench to keep the CV from spinning while i'll torqued the hell out of the nuts with a 1/2 inch 17mm wrench connected to an open ended wrench for added leverage. after 25 minutes of breaking knuckles the nuts came loose.
10) once the nuts are loose jiggle the CV flange free and let it hang down. at this point it won't slip over the differential flange yet...it needs some persuasion in the form of using a jack to lift up the control arm assembly. in order to get this to happen, disconnect the lower shock mount from the lower control arm.
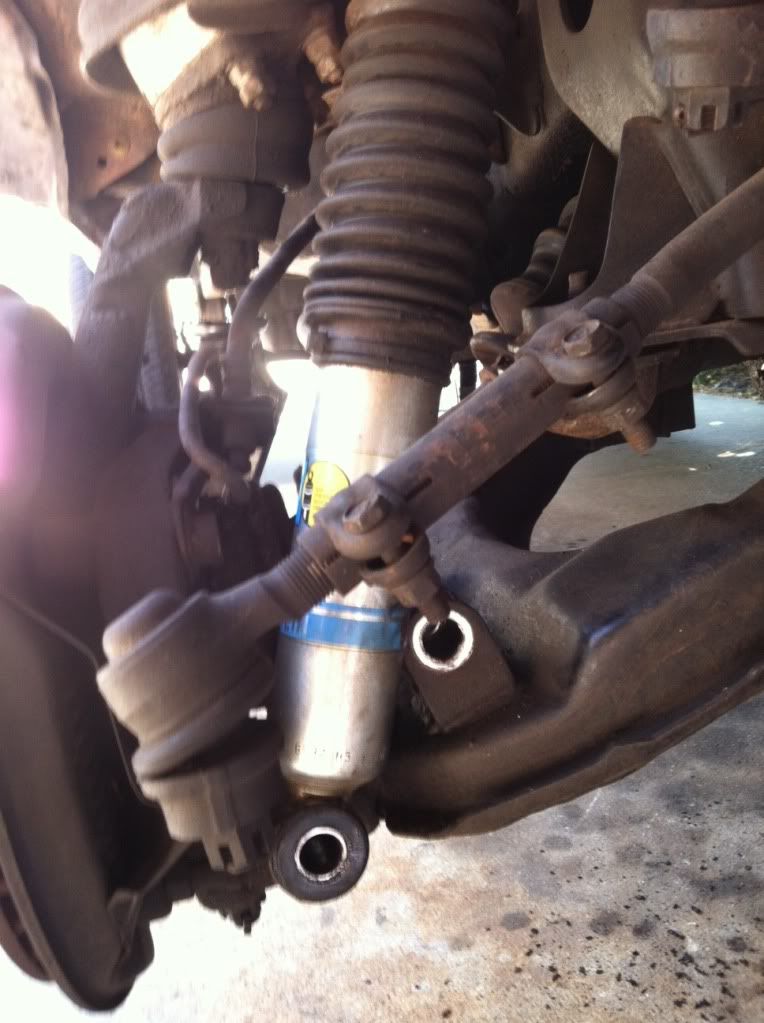
11) once the control arm assembly is at its point of maximum flex (you might want to get one of your heavy friends to sit on the hood during this process to get the most flex) you might notice something: the CV flange STILL won't make it over the diff lip. now my CV axle was super worn out and the joint's flexibility was at its end. if you found this issue, go to step 12. if you didn't and the CV flange was able to make it over the lip and hang down freely, skip to step 13.
12) i used a long furniture clamp (i know, i know) and a regular hammer to punch out the bolts sticking through the differential flange. this gave me the millimeters of clearance i needed to slip the CV over the diff flange.
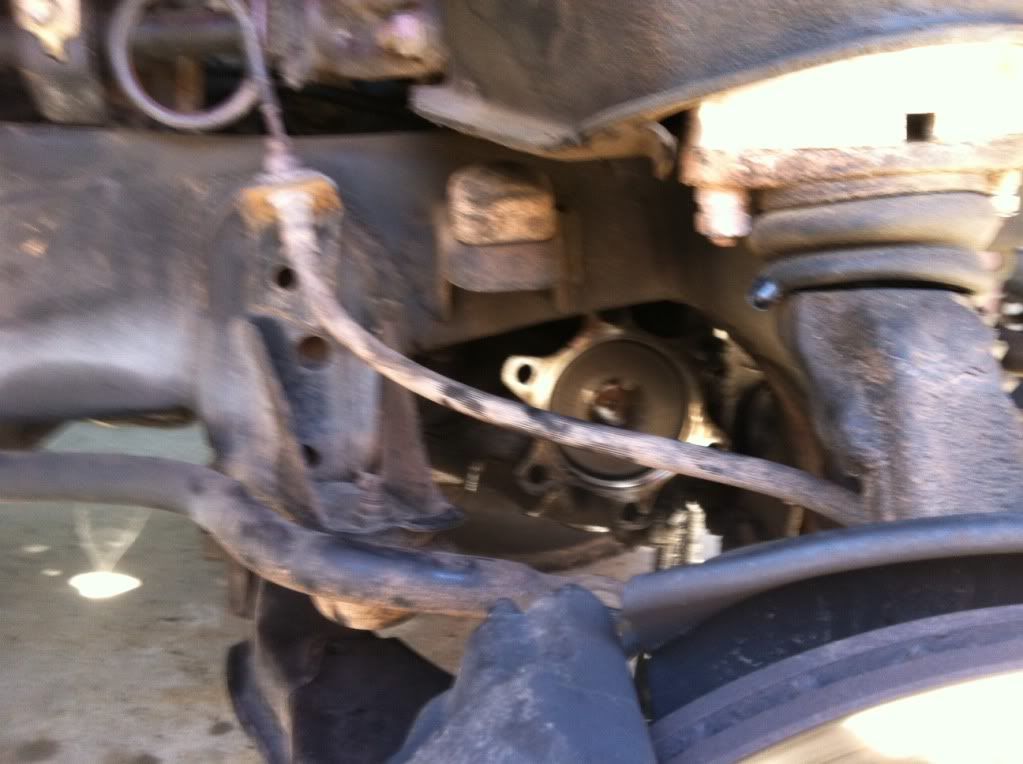
13) now that the CV is "free" from both ends there is ONE more step to ensure that the CV slips out cleanly. you need to disconnect the sway bar mount from the lower control arm to make your life MUCH more cussing-free.
14) i wasn't too worried about my old CV so i used a long flathead screwdriver and a rubber mallet and put it up against the CV spindle and banged it through the hole until it dropped on the ground. this job took me longer than it should have but you're done with the hard parts. now it's time to do the reverse of what i just told you! YAY!
stay tuned for next weekend...i'm going to tackle both rear axles seals.
1) chalk the rear wheels. this may seem pretty obvious to everyone on here but it's easy to forget when you get pumped to do a job!
2) the next step is to loosen the lug nuts on the wheel you're taking off (i did one side at a time for the sake of stability)
3) jack the side you're working on up in the air (i used the crossmember for a main jacking and stand point) and place it securely on jack stands.
4) remove the wheel
5) next step is to get a 10mm 1/4 inch wrench and loosen the hub selecting ring. slide it out carefully and make sure the dial is in the "free" position.
6) next use a 12mm 1/4 wrench to loosen up the main hub assembly bolts. HINT: don't take the nuts all the way off. just loosen them enough that they lay flush with the stud end.
7) once those nuts are loosened get yourself a 1/2 wrench butt and a rubber mallet. place the butt of the wrench up against the front of each stud/nut and give it a few good whacks. do this all the way around until you see the cone washers come loose. i then used some snub nose pliers to grab the cone washers and remove them. a lot of people have trouble with getting them off and I promise you this is the easiest way. once they're off you'll see the CV axle spindle and snap ring+washer.
8) use a pair of snap ring pliers to get the snap ring off then slide off the washer. i found the snap ring to be a pain because i was using a pair of pliers with the rounded grabbers (if you can use the duck nose pliers, MUCH easier). after a few minutes of fiddling i got the ring off with the washer. now the CV spindle is free to move back and forth.
9) the next step on the job is to loosen the CV flange nuts that connect the CV axle to the differential flange. for me these were a PITA!!!! super greasy and hard as nails to loosen up. i had my dad use a 11/16 open ended wrench to keep the CV from spinning while i'll torqued the hell out of the nuts with a 1/2 inch 17mm wrench connected to an open ended wrench for added leverage. after 25 minutes of breaking knuckles the nuts came loose.
10) once the nuts are loose jiggle the CV flange free and let it hang down. at this point it won't slip over the differential flange yet...it needs some persuasion in the form of using a jack to lift up the control arm assembly. in order to get this to happen, disconnect the lower shock mount from the lower control arm.
11) once the control arm assembly is at its point of maximum flex (you might want to get one of your heavy friends to sit on the hood during this process to get the most flex) you might notice something: the CV flange STILL won't make it over the diff lip. now my CV axle was super worn out and the joint's flexibility was at its end. if you found this issue, go to step 12. if you didn't and the CV flange was able to make it over the lip and hang down freely, skip to step 13.
12) i used a long furniture clamp (i know, i know) and a regular hammer to punch out the bolts sticking through the differential flange. this gave me the millimeters of clearance i needed to slip the CV over the diff flange.
13) now that the CV is "free" from both ends there is ONE more step to ensure that the CV slips out cleanly. you need to disconnect the sway bar mount from the lower control arm to make your life MUCH more cussing-free.
14) i wasn't too worried about my old CV so i used a long flathead screwdriver and a rubber mallet and put it up against the CV spindle and banged it through the hole until it dropped on the ground. this job took me longer than it should have but you're done with the hard parts. now it's time to do the reverse of what i just told you! YAY!
stay tuned for next weekend...i'm going to tackle both rear axles seals.
Last edited by TURBOrunnerNM; 06-13-2012 at 07:27 PM.
 06-16-2012, 10:00 AM
#13
Registered User
Thread Starter
Join Date: May 2012
Location: Albuquerque, NM
Posts: 69
Likes: 0
Received 0 Likes
on
0 Posts

 coming soon...General Grabber redletters..33x12.50R15s!
06-19-2012, 06:13 PM
coming soon...General Grabber redletters..33x12.50R15s!
06-19-2012, 06:13 PM
#15
Registered User
Thread Starter
Join Date: May 2012
Location: Albuquerque, NM
Posts: 69
Likes: 0
Received 0 Likes
on
0 Posts
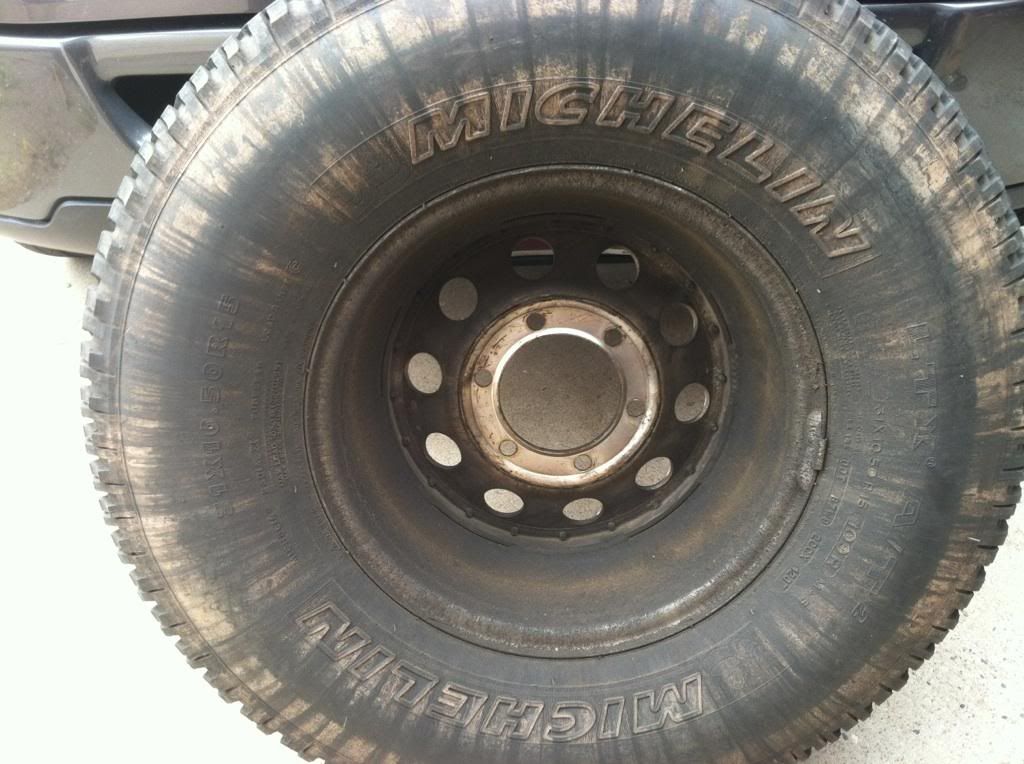
Last Saturday I swapped out the left rear inner axle seal because it was leaking everywhere and I was getting tired of having my tire resemble a zebra. Here's the write up:
1) if you have manual hubs, lock them. then put the vehicle in 4WD and in park to keep the front wheels from moving. once that's done make sure you chalk the wheels for safety.
2) Next drain the rear diff fluid and have new diff fluid ready. it's only about $6 a quart so you don't really have an excuse NOT to swap it out.
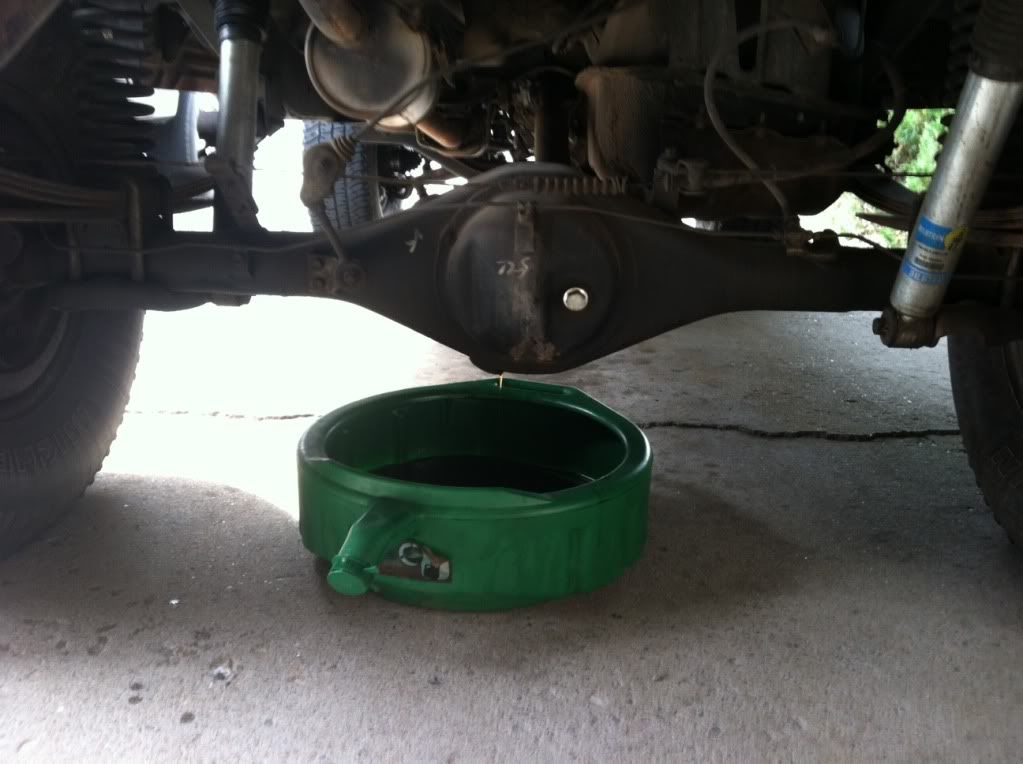
3) once the diff has completely drained put a jack under the rear axle on the side you're working on and lift the tire off the ground.
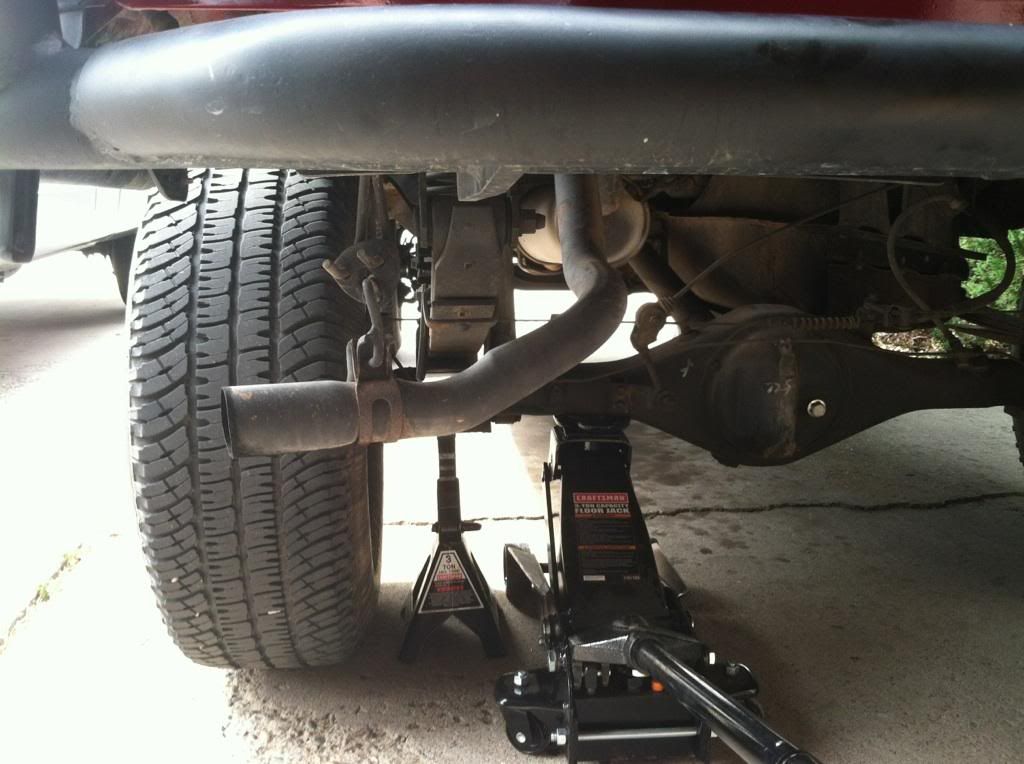
4) put a jack stand under the U-bolt and release the jack. i moved the jack around to the x-member under the vehicle on the side i had off the ground for added security.

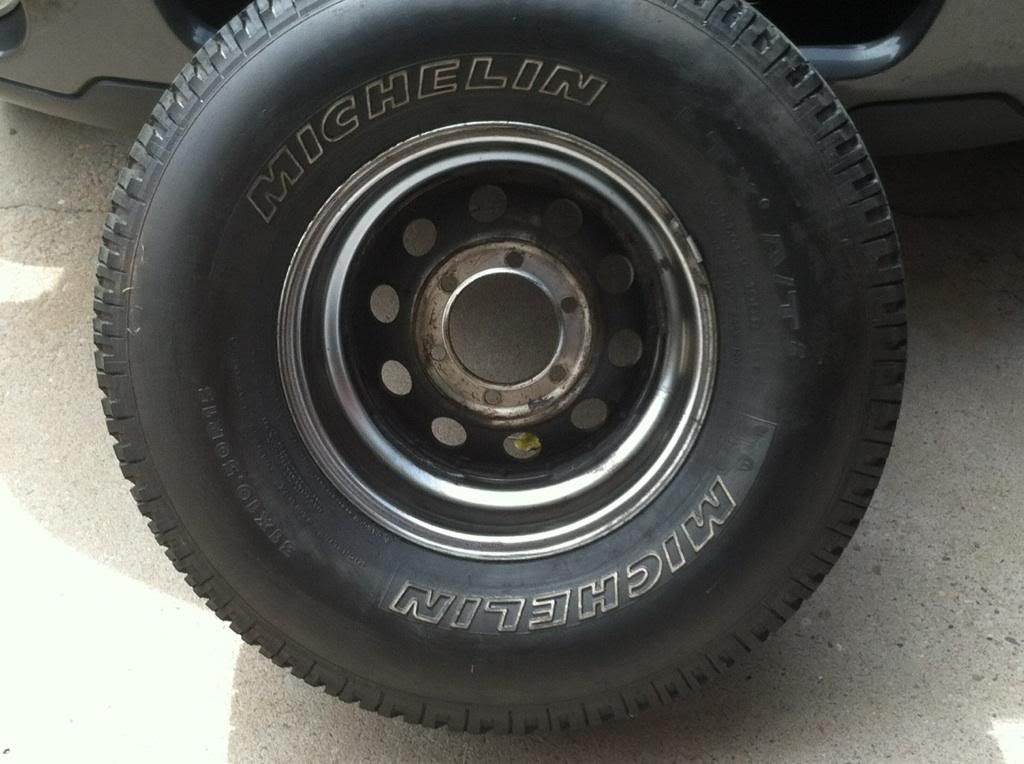
5) here's what the inside of my wheel and tire looked like.
6) you need to then disconnect the parking brake from the brake/hub assembly by removing the pin with a pair of needle nose pliers. (hint: make sure the parking brake is OFF to relief tension on the parking brake and make your life easier).
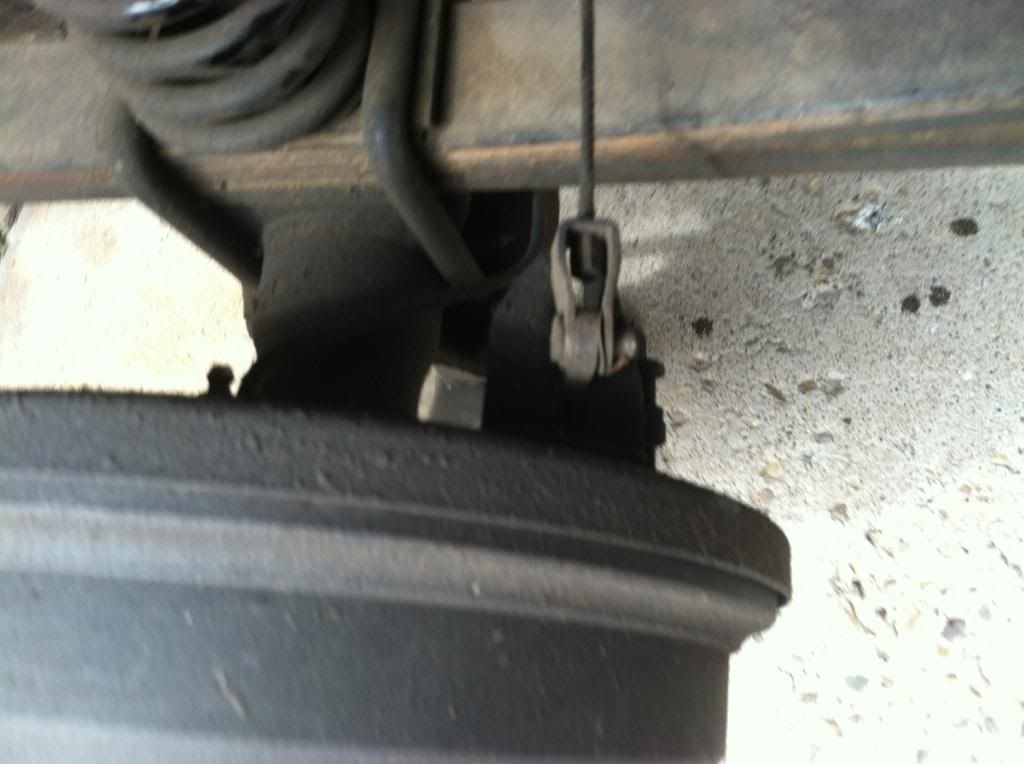
7) after you disconnect the parking brake disconnect the brake line and remove it from the main assembly (it will drip brake fluid out so put a pan underneath to catch the fluid)
8) there are 4 nuts you are required to remove from the rear of the brake/hub assembly before it's ready to come off. it might take some force to get them loose but remember, there's only 4 of them. once they're off remove the hub/brake assembly slowly. take your time doing this and have a towel ready to place the assembly down axle-side up. i then recommend putting a bleeder tube on the brake line and connect it to a small container to keep it from leaking too much.
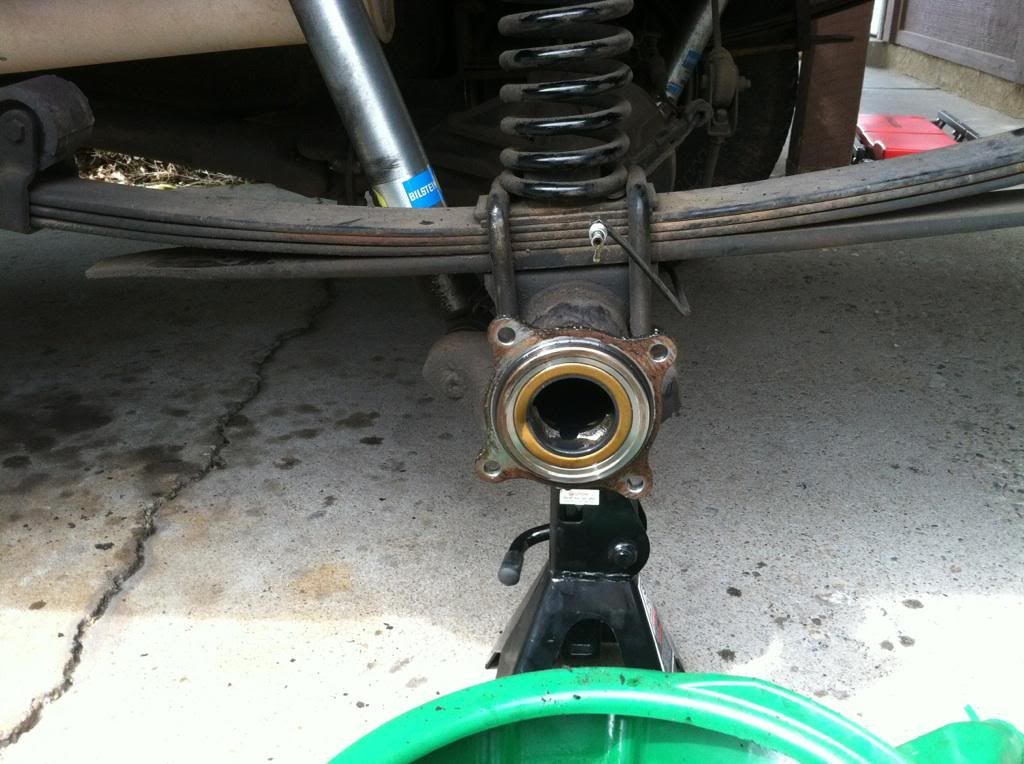
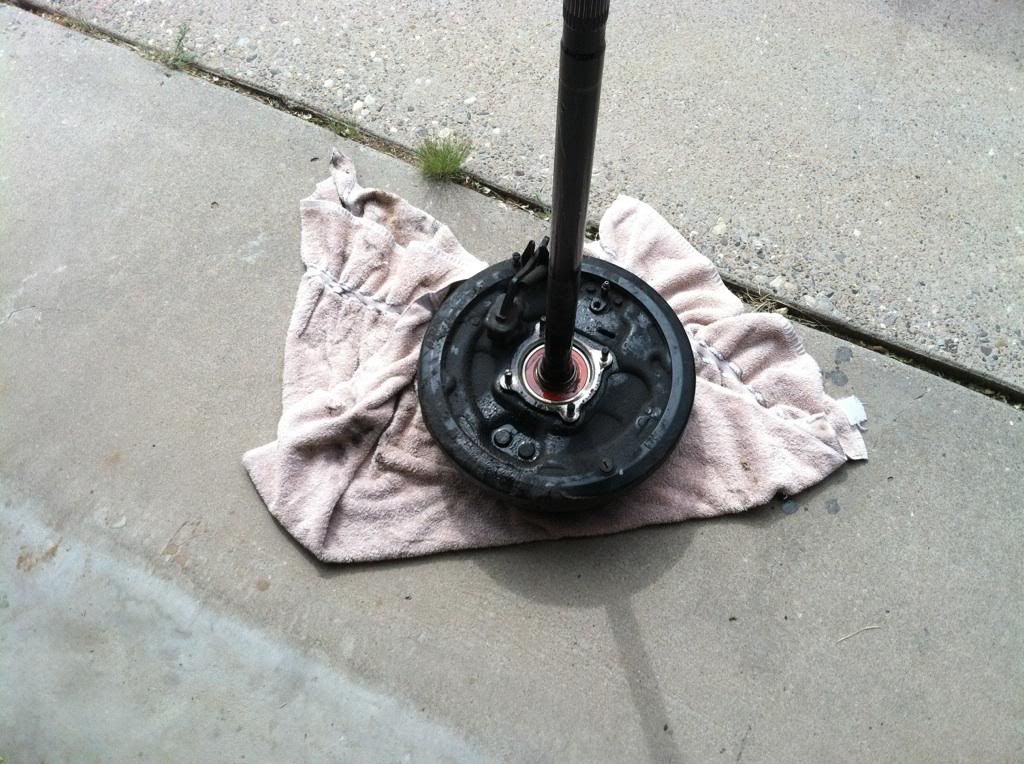
9) now you're ready to remove the old seal (in orange on the photo above). i used a seal puller i bought from harbor freight for about $10. just hook it onto the old seal and pop it out.
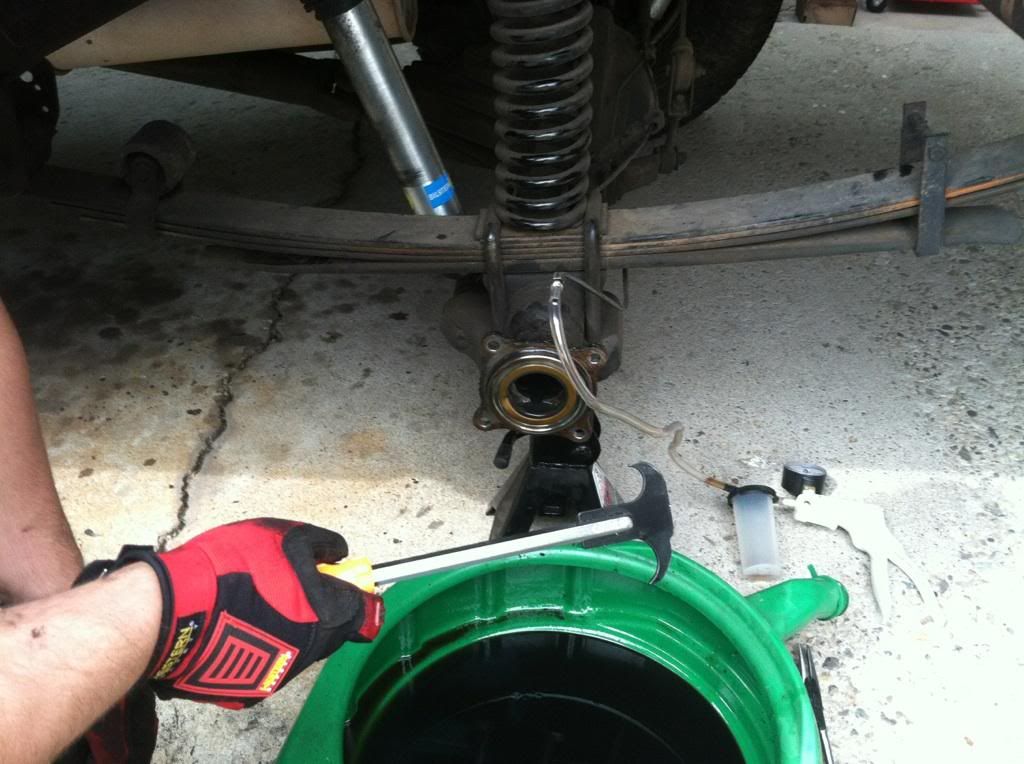
the old seal:
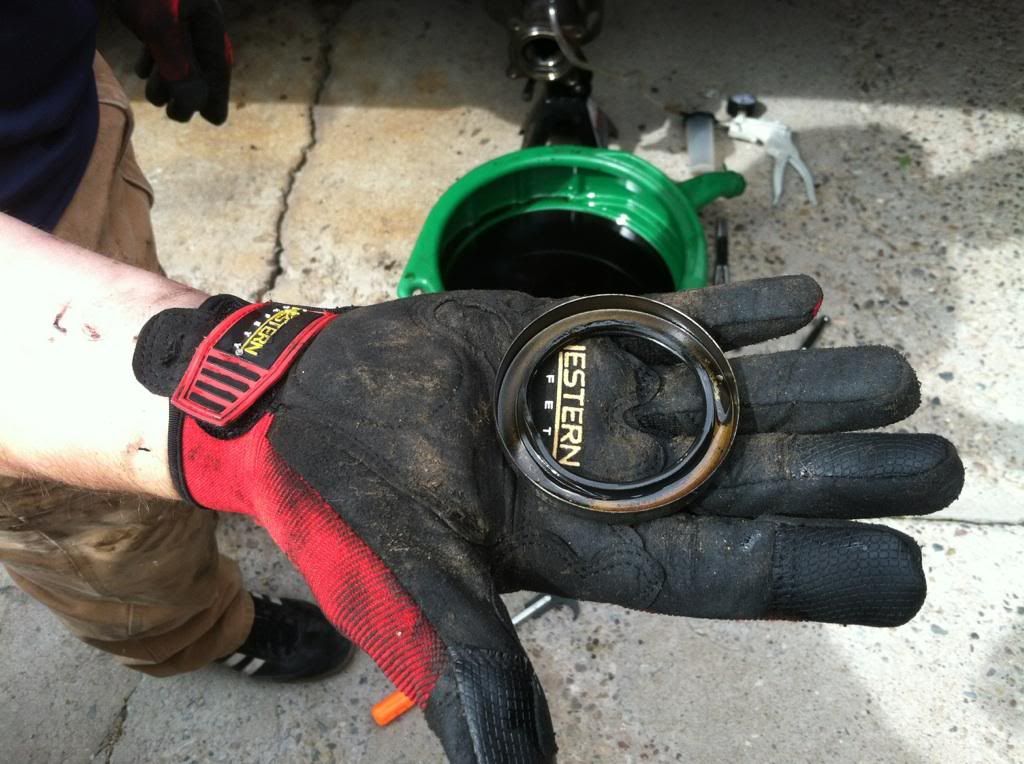
10) get your new inner seal and either a seal press kit or what i used: a piece of wood that covered the entire size of the seal and a rubber hammer to pop it into place. don't rush this, strike the wood evenly and easily around the seal to slide it into place. i put a dab of silicone on the outside of the new seal to get it to slide in easier. then the new seal is on!
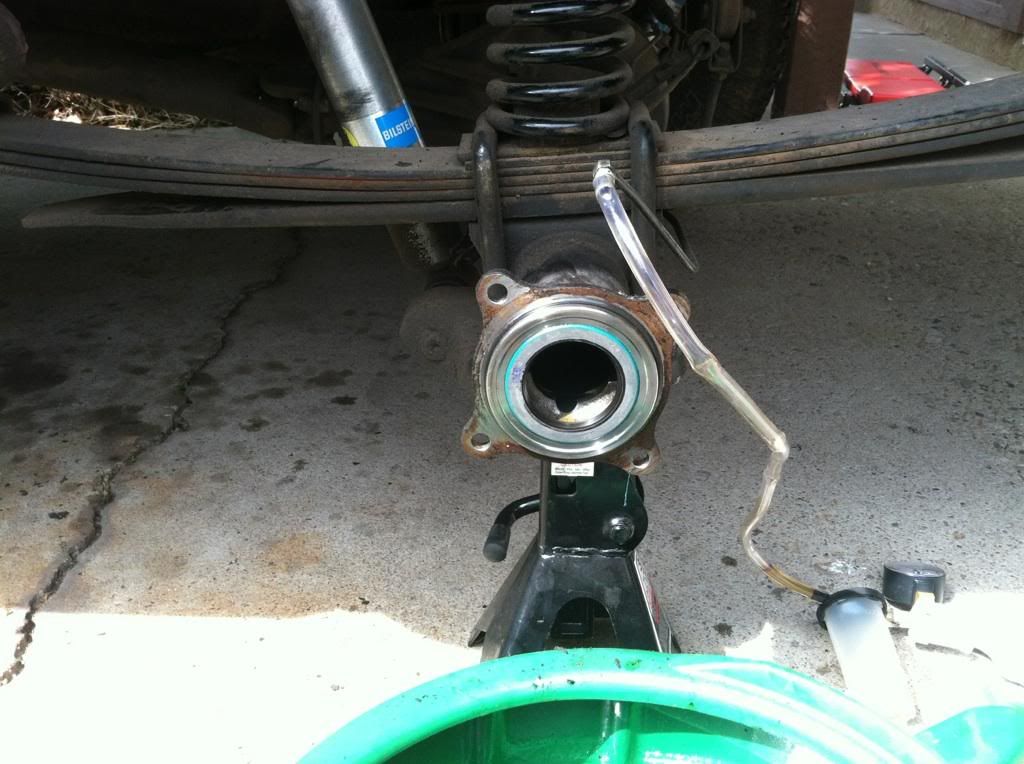
11) use this time to clean up your assembly and wheel while they're off the vehicle. i used brake cleaner, paper towels, and a tire brush. (notice the difference!)
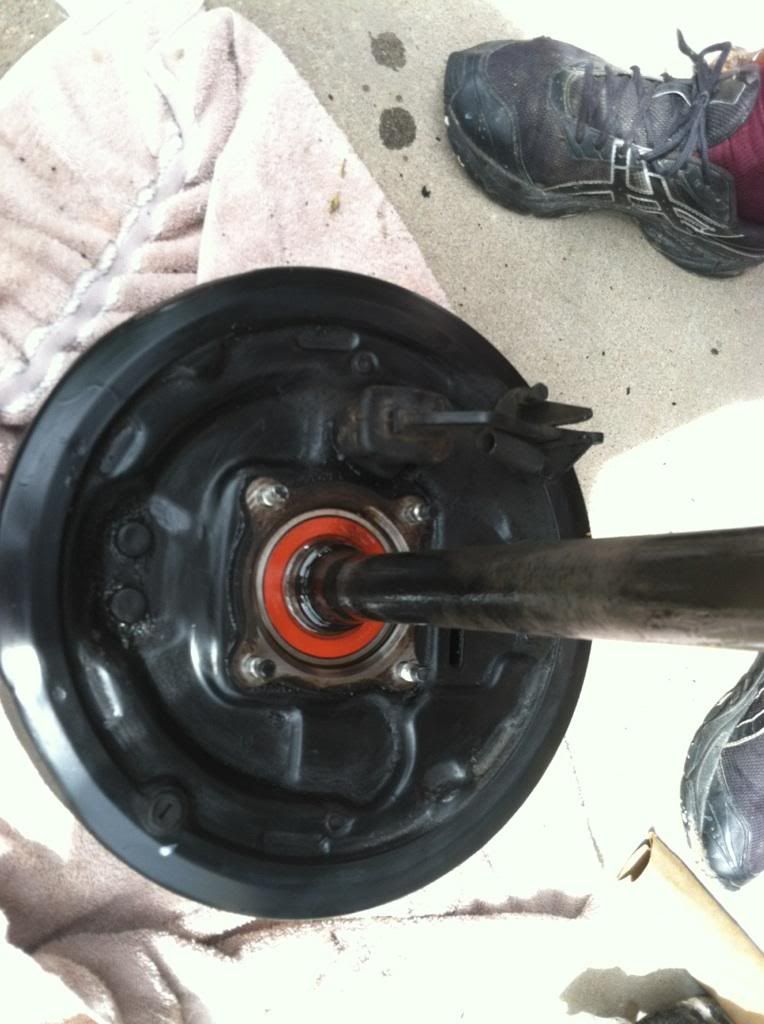
12) it's now time to replace the axle shaft and hub/brake assembly. slide it back into place (it helps to have a helper to keep the axle shaft from rubbing against the new seal while you guide it into place). once the bolt studs are back in place replace the nuts. the manual calls for 47 ft lbs of torque. make sure you abide by this!
13) reconnect the brake line and parking brake. (remember you will need to bleed your brakes before you drive the vehicle again because there will be a lot of air in the lines after this job.)
14) replace the diff fluid with new.
15) put the wheel back on and lower the vehicle after you hand-tighten the lug nuts. then torque down the lug nuts to their proper setting while the vehicle is on the ground. the manual calls for 67-85 ft lbs. i put mine at 70.
16) bleed the brakes then take her for a spin! take it around the block a few times to make sure no fluid is leaking out. then take it up to freeway speeds to double-check your work. JOB DONE!
1) if you have manual hubs, lock them. then put the vehicle in 4WD and in park to keep the front wheels from moving. once that's done make sure you chalk the wheels for safety.
2) Next drain the rear diff fluid and have new diff fluid ready. it's only about $6 a quart so you don't really have an excuse NOT to swap it out.
3) once the diff has completely drained put a jack under the rear axle on the side you're working on and lift the tire off the ground.
4) put a jack stand under the U-bolt and release the jack. i moved the jack around to the x-member under the vehicle on the side i had off the ground for added security.
5) here's what the inside of my wheel and tire looked like.
6) you need to then disconnect the parking brake from the brake/hub assembly by removing the pin with a pair of needle nose pliers. (hint: make sure the parking brake is OFF to relief tension on the parking brake and make your life easier).
7) after you disconnect the parking brake disconnect the brake line and remove it from the main assembly (it will drip brake fluid out so put a pan underneath to catch the fluid)
8) there are 4 nuts you are required to remove from the rear of the brake/hub assembly before it's ready to come off. it might take some force to get them loose but remember, there's only 4 of them. once they're off remove the hub/brake assembly slowly. take your time doing this and have a towel ready to place the assembly down axle-side up. i then recommend putting a bleeder tube on the brake line and connect it to a small container to keep it from leaking too much.
9) now you're ready to remove the old seal (in orange on the photo above). i used a seal puller i bought from harbor freight for about $10. just hook it onto the old seal and pop it out.
the old seal:
10) get your new inner seal and either a seal press kit or what i used: a piece of wood that covered the entire size of the seal and a rubber hammer to pop it into place. don't rush this, strike the wood evenly and easily around the seal to slide it into place. i put a dab of silicone on the outside of the new seal to get it to slide in easier. then the new seal is on!
11) use this time to clean up your assembly and wheel while they're off the vehicle. i used brake cleaner, paper towels, and a tire brush. (notice the difference!)
12) it's now time to replace the axle shaft and hub/brake assembly. slide it back into place (it helps to have a helper to keep the axle shaft from rubbing against the new seal while you guide it into place). once the bolt studs are back in place replace the nuts. the manual calls for 47 ft lbs of torque. make sure you abide by this!
13) reconnect the brake line and parking brake. (remember you will need to bleed your brakes before you drive the vehicle again because there will be a lot of air in the lines after this job.)
14) replace the diff fluid with new.
15) put the wheel back on and lower the vehicle after you hand-tighten the lug nuts. then torque down the lug nuts to their proper setting while the vehicle is on the ground. the manual calls for 67-85 ft lbs. i put mine at 70.
16) bleed the brakes then take her for a spin! take it around the block a few times to make sure no fluid is leaking out. then take it up to freeway speeds to double-check your work. JOB DONE!
06-19-2012, 06:26 PM
#16
Registered User
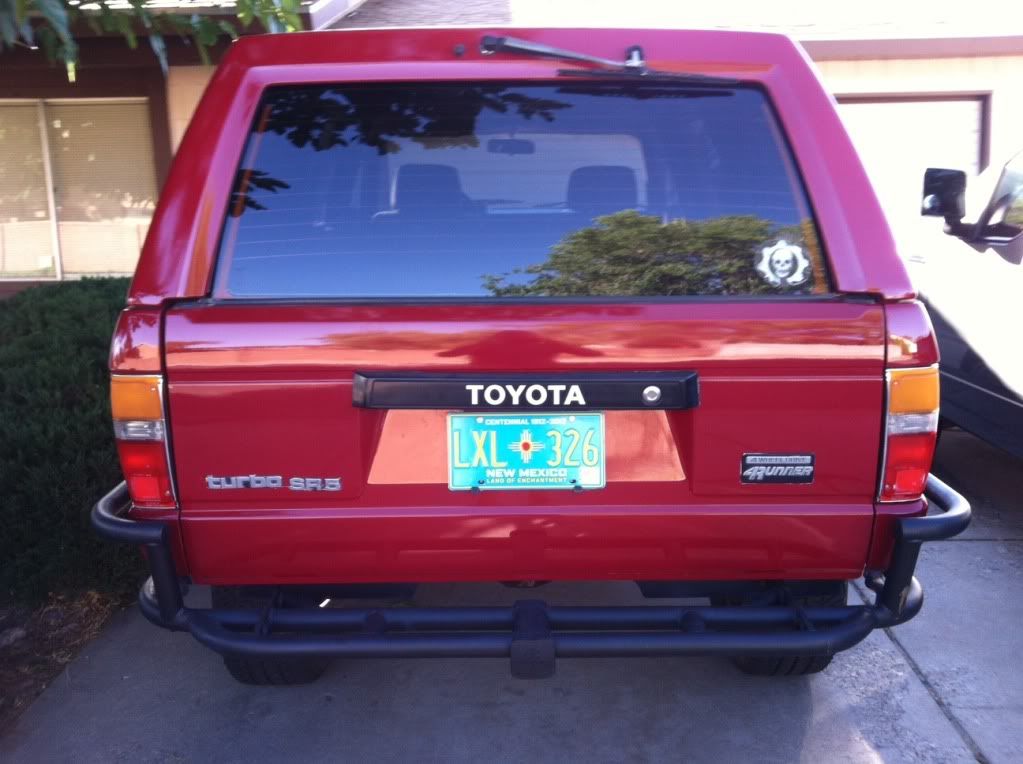
You don't see many 4Runners left in this condition, especially the turbo. Congrats on owning a rare gem!
Any particular reason for the Gears of War sticker?
Any particular reason for the Gears of War sticker?
06-22-2012, 06:01 PM
#17
Registered User
Thread Starter
Join Date: May 2012
Location: Albuquerque, NM
Posts: 69
Likes: 0
Received 0 Likes
on
0 Posts
Thanks! I love that runner and when I saw it on Craigslist I couldn't pass up the opportunity. Gears of War sticker was a decision I made late one Friday night after getting "sober." Regretted it the next day and I've been slowly peeling it off haha. Love the game though!
06-26-2012, 07:36 AM
#18
Registered User
It's cool, man. I've had the Tom Clancy logo on my rig for years:

When weather gets the better of it, I'll update with the new logo:

What can I say, I love the Clancy universe. I love the Jack Ryan novels, but the games are good, too.
When weather gets the better of it, I'll update with the new logo:
What can I say, I love the Clancy universe. I love the Jack Ryan novels, but the games are good, too.
06-26-2012, 09:36 PM
#19
Registered User
Thread Starter
Join Date: May 2012
Location: Albuquerque, NM
Posts: 69
Likes: 0
Received 0 Likes
on
0 Posts