Truckstarr's Build Up thread
 02-19-2012, 08:36 AM
#21
Registered User
Thread Starter
Join Date: Feb 2012
Location: Boulder, CO
Posts: 72
Likes: 0
Received 0 Likes
on
0 Posts
I noticed my clutch fluid reservoir was low on fluid and found the master cylinder to be leaking up behind the firewall at the pedal arm connection. Pretty easy fix. new master cylinder and a buddy to help bleed it. super easy. I did notice a new sound when letting the clutch out, but I don't think it has to do with the master. Probably started when I put bigger tires on. It makes a bit of a squeal just as the clutch is being released and the gears are engaging and only in first and sometimes second gear. No sound on either end of the throw of the pedal, just upon engaging gears and giving it some gas. Any ideas?
 02-19-2012, 09:47 AM
#22
Wow, you've been busy, man! Nice work!
Not sure on the 'Squeal'....... Maybe get a video of it and post it up(for the audio, really). A squeal could be new pressure to the throwout bearing, etc., and a lil bit of extra action at the flywheel? Hard to say, especially without hearing it.
You're saying that this 'squeal' came to be only after replacing the master? (You mentioned "after the bigger tires").
02-19-2012, 09:49 AM
#23
Registered User
Thread Starter
Join Date: Feb 2012
Location: Boulder, CO
Posts: 72
Likes: 0
Received 0 Likes
on
0 Posts
well i noticed the squeal after the tires, I think. but the master swap happened around the same time. I figure it's just the clutch having a hard time making good contact to turn bigger tires. probably just need to gear up!
03-11-2012, 02:37 PM
#24
Registered User
Thread Starter
Join Date: Feb 2012
Location: Boulder, CO
Posts: 72
Likes: 0
Received 0 Likes
on
0 Posts
Discovered a Valve cover leak. I decided I might as well do come cleaning and paint the cover while I have it off. I got a $15 gasket kit from NAPA that included the Half Moons and new grommet/washers for the bolts. The old grommet/washers were stuck, so I grabbed them with some vice grips and threaded them off.
Here's what it looked like to start:

I pulled the air cleaner cover and moved it to the side. Also removed Throttle cable bracket and PCV valve that apparently was leaking oil too. A mess!

There's this little bushing thing for the air cleaner cover's rear mount bolt:

pulled that off and flipped it over to find this mess:

Everything looked ok inside the rocker cover, and I took a peak down into the timing chain cover. Looks like she still has plastic chain guides, so fingers crossed that they aren't worn out.

Cleaned the bejeebus out of the cover's top. Hit it with a wire wheel with my drill, hand scrubbed with a wire brush, degreased with a household degreaser spray and a Scotch Brite pad. Wiped with shop rags and dish soap until the rags wiped clean. Then I Went over the whole thing with a fine steel wool. I really didn't want to screw it up by leaving any grease.
Here's what it looked like to start:
I pulled the air cleaner cover and moved it to the side. Also removed Throttle cable bracket and PCV valve that apparently was leaking oil too. A mess!
There's this little bushing thing for the air cleaner cover's rear mount bolt:
pulled that off and flipped it over to find this mess:
Everything looked ok inside the rocker cover, and I took a peak down into the timing chain cover. Looks like she still has plastic chain guides, so fingers crossed that they aren't worn out.
Cleaned the bejeebus out of the cover's top. Hit it with a wire wheel with my drill, hand scrubbed with a wire brush, degreased with a household degreaser spray and a Scotch Brite pad. Wiped with shop rags and dish soap until the rags wiped clean. Then I Went over the whole thing with a fine steel wool. I really didn't want to screw it up by leaving any grease.
Last edited by Truckstarr; 03-11-2012 at 02:38 PM.
03-11-2012, 03:05 PM
#25
Registered User
Thread Starter
Join Date: Feb 2012
Location: Boulder, CO
Posts: 72
Likes: 0
Received 0 Likes
on
0 Posts
I spent some time masking off the design I wanted with masking tape. I used the 2" wide tape and it made quick work of the large areas. I masked the top and the TOYOTA letters, which took some detailed razor blade cutting and alot of patience:

I had bought some engine parts primer, paint, and clear coat that had the ceramic high temp stuff in it. Followed the instructions on the rattle cans to the T and came out with this:

I like it!
Let it set over night and Installed new gaskets. Ultra Black on the half moons and a half turn past hand tight on the nuts. Fired her up and no leaks. Looks great on the block too.
I had bought some engine parts primer, paint, and clear coat that had the ceramic high temp stuff in it. Followed the instructions on the rattle cans to the T and came out with this:
I like it!
Let it set over night and Installed new gaskets. Ultra Black on the half moons and a half turn past hand tight on the nuts. Fired her up and no leaks. Looks great on the block too.
03-11-2012, 03:15 PM
#26
Registered User
Thread Starter
Join Date: Feb 2012
Location: Boulder, CO
Posts: 72
Likes: 0
Received 0 Likes
on
0 Posts
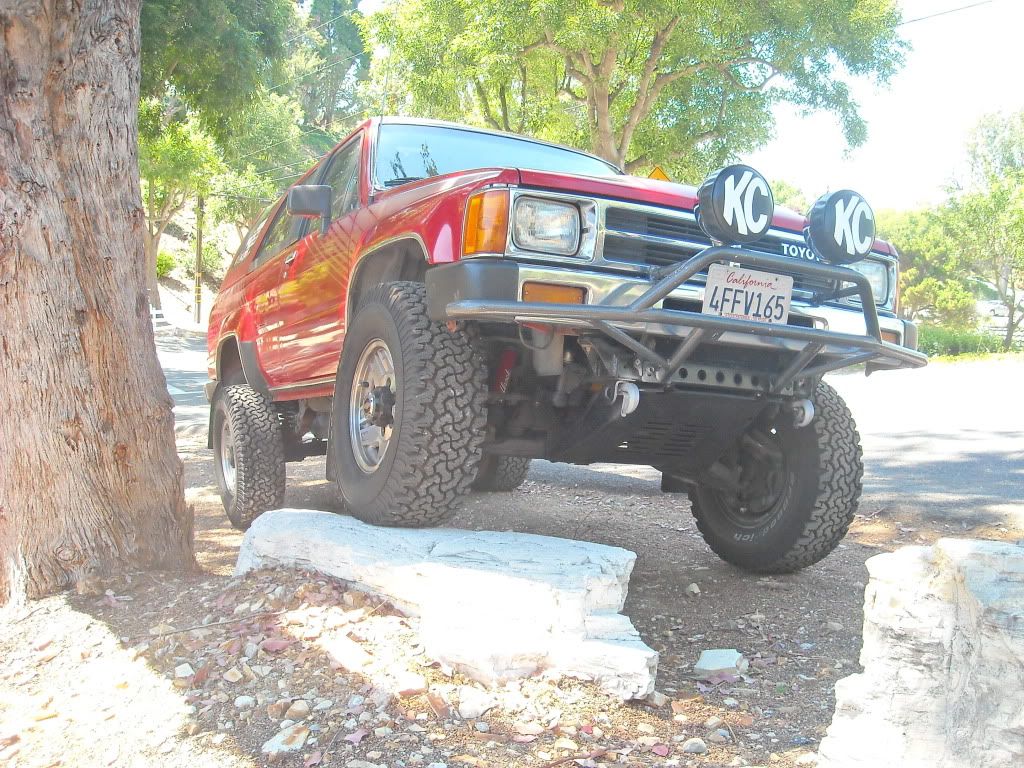
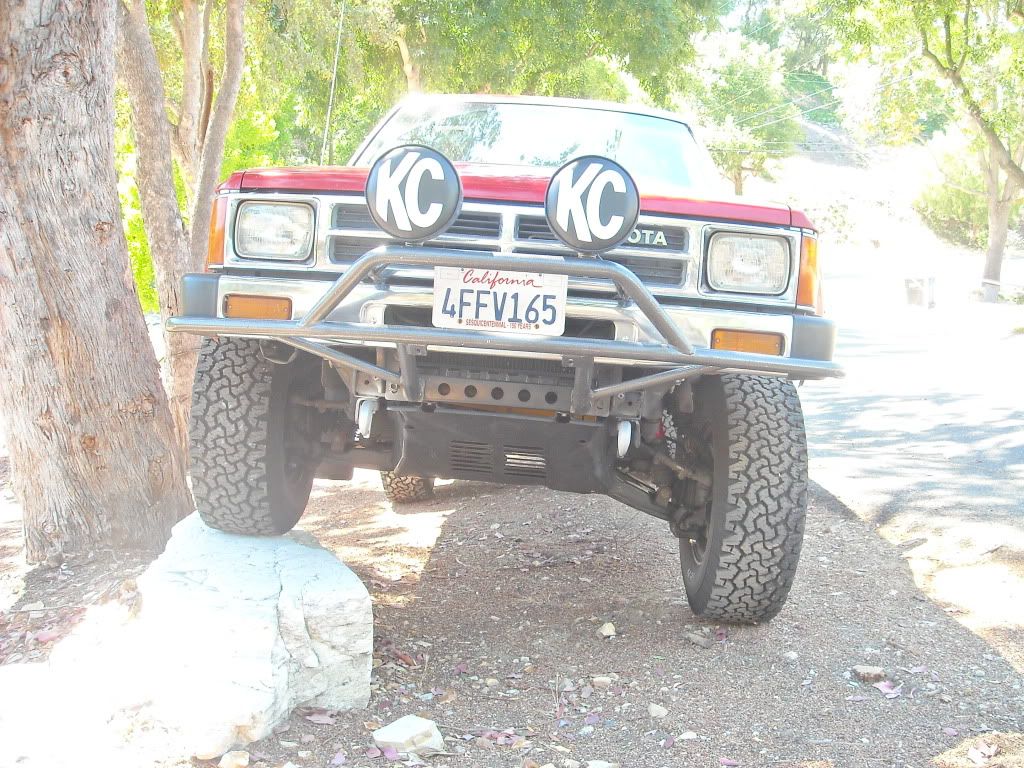
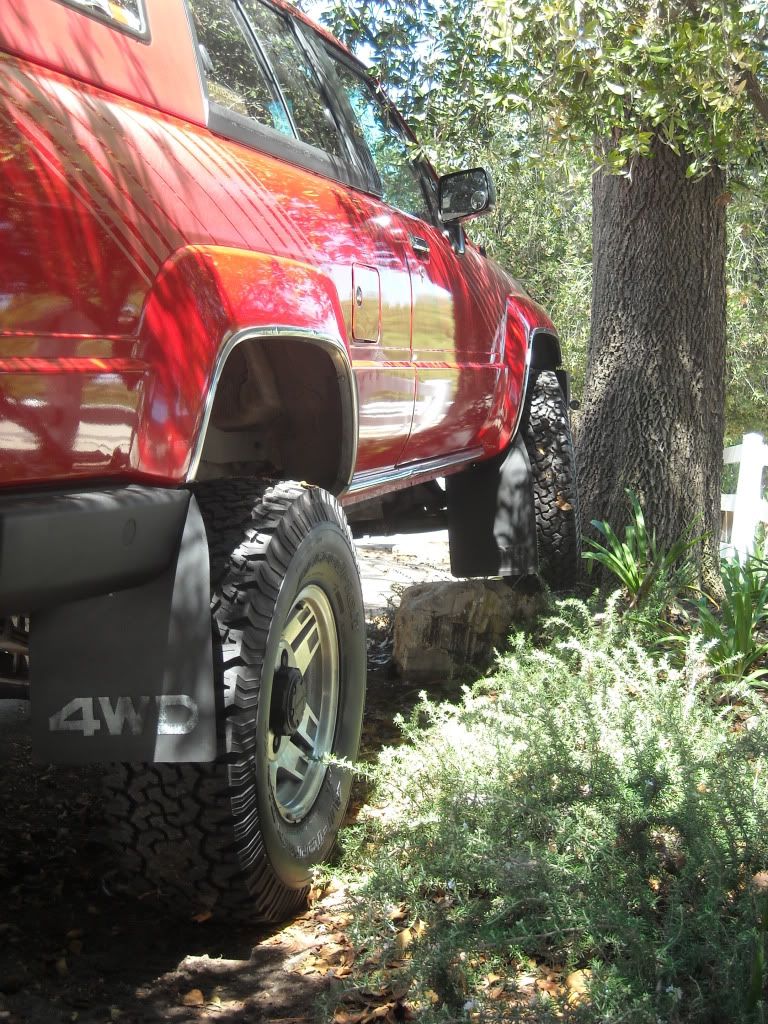
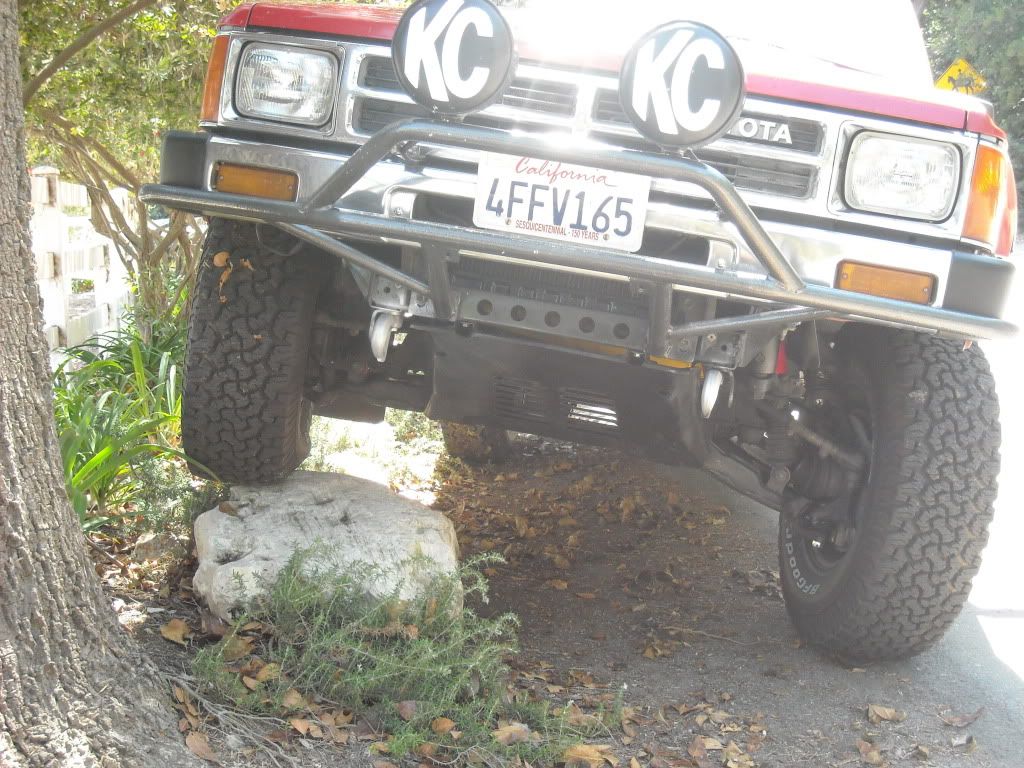
Another thing I added to the truck this weekend was low profile bump stops on the IFS. Got 3 pairs from Energy Suspension and took a hour or so to swap out. These will give me a bit more room to crank up the torsion bars to help level the truck out, plus give me a bit more room to flex.

These are only 3/8" thick and are made of polyurathane so should last forever. I gain about another Inch of height with these so I'm psyched.
Now I'm considering Sway Bar disconnects. I noticed the bushings on the sway bar are pretty shot and I've heard the discos will allow more flex.
These are only 3/8" thick and are made of polyurathane so should last forever. I gain about another Inch of height with these so I'm psyched.
Now I'm considering Sway Bar disconnects. I noticed the bushings on the sway bar are pretty shot and I've heard the discos will allow more flex.
03-24-2012, 07:21 PM
#27
Registered User
Thread Starter
Join Date: Feb 2012
Location: Boulder, CO
Posts: 72
Likes: 0
Received 0 Likes
on
0 Posts
My steering box sprang a leak as did my clutch slave cylinder last week.


So I headed out to my man Yoda Jim's Toyota heaven (junk yard) and picked up a pretty nice steering box (with pitman arm) and a clutch slave that looked pretty clean.
I painted the gear box a nice black with a clear coat over top and sanded off the TOYODA so it showed a nice contrast. Same treatment for the clutch slave.


It wasn't that hard really, but got a bit hung up getting the power steering fittings off the old box. Had to cut part of the inner wheel well out to even get a wrench on the the thing with any kind of swing. then the fitting was stuck on like WHAT! I had to grind out my 16mm box wrench a tiny bit because the 17mm was a tad big and my cheap 16 mm was a tad small. I finally got a tight fit and had to whack it with a mallet to get the fitting to budge. phew!
I thought a while about how to make sure the steering shaft went on the new box right, and wanted to correct a 10 degree to the left steering wheel lean. I way over compensated and ended up like a quarter turn to the right. Then i realized the steering shaft telescoped so I pushed the shaft in, straightened her out, and locked it down. I realized later this evening that I didn't get it all the way down on the splines. I'll revisit tomorrow.
On another note, the !@#$%^ clutch slave hydraulic fitting is in THE worst place. I could not get the flared 10 mm wrench on the fitting so i reluctantly used a regular box wrench, which still sucked. i couldn't get my fingers on the fitting either once it was loose. A real pain. I guess I could have tried to take the cylinder off first. Maybe would have made the angle better?
Bleeding the clutch is really easy. Just need a buddy to pump the clutch.
To finish the day I swapped out a HAC valve for one that works. $5 at the Yota man. I think it helped. I still need to fix my dead vacuum advance, but this is one step closer to better.
A good day on the truck!
So I headed out to my man Yoda Jim's Toyota heaven (junk yard) and picked up a pretty nice steering box (with pitman arm) and a clutch slave that looked pretty clean.
I painted the gear box a nice black with a clear coat over top and sanded off the TOYODA so it showed a nice contrast. Same treatment for the clutch slave.
It wasn't that hard really, but got a bit hung up getting the power steering fittings off the old box. Had to cut part of the inner wheel well out to even get a wrench on the the thing with any kind of swing. then the fitting was stuck on like WHAT! I had to grind out my 16mm box wrench a tiny bit because the 17mm was a tad big and my cheap 16 mm was a tad small. I finally got a tight fit and had to whack it with a mallet to get the fitting to budge. phew!
I thought a while about how to make sure the steering shaft went on the new box right, and wanted to correct a 10 degree to the left steering wheel lean. I way over compensated and ended up like a quarter turn to the right. Then i realized the steering shaft telescoped so I pushed the shaft in, straightened her out, and locked it down. I realized later this evening that I didn't get it all the way down on the splines. I'll revisit tomorrow.
On another note, the !@#$%^ clutch slave hydraulic fitting is in THE worst place. I could not get the flared 10 mm wrench on the fitting so i reluctantly used a regular box wrench, which still sucked. i couldn't get my fingers on the fitting either once it was loose. A real pain. I guess I could have tried to take the cylinder off first. Maybe would have made the angle better?
Bleeding the clutch is really easy. Just need a buddy to pump the clutch.
To finish the day I swapped out a HAC valve for one that works. $5 at the Yota man. I think it helped. I still need to fix my dead vacuum advance, but this is one step closer to better.
A good day on the truck!
04-09-2012, 05:42 PM
#29
Registered User
Thread Starter
Join Date: Feb 2012
Location: Boulder, CO
Posts: 72
Likes: 0
Received 0 Likes
on
0 Posts
NEW STEREO! The old one was a tape deck (luckily I was a mixtape nerd in college so I had plenty to play!) After taking the dash off and cutting all the wires, I found that the thing was only holding on to the dash with the knob stems through a piece of sheet metal. Once it looked like this I knew I had to fab some kind of mounting bracket:

I had a bunch of down time at work today so i let my mind wander and design this bracket. I got me some 26 gauge sheet metal and started measuring the hole in the dash. I came up with this.

First I drew out the cut and bend lines:

then cut the tabs:

Drilled holes (eventually I had to slightly modify the holes during fitting). This was the hardest part. Since there were 6 holes needed on the front and 4 holes on a different plane to hold the head unit to the bracket, I actually boogered up the first bracket pretty good trying to get the holes just right. Then I made a new one that was cleaner.
Here's what it looked like dry fitted:

The unit in place prior to final install. Note the 2 holes on the sides. These were especially hard to get lined up and the screws were pretty short so tolerances were tight.

Slid the whole thing in place and found some screws that worked. All buttoned up:

I may try a few slight adjustments as it looks a tiny bit out of level. but the thing is strong and will hold up to the trails. Way louder than the tape deck and has an mp3 input! No skips when bumping around on the rocks!
Psyched.
I had a bunch of down time at work today so i let my mind wander and design this bracket. I got me some 26 gauge sheet metal and started measuring the hole in the dash. I came up with this.
First I drew out the cut and bend lines:
then cut the tabs:
Drilled holes (eventually I had to slightly modify the holes during fitting). This was the hardest part. Since there were 6 holes needed on the front and 4 holes on a different plane to hold the head unit to the bracket, I actually boogered up the first bracket pretty good trying to get the holes just right. Then I made a new one that was cleaner.
Here's what it looked like dry fitted:
The unit in place prior to final install. Note the 2 holes on the sides. These were especially hard to get lined up and the screws were pretty short so tolerances were tight.
Slid the whole thing in place and found some screws that worked. All buttoned up:
I may try a few slight adjustments as it looks a tiny bit out of level. but the thing is strong and will hold up to the trails. Way louder than the tape deck and has an mp3 input! No skips when bumping around on the rocks!
Psyched.
04-09-2012, 05:55 PM
#30
Registered User
Thread Starter
Join Date: Feb 2012
Location: Boulder, CO
Posts: 72
Likes: 0
Received 0 Likes
on
0 Posts
Oh, last weekend I dug through about 20 different vacuum advance valves at the yoda man junk yard until i found a working one. Mine had blown the inboard diaphragm (pretty common I hear). Many in the pile were worse than mine. But at last I found one that held a vacuum. cleaned it up and gave it a hot red paint job.
Easy to swap out. I didn't remove my distributor, even though the junk yard only sold the vac advance connected to the distributor. My dizzy looked better anyway. Pulled the dizzy cap (2 screws). popped off the E clip on the vac advance arm. Removed vac advance (1 screw). Reverse to install. 10 minutes, max.
Drove it and it felt awesome. I also picked up a new HAC valve that I think is actually working (which works in conjunction with the inboard diaphragm of the vac advance). I squealed my 33s at every stop light which i could never do before. We'll see if my MPGs get any better.
05-30-2012, 12:50 PM
#31
Registered User
Thread Starter
Join Date: Feb 2012
Location: Boulder, CO
Posts: 72
Likes: 0
Received 0 Likes
on
0 Posts
I was out of the country for a week and couldn't wait to get back to the truck! I had this little project sitting there waiting for me....New Marlin Crawler shifter seats and socket bushing!
I had some seepage at the top of the tranny where the shifter retainer plates are located and I figured I'd rebuild what I could while in there. I had read about these cheap and high quality parts from Marlin so I dropped the whopping $20 and in a week I had both seats, the bushing, and a few stickers (bonus!).
Here's what it looked like at the beginning.

I pulled the trim plate and the boots off an found this.


Looks like it wasn't the shifter retainer plates leaking. Just a trashed boot. Back to Toyota and another day's wait. Meanwhile.....
The spring loaded retainer clip was really easy to remove. I literally used one finger on each hand and pushed while turning and it popped right off.
This is the tranny seat.

And it appears someone had installed a rubber washer instead of the actual seat.

Must have been relatively recently since the washer was still in pretty good shape. My theory is that the last guy looked in there and the original seat had disintegrated and all that was left was the top ring. He went and got a replacement washer without realizing it needed a seat.
Here's the tranny shifter with the old socket bushing.

The t-case's boot was still in good shape so I peeled it back and found a snap ring holding the shifter in place.

Popped that off and the shifter slid right out. This is what the t-case looked like which is the basis for my tranny-rubber-washer theory.


This was really the old seat. And of course all the tiny bits of the crumbled seat were all over the place including down inside the t-case. Oh well, looks like a fluid change is in order. (Stay tuned since the other part I got from Marlin was their output shaft seal which has been leaking for ever!)
And the top of the tranny after putting the least amount of effort into cleaning it up.

Then I decided to pretty up the trim piece for in the cab.
Before

After

The small shifter boot came in today and I greased everything up and put it back together. I had to smear a bit of grease on the boot to get it to slide down the stick shift. The snap ring was a bit of a challenge to get back on, but not really too bad. I had the luxury of a 2" body lift and it allowed me tons of room to work inside. Hopefully those retainer plates don't start leaking, but all in all it's one of the easiest projects I've done on this rig. Seemed to make a difference in the shifting, though the looseness wasn't as bad as I've seen around. Either way, a great upgrade! Thanks Marlin!
I had some seepage at the top of the tranny where the shifter retainer plates are located and I figured I'd rebuild what I could while in there. I had read about these cheap and high quality parts from Marlin so I dropped the whopping $20 and in a week I had both seats, the bushing, and a few stickers (bonus!).
Here's what it looked like at the beginning.
I pulled the trim plate and the boots off an found this.
Looks like it wasn't the shifter retainer plates leaking. Just a trashed boot. Back to Toyota and another day's wait. Meanwhile.....
The spring loaded retainer clip was really easy to remove. I literally used one finger on each hand and pushed while turning and it popped right off.
This is the tranny seat.
And it appears someone had installed a rubber washer instead of the actual seat.
Must have been relatively recently since the washer was still in pretty good shape. My theory is that the last guy looked in there and the original seat had disintegrated and all that was left was the top ring. He went and got a replacement washer without realizing it needed a seat.
Here's the tranny shifter with the old socket bushing.
The t-case's boot was still in good shape so I peeled it back and found a snap ring holding the shifter in place.
Popped that off and the shifter slid right out. This is what the t-case looked like which is the basis for my tranny-rubber-washer theory.
This was really the old seat. And of course all the tiny bits of the crumbled seat were all over the place including down inside the t-case. Oh well, looks like a fluid change is in order. (Stay tuned since the other part I got from Marlin was their output shaft seal which has been leaking for ever!)
And the top of the tranny after putting the least amount of effort into cleaning it up.
Then I decided to pretty up the trim piece for in the cab.
Before
After
The small shifter boot came in today and I greased everything up and put it back together. I had to smear a bit of grease on the boot to get it to slide down the stick shift. The snap ring was a bit of a challenge to get back on, but not really too bad. I had the luxury of a 2" body lift and it allowed me tons of room to work inside. Hopefully those retainer plates don't start leaking, but all in all it's one of the easiest projects I've done on this rig. Seemed to make a difference in the shifting, though the looseness wasn't as bad as I've seen around. Either way, a great upgrade! Thanks Marlin!
05-30-2012, 03:26 PM
#32
Registered User
Great pictures and write-ups! I hope you keep posting your progress.
 06-17-2012, 09:08 AM
#36
Registered User
Thread Starter
Join Date: Feb 2012
Location: Boulder, CO
Posts: 72
Likes: 0
Received 0 Likes
on
0 Posts
I finally got around to replacing my leaky Transfer Case output seal. I got the Marlin Crawler seal a while back and finally had a day to do it. It was getting really messy under there.

Last week I finally coughed up the $15 for a 30mm impact socket. I used a great write up (from this very site!) as a guide.
https://www.yotatech.com/forums/f116...r-case-224390/
So thanks to Grego92.
The drive shaft bolts came off really easily, though I had been treating them with BP Blaster a few times over the last week. The staked nut was pretty easy to unstake. I found that if the transfer case was in Neutral, I could freely spin the shaft by hand to get a good angle on the nut. I think that's the only time I've ever had that shifter in neutral!
There was a decent sized gap between the stake and the output shaft to get a small screwdriver in there. Then the impact wrench did all the rest of the work. I put the truck in gear, in 4 Low, and locked the hubs. One short hit with the impact and done.
I didn't have a seal puller and I was afraid of scratching the surface with a screwdriver so I used a bicycle tire tool to pull the old seal out. Actually worked pretty well, but i wrecked the tool. They are cheap. No biggie.
The Marlin Crawler seal has a bigger flange on the outside so that it sits over the edge of the Transfer Case opening, making install really easy since it's impossible to put it in too far and there's a nice edge to tap with a rubber mallet. Well played Marlin!
I had gotten a new nut from the stealership, but they didn't have the washer. I cleaned up the washer with a wire brush and it was fine. It's a pretty tuff looking washer.
I cleaned everything up as long as my patience and desire could stand. Which was minimal. But I at least mopped up anything oily that would come off with a shop rag and no degreaser. So lazy....

I spent most of the time cleaning out the U-Joint since it has a little zerk in it and it was so caked with grease and gear oil and last years mud, etc.
All in all it took about 90 minutes. I topped off the oil with 80w90. (I am due for fluid changes, I'll go synthetic when I do). I only needed about 1/4 of a Quart. (a cup?) It had been leaking since I got it 4 years ago and I never really cared until it was the only thing leaking on the Rig. And if I only lost that little bit of oil in all that time, it certainly wasn't an emergency. Just a mess, really.
So as of yesterday, I am officially LEAK FREE!
Last week I finally coughed up the $15 for a 30mm impact socket. I used a great write up (from this very site!) as a guide.
https://www.yotatech.com/forums/f116...r-case-224390/
So thanks to Grego92.
The drive shaft bolts came off really easily, though I had been treating them with BP Blaster a few times over the last week. The staked nut was pretty easy to unstake. I found that if the transfer case was in Neutral, I could freely spin the shaft by hand to get a good angle on the nut. I think that's the only time I've ever had that shifter in neutral!
There was a decent sized gap between the stake and the output shaft to get a small screwdriver in there. Then the impact wrench did all the rest of the work. I put the truck in gear, in 4 Low, and locked the hubs. One short hit with the impact and done.
I didn't have a seal puller and I was afraid of scratching the surface with a screwdriver so I used a bicycle tire tool to pull the old seal out. Actually worked pretty well, but i wrecked the tool. They are cheap. No biggie.
The Marlin Crawler seal has a bigger flange on the outside so that it sits over the edge of the Transfer Case opening, making install really easy since it's impossible to put it in too far and there's a nice edge to tap with a rubber mallet. Well played Marlin!
I had gotten a new nut from the stealership, but they didn't have the washer. I cleaned up the washer with a wire brush and it was fine. It's a pretty tuff looking washer.
I cleaned everything up as long as my patience and desire could stand. Which was minimal. But I at least mopped up anything oily that would come off with a shop rag and no degreaser. So lazy....
I spent most of the time cleaning out the U-Joint since it has a little zerk in it and it was so caked with grease and gear oil and last years mud, etc.
All in all it took about 90 minutes. I topped off the oil with 80w90. (I am due for fluid changes, I'll go synthetic when I do). I only needed about 1/4 of a Quart. (a cup?) It had been leaking since I got it 4 years ago and I never really cared until it was the only thing leaking on the Rig. And if I only lost that little bit of oil in all that time, it certainly wasn't an emergency. Just a mess, really.
So as of yesterday, I am officially LEAK FREE!
06-17-2012, 09:41 AM
#37
Registered User
Thread Starter
Join Date: Feb 2012
Location: Boulder, CO
Posts: 72
Likes: 0
Received 0 Likes
on
0 Posts
I also decided to finally swap out my thermostat since I'd been sitting on a new one for more than a year. Back then I noticed the the engine temp sitting pretty low. Maybe topped out a 25% up the gauge, about half of what it was/should be running. Never really mattered. It ran fine all year and kept a bit cooler wheeling in the hot summer sun. I figured "at least it's stuck in the open position!" Stuck closed would be much worse.
Once the winter came around, it was putting out pretty luke warm (at best) heat. Not my DD so no big deal, though when I did drive it around, it wasn't really comfy, especially since my driver window won't stay rolled up all the way (trashed actuator arm).
I digress..... I drained about 1.5 quarts of coolant out, I really didn't want to make a mess of coolant all over my block should any come out of the t-stat housing. I packed rags around the housing as protection, too.
Disconnected the upper radiator hose at the t-stat housing and had no coolant run out so I was pretty confident I had drained enough. Two 12mm bolts came out with little effort, and voila!

I used a pair of pliers to pull the old t-stat out and found the coolant level to be about 1 cm below the top of the t-stat. So I'd say that 1.5 quarts is just about right. I put the new gasket on the new t-stat and popped it in the same way the old one was. Cleaned up the housing and reassembled. Topped off the coolant and burped the system. Now she's running just right; the gauge is back up to just under half way. Took it for a test spin (to test the tranny output seal too...see previous) and held steady temp wise, no funny noises anywhere and no leaks!
20 minute job, maybe 30. Took longest to burp the system.
I had a bunch more time in the day so I checked a few more little dinky items off my to-do list:
Finally drilled out a needed clearance hole for my front bumper. With my body lift kit from 4 Crawler (highly recommended) came front bumper lift brackets. They way they work requires a hole to be drilled through the stock bumper bracket . On the driver side, the lower bracket hole lined up perfectly with the old bolt hole, but I had welded on a Bambi Basher grille guard long ago and the passenger side custom bracket I made for it got in the way of the bumper bracket. Thus, unless I drilled out the upper hole on the passenger side, it wouldn't have anything holding it on. So for the last year I have left it floating. It's pretty tight up behind the grill guard, and all the stock bumper is doing is holding my turn signal lamps, the trim pieces on the corners, and my licence plate. I was able to drill the holes without removing the bumper altogether from the truck. I just unbolted it and dropped it down far enough to get a 1/2" drill bit on it. I used the hole in the lift bracket as my guide. I did both sides so now I have 3 bolts of the 4 holding it on. Better than only 1!
Also did some prep work for my new roll bar (write up to come as soon I finish it). And hit the cab with a shop vac. All in all a productive Saturday!
Once the winter came around, it was putting out pretty luke warm (at best) heat. Not my DD so no big deal, though when I did drive it around, it wasn't really comfy, especially since my driver window won't stay rolled up all the way (trashed actuator arm).
I digress..... I drained about 1.5 quarts of coolant out, I really didn't want to make a mess of coolant all over my block should any come out of the t-stat housing. I packed rags around the housing as protection, too.
Disconnected the upper radiator hose at the t-stat housing and had no coolant run out so I was pretty confident I had drained enough. Two 12mm bolts came out with little effort, and voila!
I used a pair of pliers to pull the old t-stat out and found the coolant level to be about 1 cm below the top of the t-stat. So I'd say that 1.5 quarts is just about right. I put the new gasket on the new t-stat and popped it in the same way the old one was. Cleaned up the housing and reassembled. Topped off the coolant and burped the system. Now she's running just right; the gauge is back up to just under half way. Took it for a test spin (to test the tranny output seal too...see previous) and held steady temp wise, no funny noises anywhere and no leaks!
20 minute job, maybe 30. Took longest to burp the system.
I had a bunch more time in the day so I checked a few more little dinky items off my to-do list:
Finally drilled out a needed clearance hole for my front bumper. With my body lift kit from 4 Crawler (highly recommended) came front bumper lift brackets. They way they work requires a hole to be drilled through the stock bumper bracket . On the driver side, the lower bracket hole lined up perfectly with the old bolt hole, but I had welded on a Bambi Basher grille guard long ago and the passenger side custom bracket I made for it got in the way of the bumper bracket. Thus, unless I drilled out the upper hole on the passenger side, it wouldn't have anything holding it on. So for the last year I have left it floating. It's pretty tight up behind the grill guard, and all the stock bumper is doing is holding my turn signal lamps, the trim pieces on the corners, and my licence plate. I was able to drill the holes without removing the bumper altogether from the truck. I just unbolted it and dropped it down far enough to get a 1/2" drill bit on it. I used the hole in the lift bracket as my guide. I did both sides so now I have 3 bolts of the 4 holding it on. Better than only 1!
Also did some prep work for my new roll bar (write up to come as soon I finish it). And hit the cab with a shop vac. All in all a productive Saturday!
07-12-2012, 12:01 PM
#39
Hey man
Curious how the bump stops worked out.... After I reread the top post.... thought over that.... "Gain some flex after I torque the T-bars".... so I'm not sure there... I have stock bump stops, BJ spacers, T-bars relaxed and still couldn't gain TOO much stuff'.... But overall, pretty good flex for IFS, hahaha.........


Could you post up some pics with your "FLEX" with the stuff you've done, including the bump stops? Thanks, Truckstar
Curious how the bump stops worked out.... After I reread the top post.... thought over that.... "Gain some flex after I torque the T-bars".... so I'm not sure there... I have stock bump stops, BJ spacers, T-bars relaxed and still couldn't gain TOO much stuff'.... But overall, pretty good flex for IFS, hahaha.........
Could you post up some pics with your "FLEX" with the stuff you've done, including the bump stops? Thanks, Truckstar
07-12-2012, 02:41 PM
#40
Registered User
Thread Starter
Join Date: Feb 2012
Location: Boulder, CO
Posts: 72
Likes: 0
Received 0 Likes
on
0 Posts
Thanks Terry! It's one small task at a time, but it's coming along. I have gotten great help from others here on YotaTech. Sometimes I can find a great step by step with pictures and sometimes I can't, which can get frustrating since I know I'm not the first with these problems. I figured I'd do the write ups as I wish all write ups were! I hope they help others.
Chef, I guess I meant that I got more droop than I had with the T-bars cranked against the original top bump stop. In that state I had no droop. With low pro stops the T-Bars are in the same state of torque as they were with the original stops (cranked up a bit from stock) but the stop is now an inch or so away from hitting.
I actually haven't had the rig on the trail since I did the swap. Many of the roads have just recently opened for the season around Boulder. My flex pics tend to look alot like yours anyway! I am considering sway bar disconnects, but want to see if it'll make any difference first. I'll post some pics from that little experiment when it happens.
btw I love your rig. so shiny!


