Numbchux' 1987 4Runner Build-Up Thread
 08-24-2020, 10:36 AM
#141

Update is bad....
2020-08-10_02-53-37 by Numbchux, on Flickr
Somehow, the o-ring for the high pressure output of the oil pump into the block shifted while I was installing it, you can see half of it sticking out from behind the pump on the left side of the picture. I'm surprised how well it does seal, it squirts out there under pressure, but really not much volume, and it builds enough pressure to turn off an idiot light (admittedly, that's not much...). This is a pretty major setback, and to fix it correctly involves pulling both lower and upper oil pans off, which means I should pull the engine. I'm going to try to pull just the lower pan, which will make the pump bolts accessible. From what I understand, it's barely possible (have to extract one of the studs for the pickup, and even then...) to remove the pump that way, but I'm hoping I can get just enough to sneak an oring in there. This will depend how pliable the anaerobic sealer is.
With my current to-do list, this guarantees that this project won't be driveable this year....sucks, but things move a little slower when you have little kids.
 08-25-2020, 02:00 PM
#142
Registered User
Thread Starter

Oh boy...
Mostly regular maintenance on our Outbacks (3 of them, all varying degrees of high mileage and neglect), really should do shocks/struts on all 3, my 335k mile '00 has something loose in the front end. I also really want to get my conversion van driveable this year. I haven't driven my Celica since I discovered the steering rack mounts are cracked (found a couple posts online about this, and mine had hit a curb before I got it), so the engine has to come out to weld those.
And lower on the list, in no particular order: I've got an SVX that needs the rear subframe replaced. I just acquired 3 1st gen Subaru Foresters for next to nothing that I should be able to turn into 2 usable (sellable) cars. I'd like to do a few things to my XT6 so I can Rallycross it. My Subaru brat needs a tuneup and waterpump just to continue using it around the yard. My car trailer needs 2 more leaf springs and wiring. There's the Tacoma (swap rear axles with the 4runner, remove the bed and patch the frame, modify for yard truck use).
Also, finish the stairs and attic with 2 more bedrooms and a bathroom. Rewire the garage. My lawn tractor needs new tires.
And raise a 3.5 year old and 5 month old. And work full time.
08-27-2020, 08:03 AM
#143
Oh boy...
Mostly regular maintenance on our Outbacks (3 of them, all varying degrees of high mileage and neglect), really should do shocks/struts on all 3, my 335k mile '00 has something loose in the front end. I also really want to get my conversion van driveable this year. I haven't driven my Celica since I discovered the steering rack mounts are cracked (found a couple posts online about this, and mine had hit a curb before I got it), so the engine has to come out to weld those.
And lower on the list, in no particular order: I've got an SVX that needs the rear subframe replaced. I just acquired 3 1st gen Subaru Foresters for next to nothing that I should be able to turn into 2 usable (sellable) cars. I'd like to do a few things to my XT6 so I can Rallycross it. My Subaru brat needs a tuneup and waterpump just to continue using it around the yard. My car trailer needs 2 more leaf springs and wiring. There's the Tacoma (swap rear axles with the 4runner, remove the bed and patch the frame, modify for yard truck use).
Also, finish the stairs and attic with 2 more bedrooms and a bathroom. Rewire the garage. My lawn tractor needs new tires.
And raise a 3.5 year old and 5 month old. And work full time.
Mostly regular maintenance on our Outbacks (3 of them, all varying degrees of high mileage and neglect), really should do shocks/struts on all 3, my 335k mile '00 has something loose in the front end. I also really want to get my conversion van driveable this year. I haven't driven my Celica since I discovered the steering rack mounts are cracked (found a couple posts online about this, and mine had hit a curb before I got it), so the engine has to come out to weld those.
And lower on the list, in no particular order: I've got an SVX that needs the rear subframe replaced. I just acquired 3 1st gen Subaru Foresters for next to nothing that I should be able to turn into 2 usable (sellable) cars. I'd like to do a few things to my XT6 so I can Rallycross it. My Subaru brat needs a tuneup and waterpump just to continue using it around the yard. My car trailer needs 2 more leaf springs and wiring. There's the Tacoma (swap rear axles with the 4runner, remove the bed and patch the frame, modify for yard truck use).
Also, finish the stairs and attic with 2 more bedrooms and a bathroom. Rewire the garage. My lawn tractor needs new tires.
And raise a 3.5 year old and 5 month old. And work full time.
08-27-2020, 01:52 PM
#144
Registered User
Thread Starter
That said, having bought them all in some form of neglect or another I've been able to either turn a profit, get many years of service or both.
The following users liked this post:
bend (08-28-2020)
09-23-2020, 07:22 AM
#145
Registered User
Thread Starter
With the stud for the pickup, the pump only comes off the block by about 1/2". Not enough to do anything.
Borrowed a nice 6mm stud extractor socket from one of the mechanics at work, and then the pump comes off pretty easily. Resealed and reinstalled. Not ideal as you're sealing 2 surfaces at 90* from each other at the same time (block and upper oil pan), but I think it should work.
Bought a Mitsuboshi timing belt and NSK pulleys while I have it apart this far.
Hopefully I'll be back on track this weekend.
11-10-2020, 01:48 PM
#146
Registered User
Thread Starter
Haven't had much to update. Young kids and full time jobs makes for little free time. Got the oil pump resealed, haven't put the timing set back on, though, so it still hasn't run.
But, managed to edit together the time lapse I took of me actually swapping the engines.
But, managed to edit together the time lapse I took of me actually swapping the engines.
The following users liked this post:
old87yota (11-15-2020)
12-02-2020, 10:30 AM
#147
Registered User
Thread Starter
I thought I'd publicize my spreadsheet. This has been my scratchpad for this build, so it's sort of a stream of consciousness, but I tried to keep it somewhat organized.
But there are part numbers (OEM and aftermarket), sources, prices, links, notes, dimensions, etc. The "Parts" tab has a running total of what I've spent (and have left to spend), for those curious what this endeavor will cost and why (keep in mind, my $500 initial purchase price of the engine/transmission/wiring/ECU isn't included).
the "Gaskets" and "Fuse box" tabs totals are inserted into the "Parts" list for that running total.
The "OEM Parts" tab is redundant from the other lists, so I can print it out, highlight what I need, and bring it to my local dealer (they use matrix pricing, but the guy that usually helps me usually gives me list price when he sees that I've already looked it up).
https://docs.google.com/spreadsheets...it?usp=sharing
The following users liked this post:
SomedayJ (12-02-2020)
04-27-2021, 05:19 AM
#148
Registered User
Thread Starter
Finally, some progress. The weather is breaking (although, we've had snow overnight like 5 of the last 7 nights...), and my son is sleeping better, so I'm spending some time on it.
I built a new front harness down to the crank and cam sensors and LH coil. All new connectors, wire, wrap, etc. Then I put the timing set on, and a couple of the covers. Looks like an engine again!

by Numbchux, on Flickr
Spent a considerable amount of time chasing some odd symptoms when I went to start it. I have good power and ground at the ignitors. My aftermarket tach wiggles while cranking (indicating there's a crank signal). I have good power to the coils. But inductive timing light stays dark at both coil wires.
Also, there are 2 relays in the SC400, and I'm mimicking the factory setup, one is ignition switched, and the other ECU switched. When I turn the ignition off, there's still some residual voltage holding the second relay on. The only way to get it to turn off, is to disconnect the relay or battery.
I built a new front harness down to the crank and cam sensors and LH coil. All new connectors, wire, wrap, etc. Then I put the timing set on, and a couple of the covers. Looks like an engine again!
by Numbchux, on Flickr
Spent a considerable amount of time chasing some odd symptoms when I went to start it. I have good power and ground at the ignitors. My aftermarket tach wiggles while cranking (indicating there's a crank signal). I have good power to the coils. But inductive timing light stays dark at both coil wires.
Also, there are 2 relays in the SC400, and I'm mimicking the factory setup, one is ignition switched, and the other ECU switched. When I turn the ignition off, there's still some residual voltage holding the second relay on. The only way to get it to turn off, is to disconnect the relay or battery.
06-09-2021, 05:39 AM
#149
Registered User
Thread Starter
I *think* the oddball no-start condition I had was just low voltage, I had cranked a lot, and drawn down my battery and jump pack. Did some diagnostics (which showed no issues) the next weekend, and it started right up.
3UZ 135a Alternator
Numbchux, on Flickr
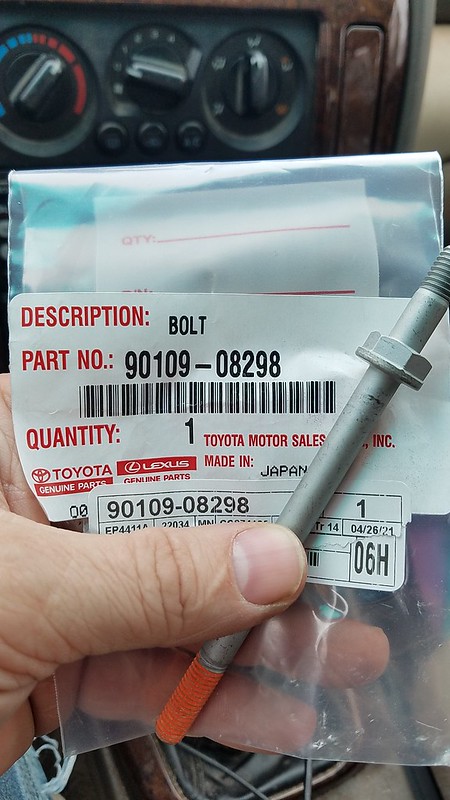
Replace one of the oil pump bolts with this stud to utilize the 3rd mount on the 3UZ alt.
Numbchux, on Flickr
RH Exhaust manifold modified and v-band flange welded on. Still need to do some heat management before final installation.
Numbchux, on Flickr
And then....Wiring. First draft of the diagram just for the engine bay harness I'm making. This does not include any wiring modifications in the cabin.
Numbchux, on Flickr
Started with the battery bracket on the LH side, I made a simple steel bracket to mount a 150a breaker and Jcase fuse box next to the battery. This will feed power into the main cabin fuse box, and a small fuse for the sense wire on the alternator (this should be as close to the battery as possible to account for voltage drop).
Numbchux, on Flickr
Then mounted the SC400 airbox where the battery was, and bent up this sheet metal bracket to mount where the old fuse box was and my new fuses/breakers/relays will mount there.
Numbchux, on Flickr
But the really exciting thing, is my custom etched rocker switch actuators came from rockerswitchpros.com. These are awesome, and will illuminate through the text via lights in the switches. The upper logo will be lit with the factory illumination circuit/rheostat so they come on and dim just like all the factory switch gear. And the lower will light up to indicate the operation of the circuit. 4 (including a USB charger) will be mounted in place of the ash tray, and 3 to the left of the steering wheel.
Numbchux, on Flickr
3UZ 135a Alternator

Replace one of the oil pump bolts with this stud to utilize the 3rd mount on the 3UZ alt.
RH Exhaust manifold modified and v-band flange welded on. Still need to do some heat management before final installation.

And then....Wiring. First draft of the diagram just for the engine bay harness I'm making. This does not include any wiring modifications in the cabin.

Started with the battery bracket on the LH side, I made a simple steel bracket to mount a 150a breaker and Jcase fuse box next to the battery. This will feed power into the main cabin fuse box, and a small fuse for the sense wire on the alternator (this should be as close to the battery as possible to account for voltage drop).

Then mounted the SC400 airbox where the battery was, and bent up this sheet metal bracket to mount where the old fuse box was and my new fuses/breakers/relays will mount there.

But the really exciting thing, is my custom etched rocker switch actuators came from rockerswitchpros.com. These are awesome, and will illuminate through the text via lights in the switches. The upper logo will be lit with the factory illumination circuit/rheostat so they come on and dim just like all the factory switch gear. And the lower will light up to indicate the operation of the circuit. 4 (including a USB charger) will be mounted in place of the ash tray, and 3 to the left of the steering wheel.


Thread
Thread Starter
Forum
Replies
Last Post
Co_94_PU
86-95 Trucks & 4Runners (Build-Up Section)
281
04-04-2022 12:46 PM
Saturn
86-95 Trucks & 4Runners (Build-Up Section)
6
09-18-2020 04:14 PM
egesledder
All Other Toyota Swaps
120
02-22-2017 06:14 AM
chetcojoe
86-95 Trucks & 4Runners (Build-Up Section)
9
02-01-2012 07:42 PM


