Monochrome's 1990 Pickup Build-Up Thread
 10-15-2009, 03:05 PM
#41
Registered User
Thread Starter
Remove the bubble pack deadener, it will begin to melt as the plastic is thinner than even the factory carpet backing. Pick up some dynamat and do it right.
� Convenient Roll Sizes
� Reflects 97% of Radiant Energy
� Cost Efficient
� Non-Toxic/Non-Carcinogenic
� Quick and Easy Installation
� Class A/Class 1 Fire Rating
� Inhibits Dew Point Condensation Problems
� No Protective Clothing Required for Installation
� Vapor Retarder
� Does Not Promote Nesting of Insects or Rodents
� Does Not Compress, Collapse, or Disintegrate
It met all of my requirements for good insulation in my truck, and most importantly; it's CHEAP!

As for the melting issue, it has a 180 degree tolerance, so it's not going to melt unless an accident occurs. It also has a Class A tolerance rating for fire resistance, which means it's not going to catch fire all the sudden or something.
As for compression, it's impossible unless the bubbles pop. But as I tried repeatedly, the bubbles are very difficult to pop, especially when you have multiple over a square inch. The only way this stuff could theoretically compress is if the temperature changed drastically and the density of the air went down (very cold temperatures). But even then, it's not a permanent issue.
Remove your square tube seat rail spacers and cap off both ends asap. You'll likely be OK for a little bit, but after a bit they'll cut into that new carpet, and begin cutting into your floor pan, or worse, buckle if you put any odd stresses on them, either way, your seat positioning is compromised.
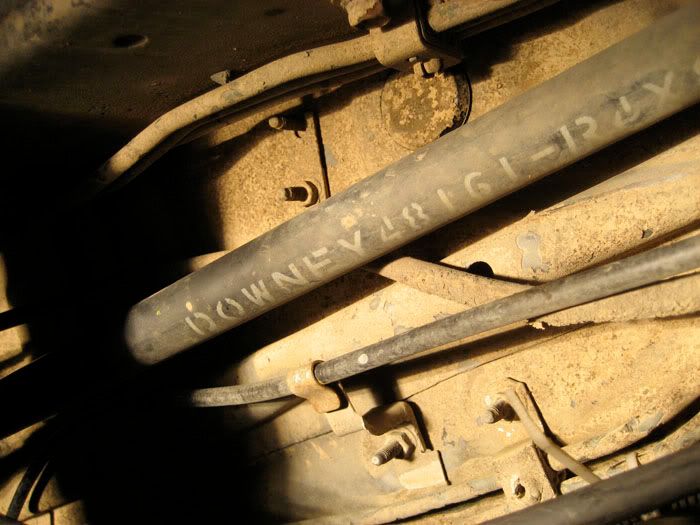
As for that IFS truss, looks like an old school Downey dog-legged pipe version. If you're gonna wheel it, or just want to keep that frame aligned good go with a Sonoran Steel truss IMHO
 10-15-2009, 03:07 PM
#42
Contributing Member
 10-15-2009, 05:14 PM
#43
Registered User
Join Date: Feb 2007
Location: North Carolina
Posts: 521
Likes: 0
Received 0 Likes
on
0 Posts
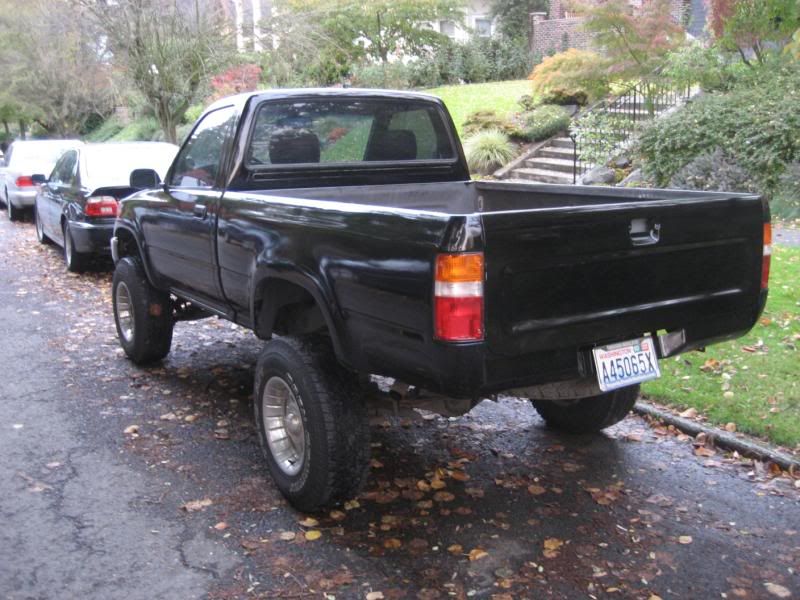
nice truck! I just started one of my own the other week 90 sr5 pickup with 260k miles and a different motor (link is in my sig if you want to check it out). Great work hopefully I can get mine looking presentable sometime soon. Keep us posted!
10-17-2009, 07:25 PM
#45
Registered User
Thread Starter
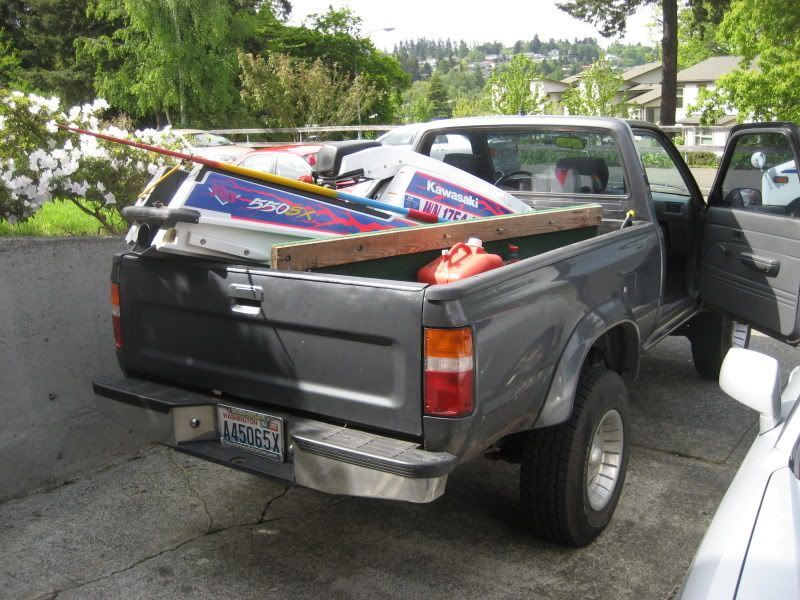
My rusty bumper really started to bother me, so I made another trip to the junkyard, though this one was quite a bit farther away. I did come across some great goodies, for a total of $125, including a practically mint front bumper, valance, a drop-in bedliner (more on the reason for this later), and a ridiculous looking brush guard for an F-150 that some guy welded to the frame of their Toyota. The best part? I ended up selling that brush guard for $75, so the total cost for a practically brand new bumper, valance, and bedliner was only $50.
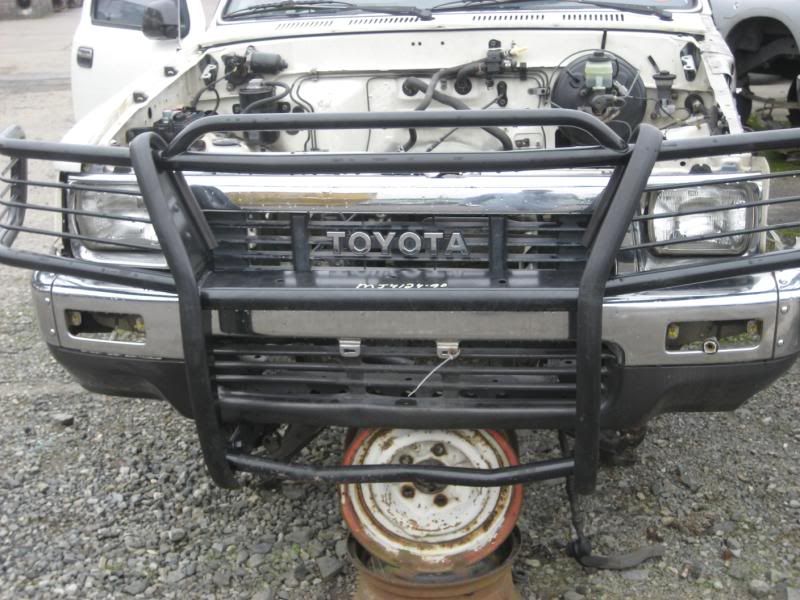
Here's that truck in the yard before the guy came and torched off the brush guard:
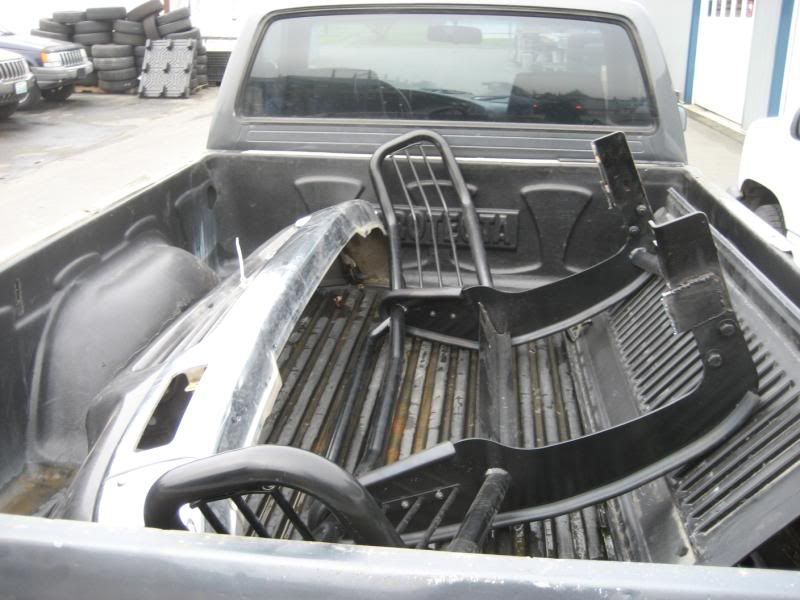
And here's the drop in bedliner out of a wrecked Yota:

I was very happy at this point:
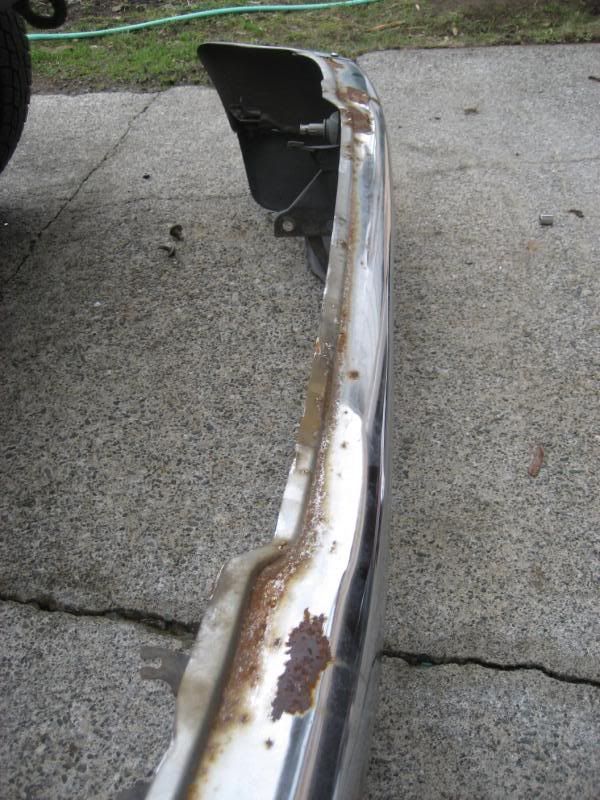
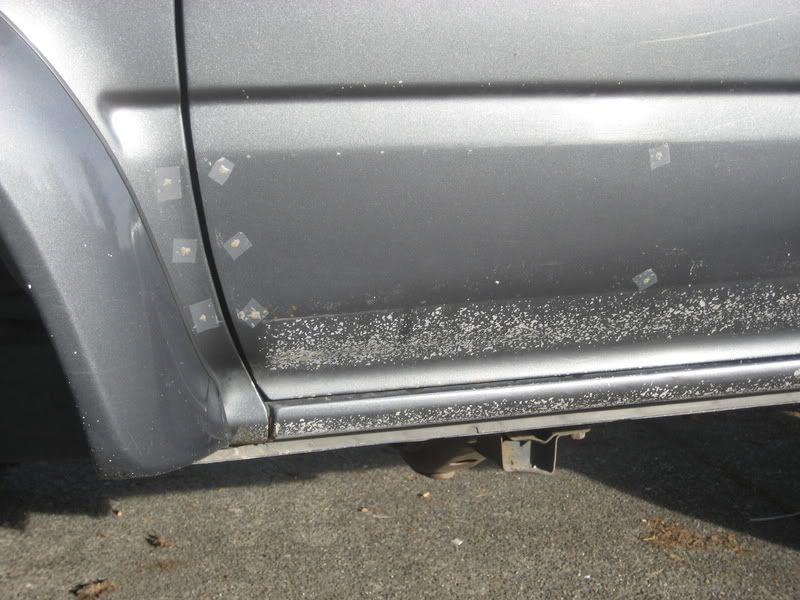
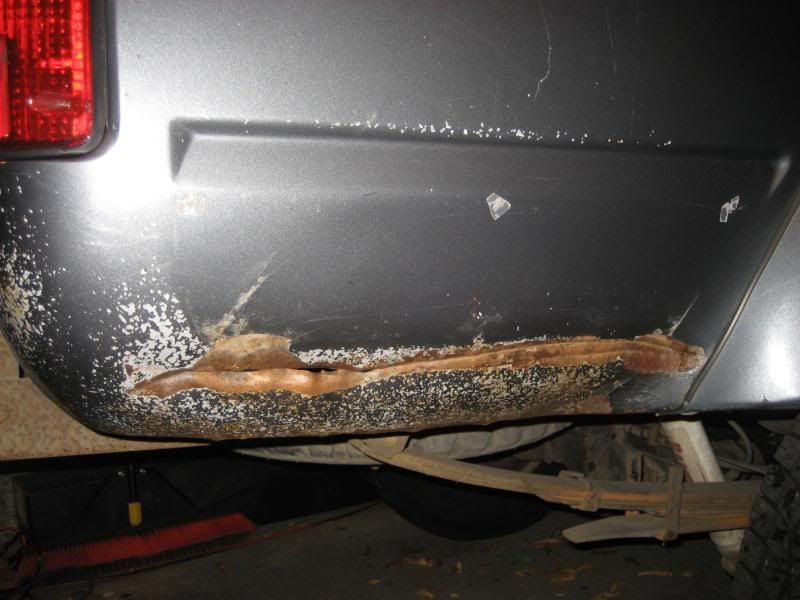
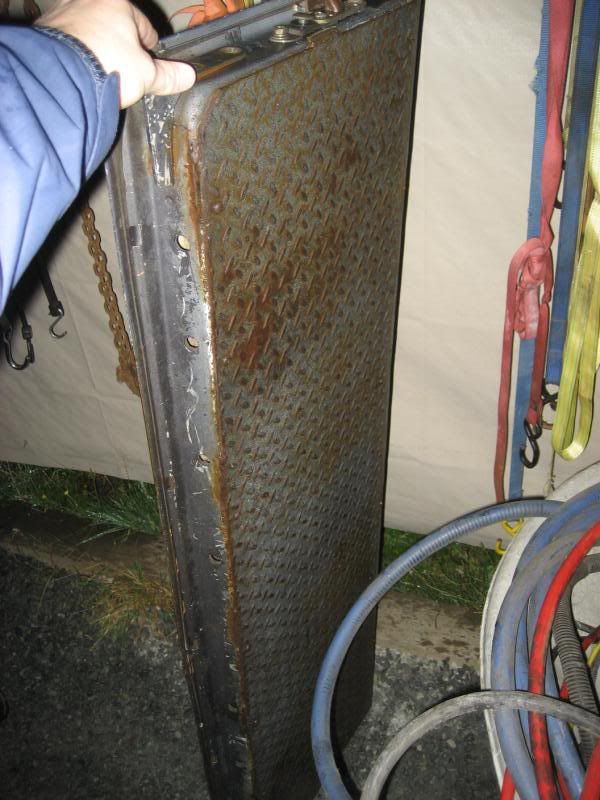
Here's the reason that I wanted to get rid of my old bumper:


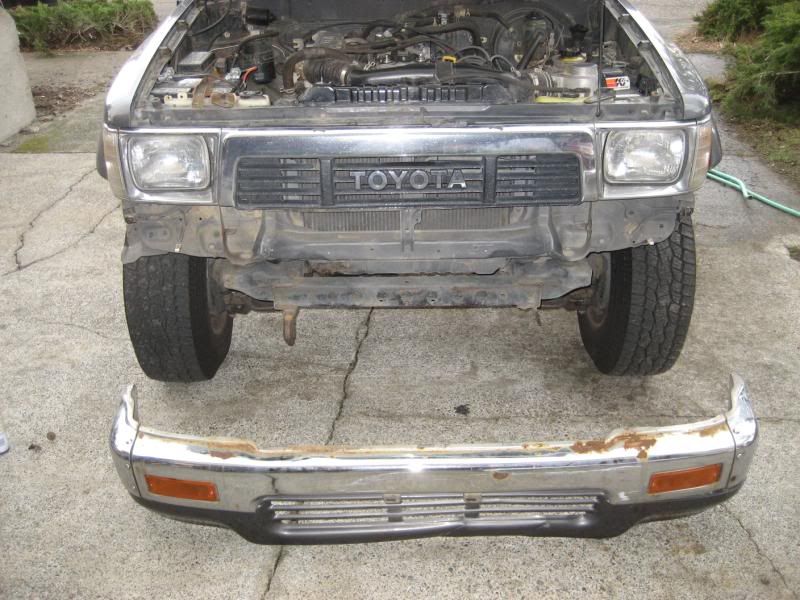
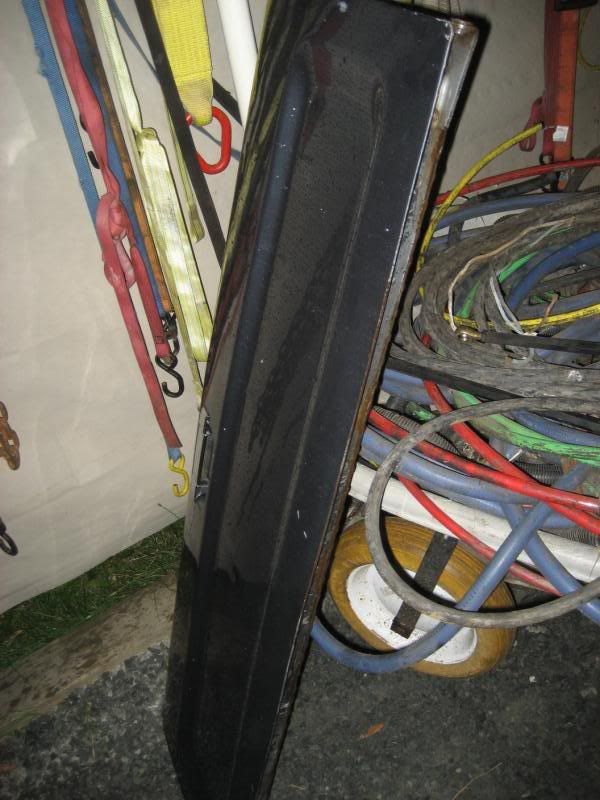
Here's another picture of the rusty and bent bumper, if it wasn't clear enough before:
I decided to paint my grille because it was a bit faded and had some paint chips. So I lightly sanded it down and hit it with a few coats of flat black industrial paint. I later did a few layers of clear coat, but I didn't take pictures of it.
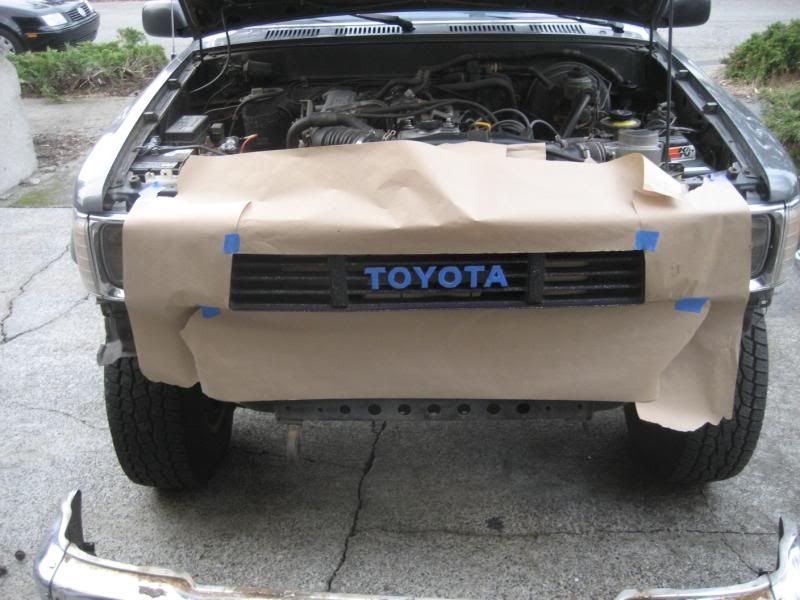

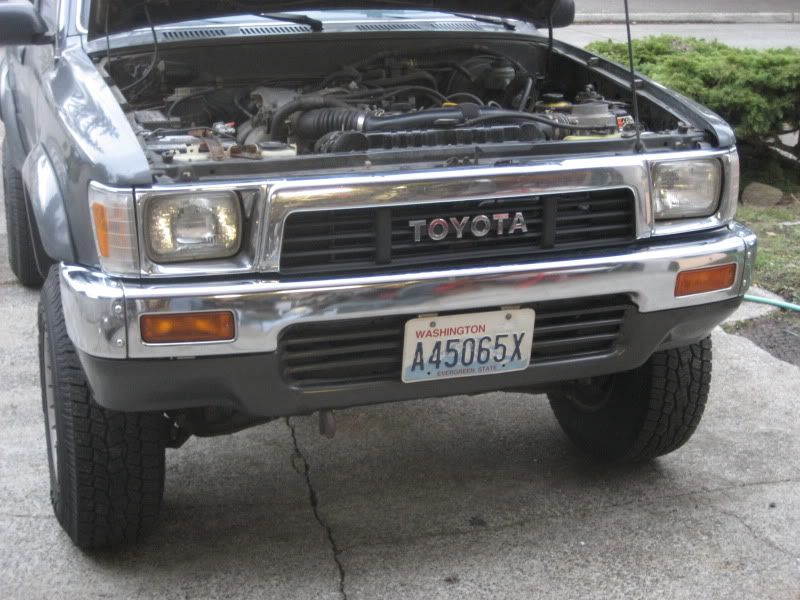
And lastly, here is the final product, a practically new looking front end:
Here's that truck in the yard before the guy came and torched off the brush guard:
And here's the drop in bedliner out of a wrecked Yota:
I was very happy at this point:
Here's the reason that I wanted to get rid of my old bumper:
Here's another picture of the rusty and bent bumper, if it wasn't clear enough before:
I decided to paint my grille because it was a bit faded and had some paint chips. So I lightly sanded it down and hit it with a few coats of flat black industrial paint. I later did a few layers of clear coat, but I didn't take pictures of it.
And lastly, here is the final product, a practically new looking front end:
10-17-2009, 07:26 PM
#46
Registered User
Thread Starter
Ahh thank you for that! and From what I have heard, it is a yard for Domestic trucks, ford, dodge, chevy, but they also SPECIALIZE in Toyota's. I don't have the name, but can get it from a guy that I went with.
I am going to be going Sunday morning, as what the guy said, they go around to places with busted up Toyota's and look for certain things. Some trucks, they want the drivetrains, some trucks they want the interior, others they want misc. stuff. Let me know if you need anything, and I can see if there is anything there. I can pick it up, we can meet up and you can just pay me for the parts.
I am going to be going Sunday morning, as what the guy said, they go around to places with busted up Toyota's and look for certain things. Some trucks, they want the drivetrains, some trucks they want the interior, others they want misc. stuff. Let me know if you need anything, and I can see if there is anything there. I can pick it up, we can meet up and you can just pay me for the parts.
10-18-2009, 11:30 PM
#48
Registered User
Thread Starter
lookin good dude
This update is more about figuring out little details, so it's not very exciting, but it might be helpful to people.
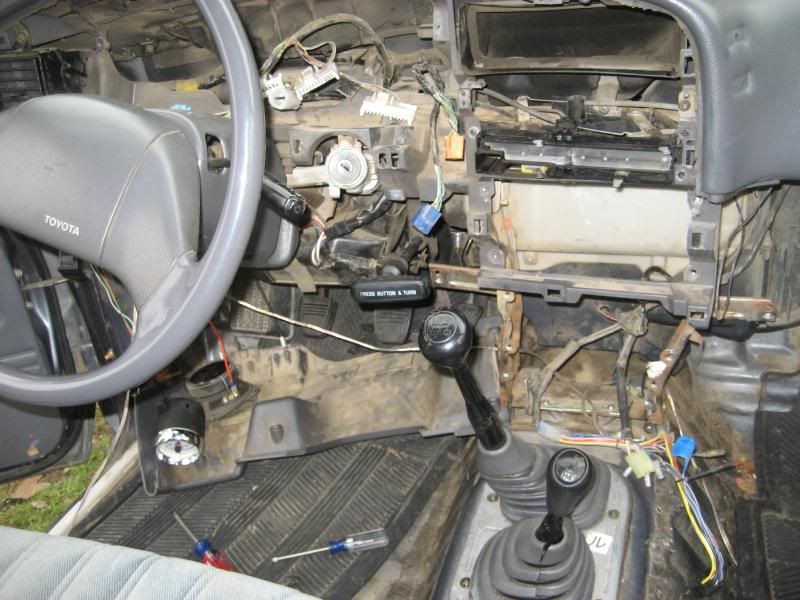
As the list of issues with my truck grew, I started clumping them together and tried to knock out as many as possible. One day I got the courage to tear apart my dash to figure out: 1) why my speakers were crackling; 2) why my dome light didn't work; 3) how much room I had to put in firewall insulation; 4) where those damn rattles from the dash were coming from; 5) why my parking brake light always came on even when it was off and why it was hard to put back in after being extended; 6) where the two dash-mounted switches actually ran to; 7) why my CB radio didn't work; 8) what kind of instrument cluster I had and why the speedo needle would jump.
Without further ado:
Some of the rattles were coming from the climate controls, and the others because a bolt was missing on the lower dash:

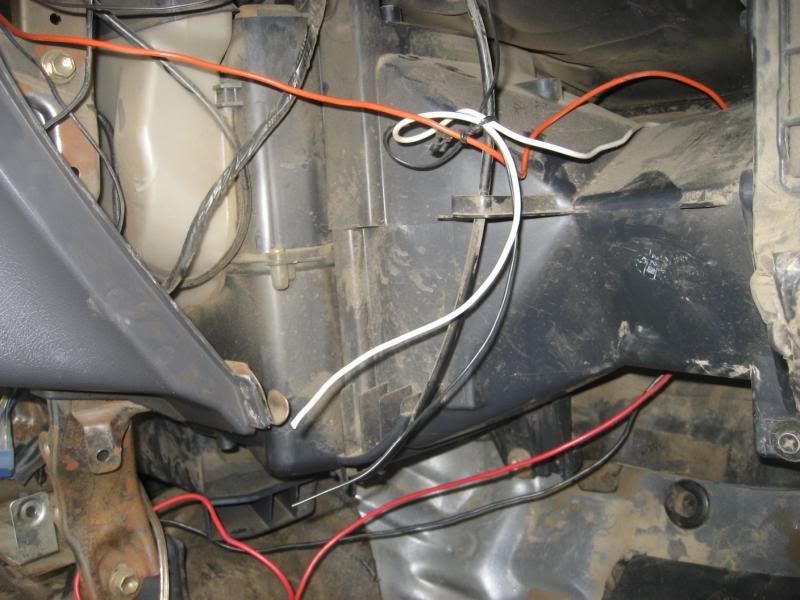
The random switches were cut off after a few feet of wire, so I have no idea what they originally ran to. In addition, the power AND antenna cables were cut to my CB radio. Lame!
Pulling out more dash stuff:
Tracing the dome light to a weird wiring bundle in the kick panel:
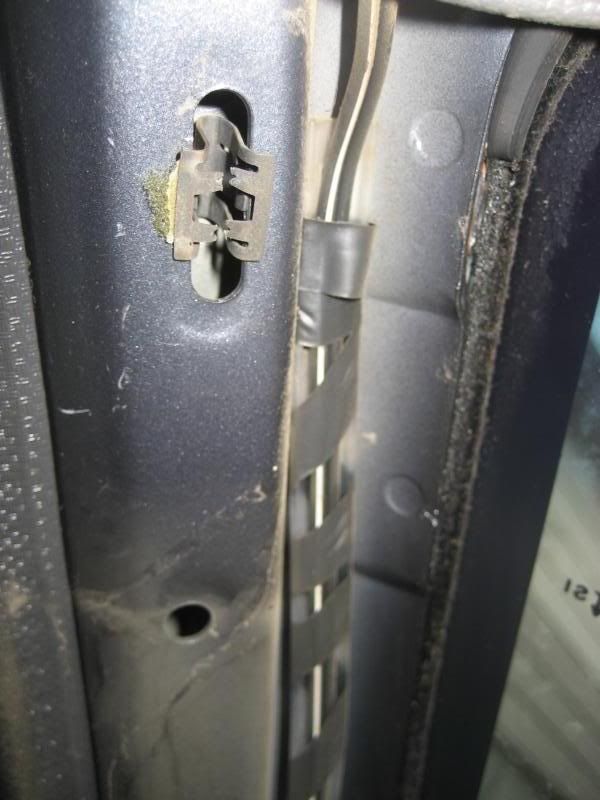
It turns out the black connector was unplugged. I just plugged it in, and voila -- I finally had a dome light!
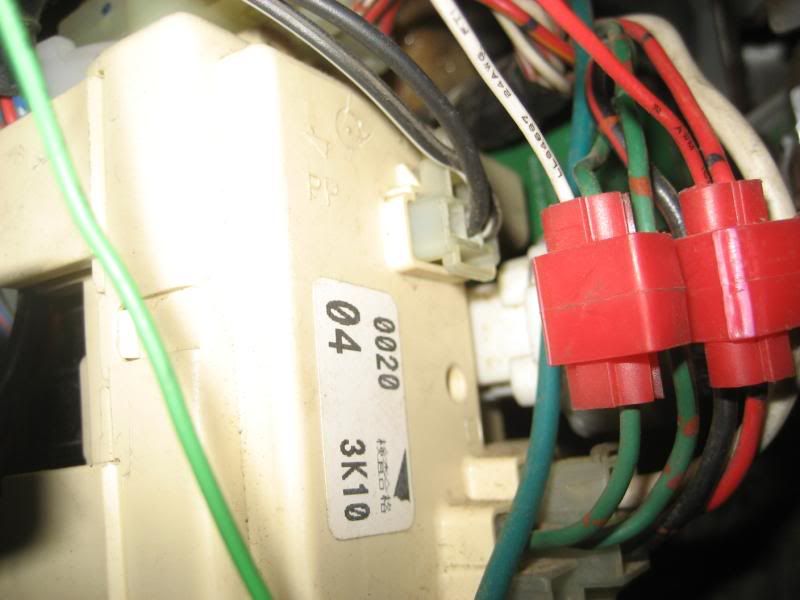
I took out the instrument cluster to see what kind it was, and also to add some graphite lubricant at the cable connector. This helped out a bit.

I also found that my parking brake light was coming on because the lever wasn't under enough tension. Also, the cable was getting bunched up, which explained why I couldn't push the brake back in sometimes.
I cleaned behind everything as best as I could with a wet rag and put it all back together. Cleaner and wiser. More fun stuff is coming up.

 10-20-2009, 08:47 AM
#51
Registered User
Thread Starter
Body work is 95% done -- I'm going to use some more glazing putty today to fix very minor issues. I got my first coat of paint on my truck (not the same color, black gloss Interlux Brightside with a foam roller), and I must say it looks AWESOME considering. Will post pictures in the next few days of the process.
10-21-2009, 09:12 PM
#52
Registered User
Thread Starter
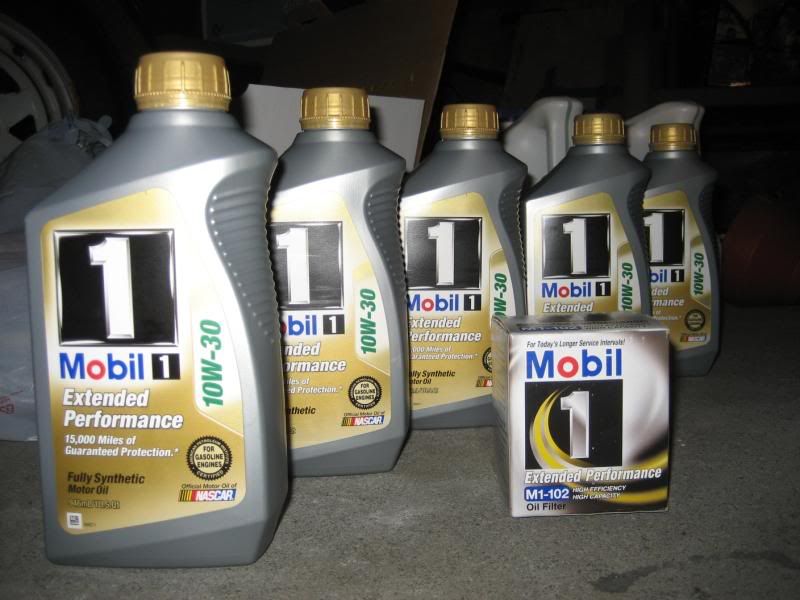
I had never checked the diffs, transmission, tcase, zerks, or anything since I bought the truck. Though I'd only put about 8k miles on it since I bought it, I decided to drain it all and go synthetic. It was a little more expensive, but O'Reilly's had some good specials, so it wasn't too bad. There wasn't really a learning curve for these things except for using the grease gun. I broke it within a few minutes of buying it by unscrewing the nipple adapter, then a spring and a bunch of crap flew out inside the garage. After about 45 minutes and three tries later, I put it back together correctly.
Changing the oil:

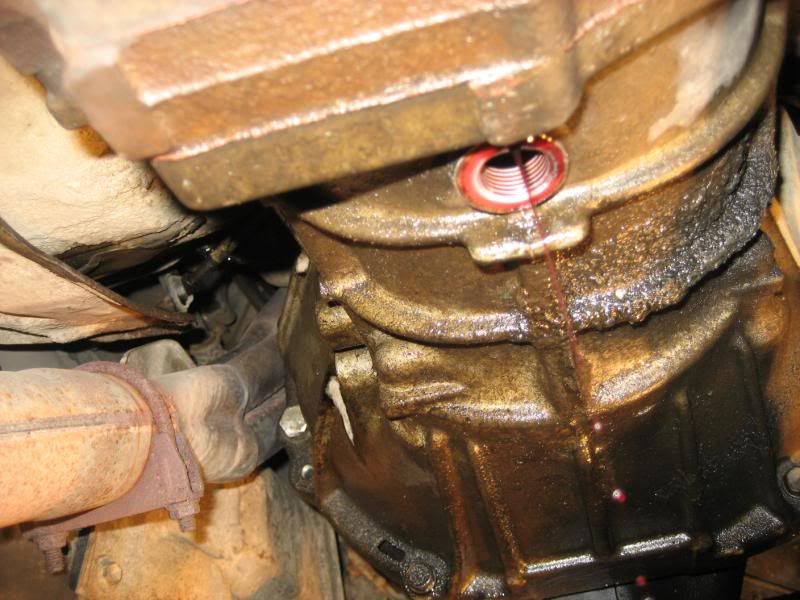
Bought a pump for the t-case and transmission, though they probably could have been done without one:

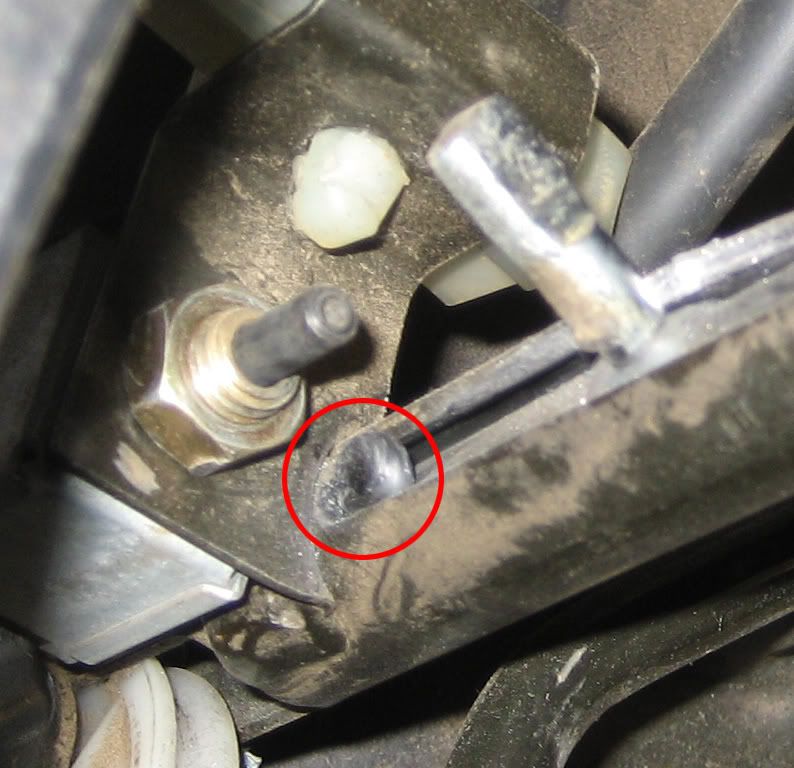
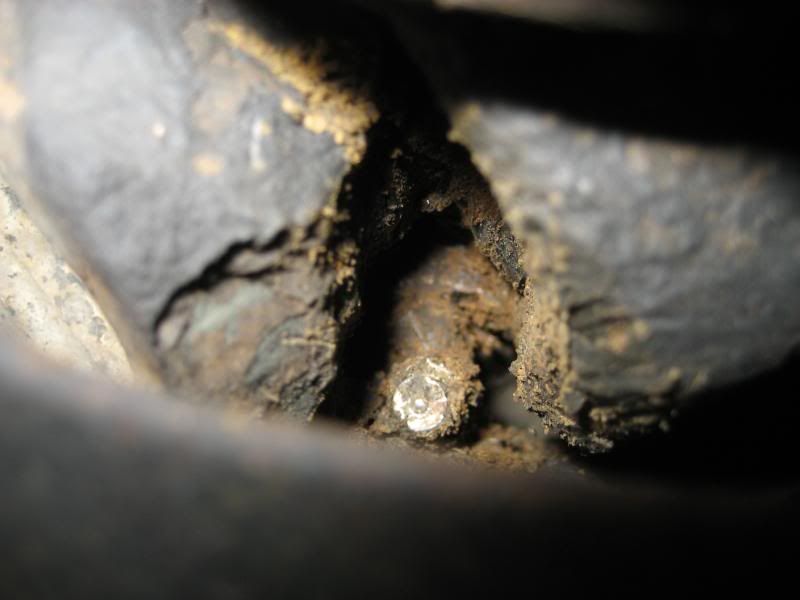
Some of those zerks are a PAIN to get to!! Especially if they're covered in like this one was:
And finally I greased my steering stops with some extra lithium chassis grease. No more frowns and stares whenever I turn in the parking lot!

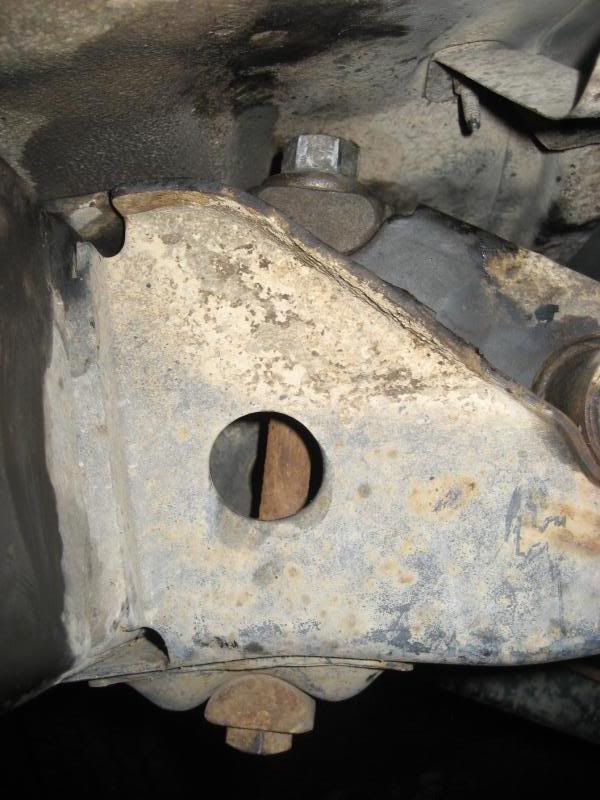
I also sought to loosen up my torsion bars because of the stiff ride, only to find that I had aftermarket bars, and they were already loosened to the maximum:
Ever since I installed my new seats, the lumbar support was lacking. So I bought a cheap lumbar pad from the store, cut it to fit, took apart my chair's upholstery and then put it all back together. Much more support, if it's not obvious in the picture.
Before:
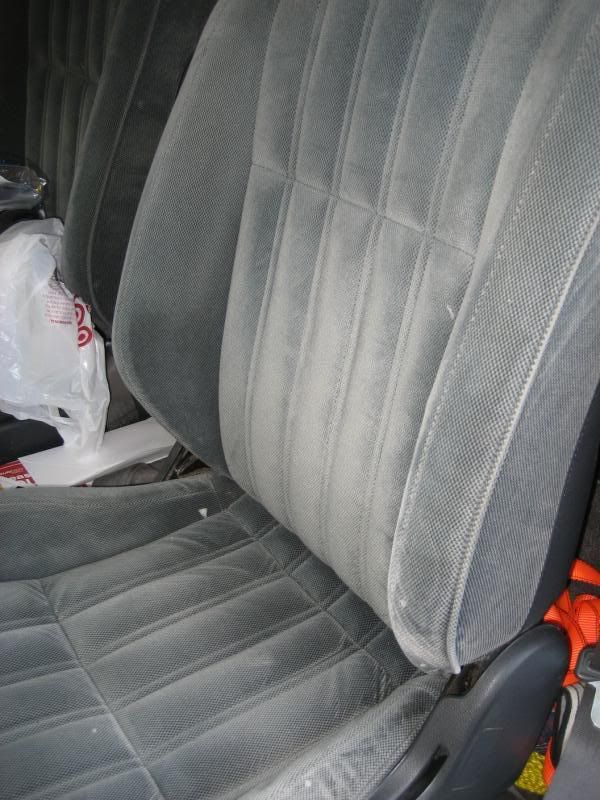
After:

Changing the oil:
Bought a pump for the t-case and transmission, though they probably could have been done without one:
Some of those zerks are a PAIN to get to!! Especially if they're covered in like this one was:
And finally I greased my steering stops with some extra lithium chassis grease. No more frowns and stares whenever I turn in the parking lot!
I also sought to loosen up my torsion bars because of the stiff ride, only to find that I had aftermarket bars, and they were already loosened to the maximum:
Ever since I installed my new seats, the lumbar support was lacking. So I bought a cheap lumbar pad from the store, cut it to fit, took apart my chair's upholstery and then put it all back together. Much more support, if it's not obvious in the picture.
Before:
After:
10-21-2009, 09:42 PM
#53
Registered User
Thread Starter
Finally to the stuff that I've been doing for the past few weeks and has made me want to stab myself in the eye, though the results have proven very satisfying.
I've never done bodywork before, never used Bondo, never hammered anything out, never painted anything. A complete noob. So, the learning curve for this was a bit steep. And, I wanted to do it cheaply, which doesn't always mean the best way. And, I'm somewhat of a perfectionist, so I knew there would have to be some give and take. The combination of no experience, small budget, and perfection don't mix very well.
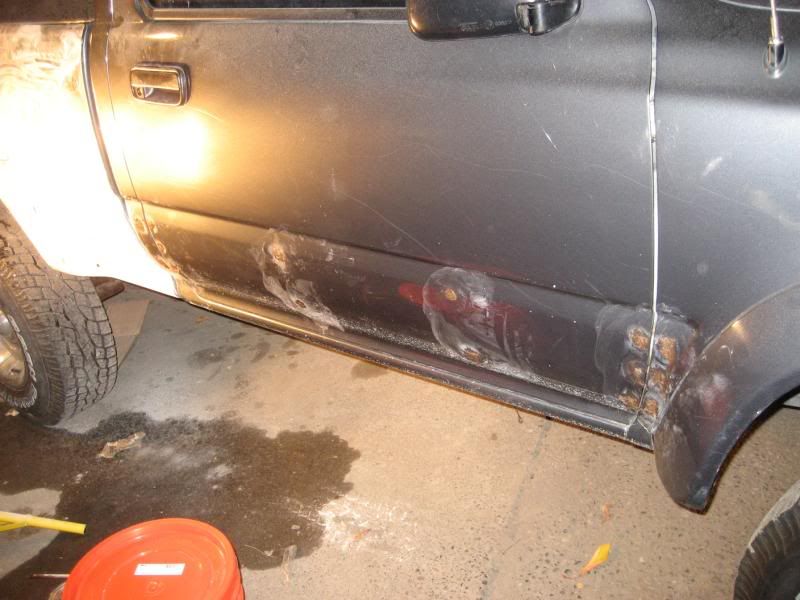
I set out to make my truck hole-less. Remember all those holes in the sheet metal? Yeah, these ones after removing the diamond plating? I wanted them gone.
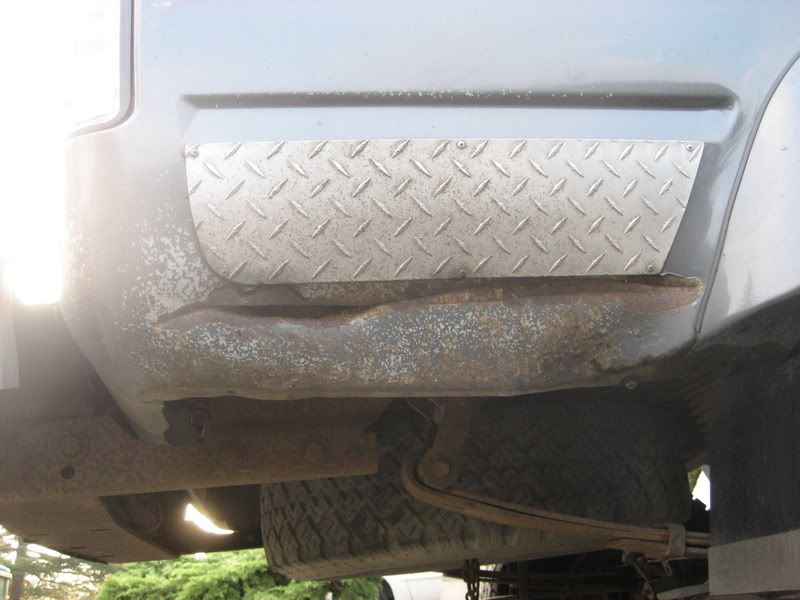
I also wanted this gash gone, but I don't have a welder, don't have access to one or anyone who welds, so I had to figure out how to do it myself with some success of the repair holding up. That lead me to fiberglass, which many people have had a lot of success with. i was told that the key is good surface prep, lots of overlap (for the fiberglass to stick to), and patience for multiple layers and sanding. So I went out and bought a bunch of sand paper, a sanding block, a legit 3M respirator, Bondo fiberglass repair kit, Bondo hair (bondo with fiberglass strands in it), Bondo filler, and Bondo glazing putty. I think I became a Bondo master after this project. Total cost was about $100 for everything, but it ended up being enough for the whole truck, so that's not bad. And, I have lots of material left over.
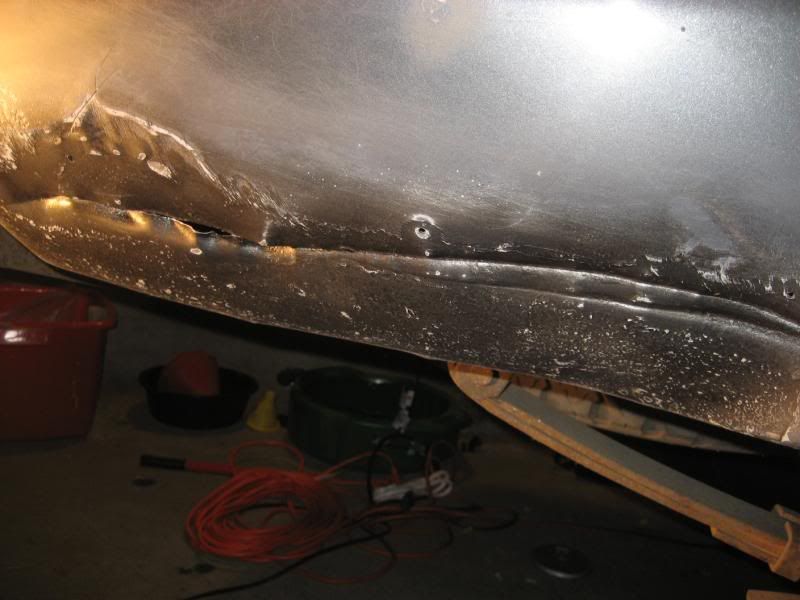
So, let's get started. Here's what I had to work with, after hammering it into a generally good shape, filling in behind the gash, and some of the major rust removed:
Pulled one of the Bushwhackers to get complete access:

Sanded down the rust down to bare metal with some 40 and 80 grit, sprayed it with Extend rust neutralizer, then sprayed some primer.
Prepped the whole area with some 80 grit, and layed down a few layers of fiberglass. Didn't get any pictures of this in process because that stuff is STICKY!
I let the fiberglass dry for a few hours, and in the meantime started doing other prep. Scoured up the holes really well in preparation for Bondo hair. In hindsight I think I should have chosen Bondo glass, because it has shorter strands of fiberglass. The strands were just too long for my small holes.
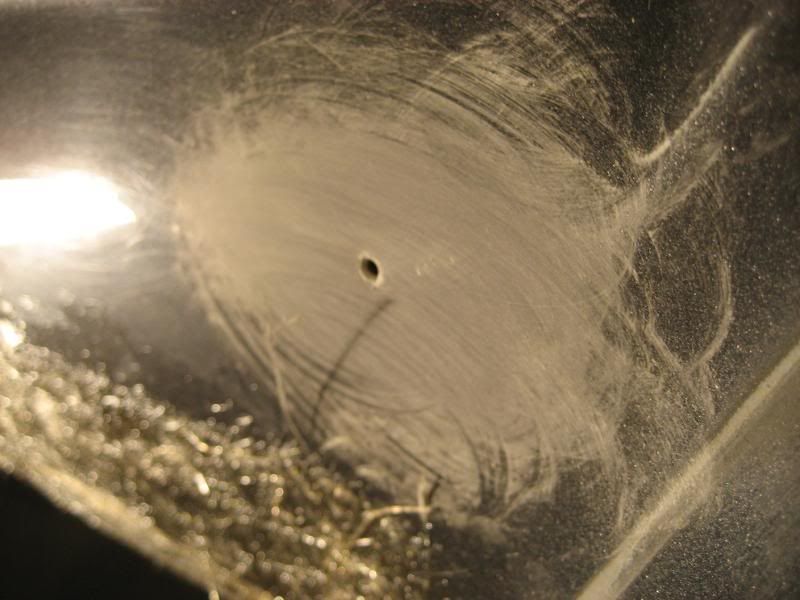

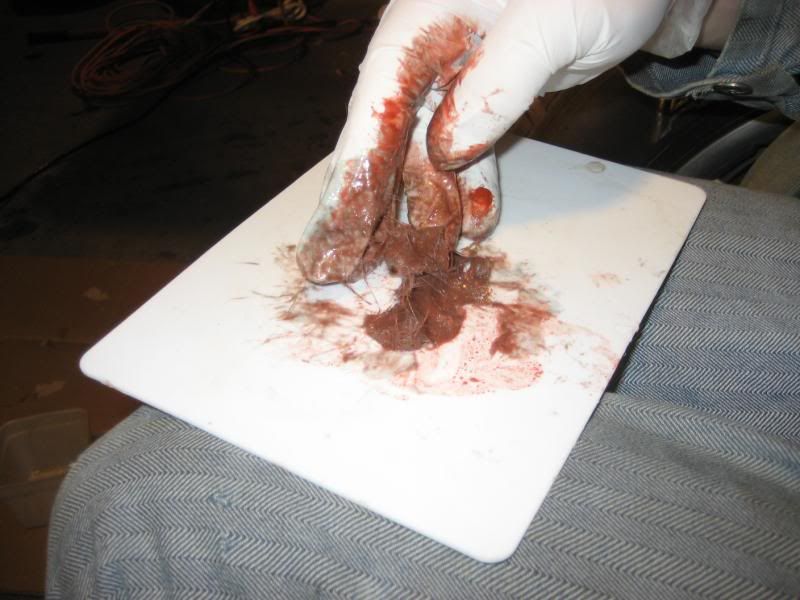
Here's what it looked like on the very first hole with a little bit too much hardener, but it still worked fine:

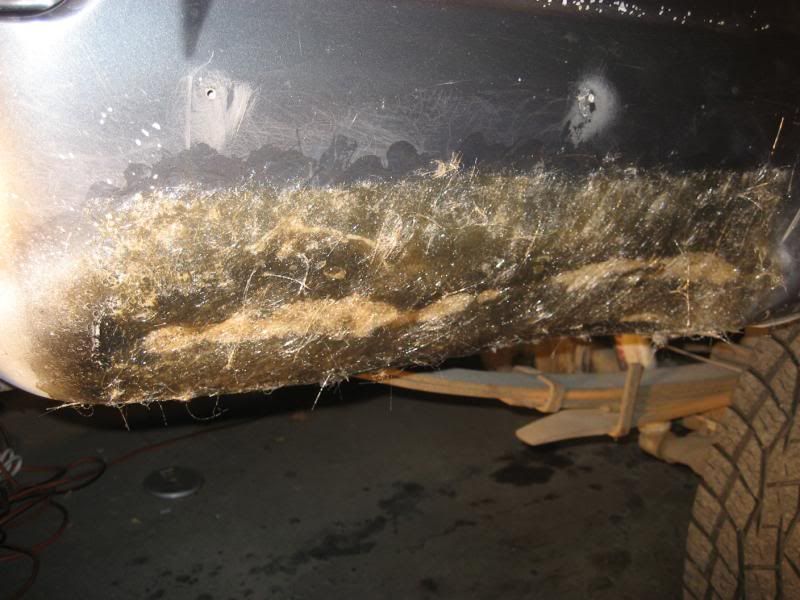
Here's that whole area with the fiberglass mats and the bondo hair:

Here's the rest of that side of the bed:
By this point the fiberglass was totally dry, and so I put a layer of the Bondo hair right on top of the fiberglass. I was quite shocked to see how strong the fiberglass was -- I tried pushing on it, then hitting it and it wouldn't budge. Hopefully a good foundation for the Bondo hair, which is fiberglass based as well. After putting up the bondo hair on the area, I sanded down the holes smooth, and was very very happy to see that they were actually smooth. The holes were repaired at last!
Next I covered the remaining top layer with a thin coat of normal Bondo, just to level out the wavy surface of the Bondo hair.

While that was drying, I worked all the way up to the side of the cab because my experience thus far had made me more confident.
Then I sanded down the bondo to a pretty damn level shape, though it took a long time, at least an hour of constant sanding. I was dripping with sweat. I ended up adding another thin layer of bondo to fill out the final divots in that the first layer didn't cover. Then I sanded that one down as well.
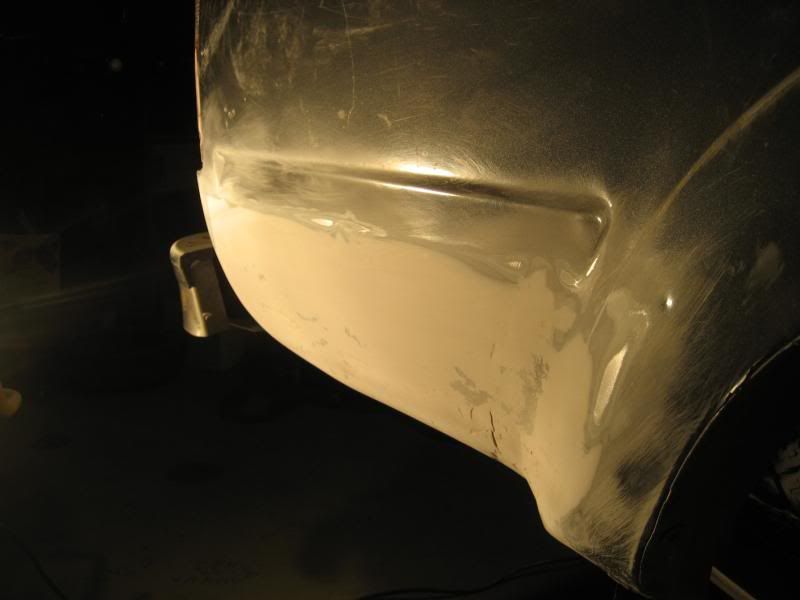

It was 95% done and shaped correctly, so I sprayed a layer of primer to get a better feel for my job. I was pretty impressed, because it looked awesome already:

Then I wet sanded down the whole side of the truck with 220 grit to end the night. It was a long night, I started after work and went to bed at about 2am, but I was so happy to have fixed that gash and to have filled those holes in the body. Here's what it looked like after wet sanding:
I've never done bodywork before, never used Bondo, never hammered anything out, never painted anything. A complete noob. So, the learning curve for this was a bit steep. And, I wanted to do it cheaply, which doesn't always mean the best way. And, I'm somewhat of a perfectionist, so I knew there would have to be some give and take. The combination of no experience, small budget, and perfection don't mix very well.
I set out to make my truck hole-less. Remember all those holes in the sheet metal? Yeah, these ones after removing the diamond plating? I wanted them gone.
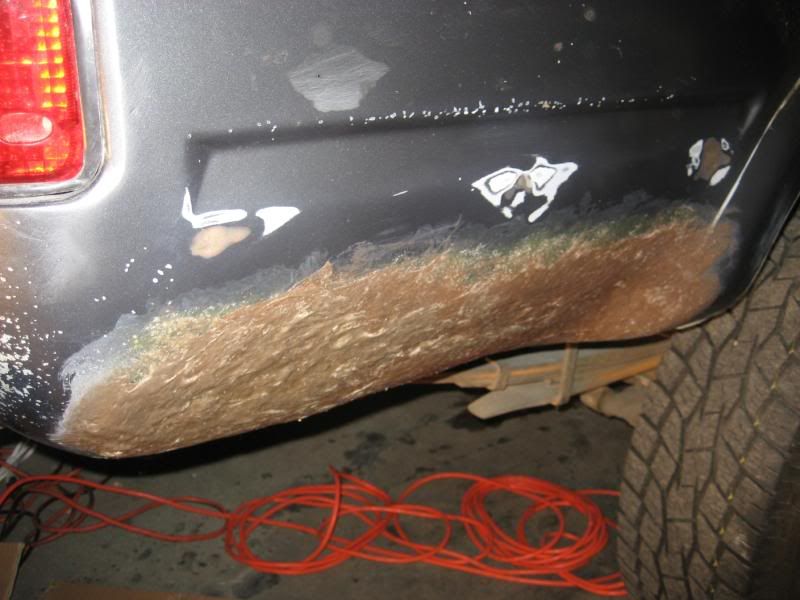
I also wanted this gash gone, but I don't have a welder, don't have access to one or anyone who welds, so I had to figure out how to do it myself with some success of the repair holding up. That lead me to fiberglass, which many people have had a lot of success with. i was told that the key is good surface prep, lots of overlap (for the fiberglass to stick to), and patience for multiple layers and sanding. So I went out and bought a bunch of sand paper, a sanding block, a legit 3M respirator, Bondo fiberglass repair kit, Bondo hair (bondo with fiberglass strands in it), Bondo filler, and Bondo glazing putty. I think I became a Bondo master after this project. Total cost was about $100 for everything, but it ended up being enough for the whole truck, so that's not bad. And, I have lots of material left over.
So, let's get started. Here's what I had to work with, after hammering it into a generally good shape, filling in behind the gash, and some of the major rust removed:
Pulled one of the Bushwhackers to get complete access:
Sanded down the rust down to bare metal with some 40 and 80 grit, sprayed it with Extend rust neutralizer, then sprayed some primer.
Prepped the whole area with some 80 grit, and layed down a few layers of fiberglass. Didn't get any pictures of this in process because that stuff is STICKY!
I let the fiberglass dry for a few hours, and in the meantime started doing other prep. Scoured up the holes really well in preparation for Bondo hair. In hindsight I think I should have chosen Bondo glass, because it has shorter strands of fiberglass. The strands were just too long for my small holes.
Here's what it looked like on the very first hole with a little bit too much hardener, but it still worked fine:
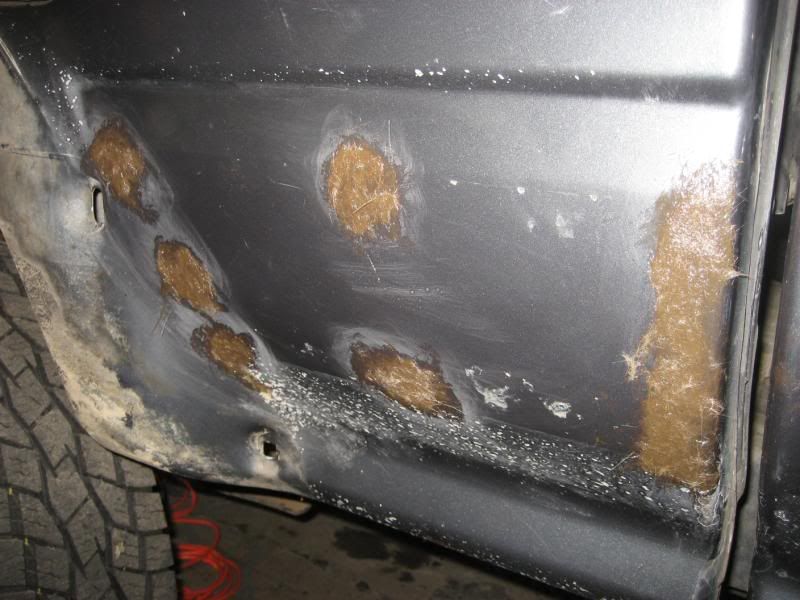
Here's that whole area with the fiberglass mats and the bondo hair:
Here's the rest of that side of the bed:
By this point the fiberglass was totally dry, and so I put a layer of the Bondo hair right on top of the fiberglass. I was quite shocked to see how strong the fiberglass was -- I tried pushing on it, then hitting it and it wouldn't budge. Hopefully a good foundation for the Bondo hair, which is fiberglass based as well. After putting up the bondo hair on the area, I sanded down the holes smooth, and was very very happy to see that they were actually smooth. The holes were repaired at last!
Next I covered the remaining top layer with a thin coat of normal Bondo, just to level out the wavy surface of the Bondo hair.
While that was drying, I worked all the way up to the side of the cab because my experience thus far had made me more confident.
Then I sanded down the bondo to a pretty damn level shape, though it took a long time, at least an hour of constant sanding. I was dripping with sweat. I ended up adding another thin layer of bondo to fill out the final divots in that the first layer didn't cover. Then I sanded that one down as well.
It was 95% done and shaped correctly, so I sprayed a layer of primer to get a better feel for my job. I was pretty impressed, because it looked awesome already:
Then I wet sanded down the whole side of the truck with 220 grit to end the night. It was a long night, I started after work and went to bed at about 2am, but I was so happy to have fixed that gash and to have filled those holes in the body. Here's what it looked like after wet sanding:
Last edited by Monochrome; 10-21-2009 at 09:51 PM.
10-21-2009, 10:14 PM
#54
Registered User
Thread Starter
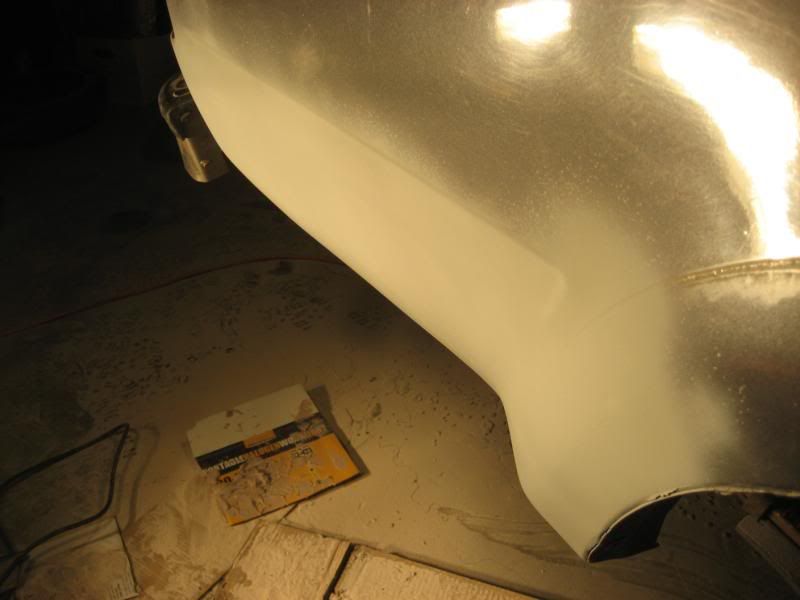
I ended up fixing all the holes on the truck a few days later, though it was pretty labor intensive. I'd say I spent about 12 hours total fixing body issues and wet sanding. At least my arms are stronger! 
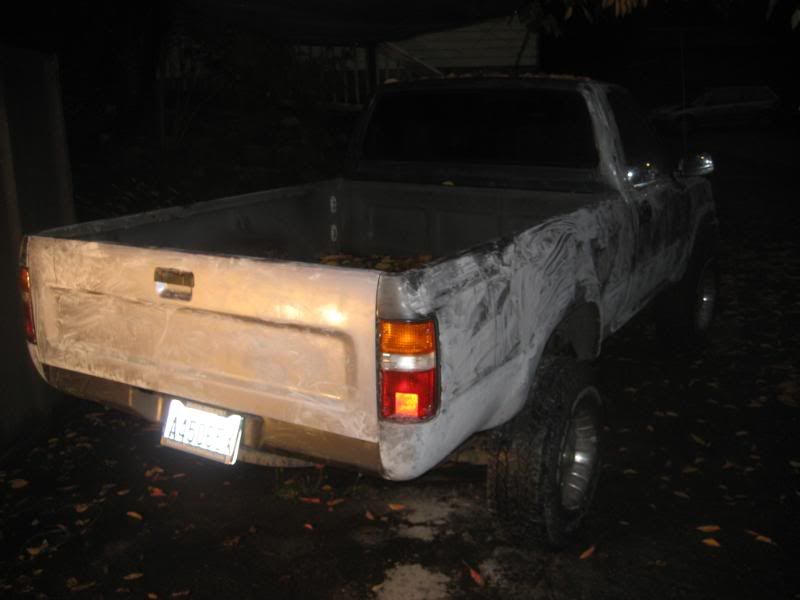
Here's what she looked like at this point, on the last wet sand:

It was also time to get rid of my tailgate. The previous pictures make it look just fine, but in reality the tailgate is in really bad shape. The previous owner had welded a diamond plate to it, preventing access to the hardware and handle (which was broken). He must have also carried something really heavy, because it was totally bent out in a "C" shape. Here are a few pictures, but it's hard to tell. Did I mention there was also about 50 dents that I would have had to fix?
So, I drove up to Arlington and picked up a new tailgate in awesome condition, with a black handle just like I wanted all along.
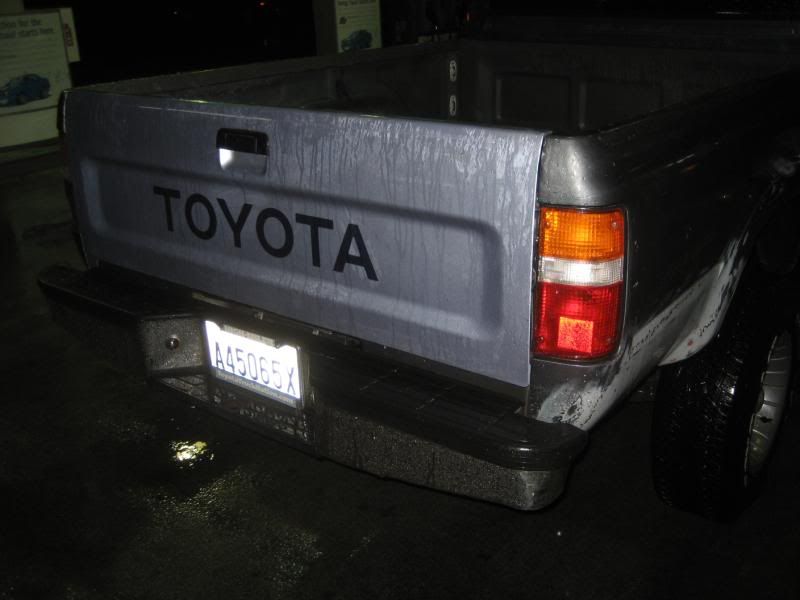
Proceeded to take it home, install it, remove the lettering, and wet sand it down:
Now it was time for paint, at long last!!!
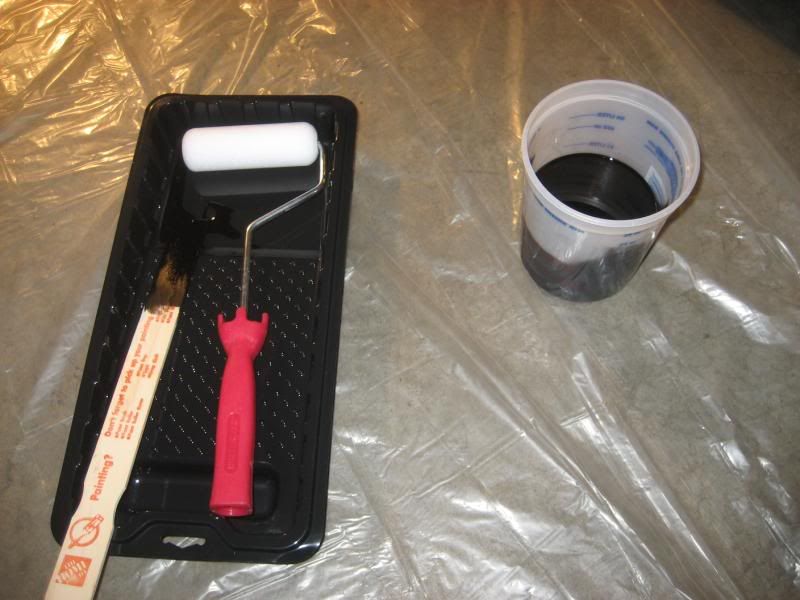
For this I chose Interlux Brightside topside yacht paint and foam rollers as the method of application. It sounded sooo ghetto when I first read about it, but I became convinced after the 3rd or 4th hour of research and seeing the results people were getting. It's kind of expensive stuff -- I paid $40/quart at a local store (should have ordered online) and bought two quarts. I thinned it with mineral spirits at 10% according to the instructions on the can. So, total cost for foam rollers, trays, plastic paint mixers, and the paint itself came to $100. Was it worth it? Keep reading.
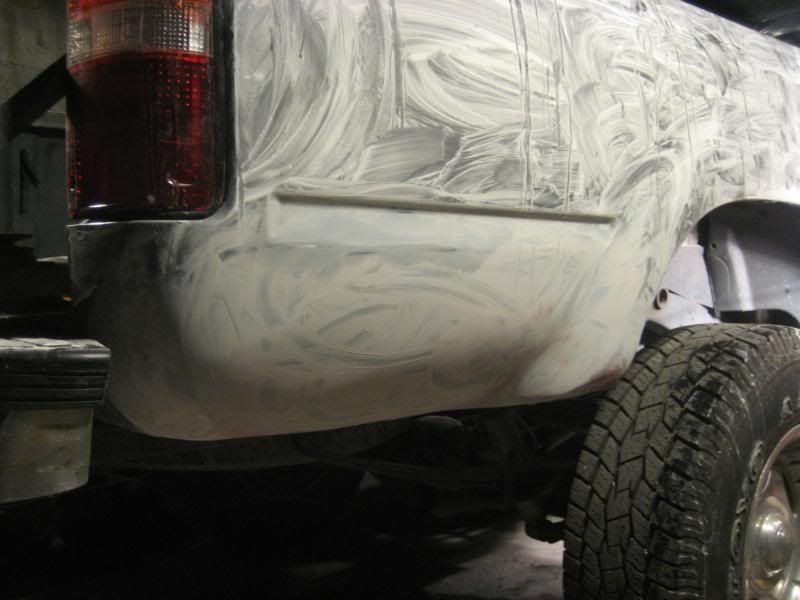
Here are the pictures before the truck was painted:


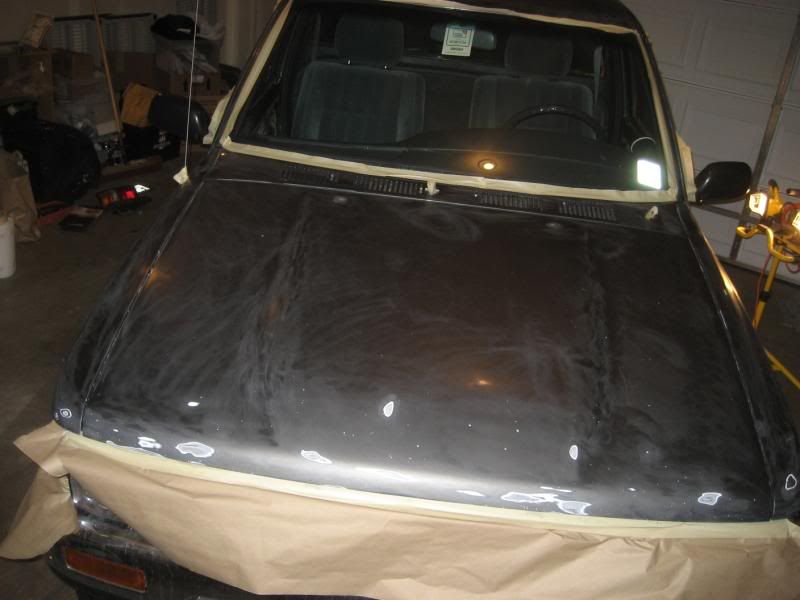
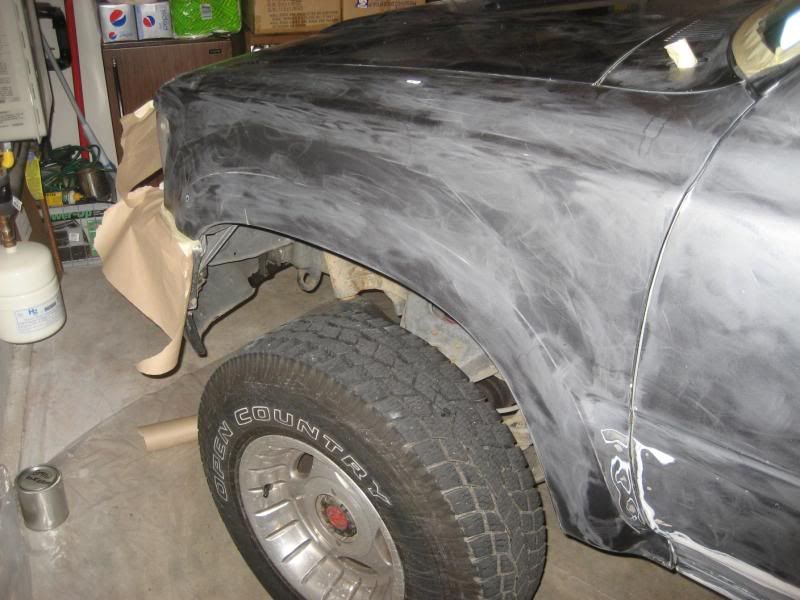


Just about to start:

Here's the first application, on the passenger rear panel:
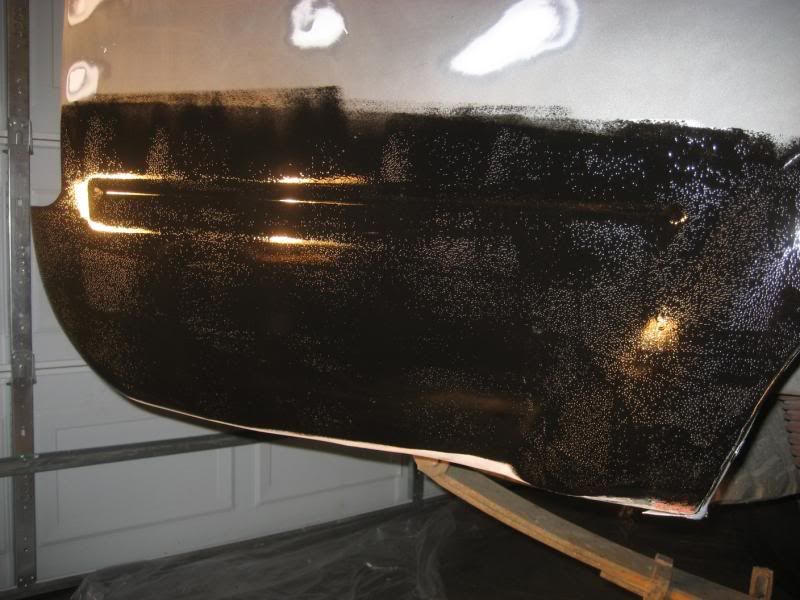
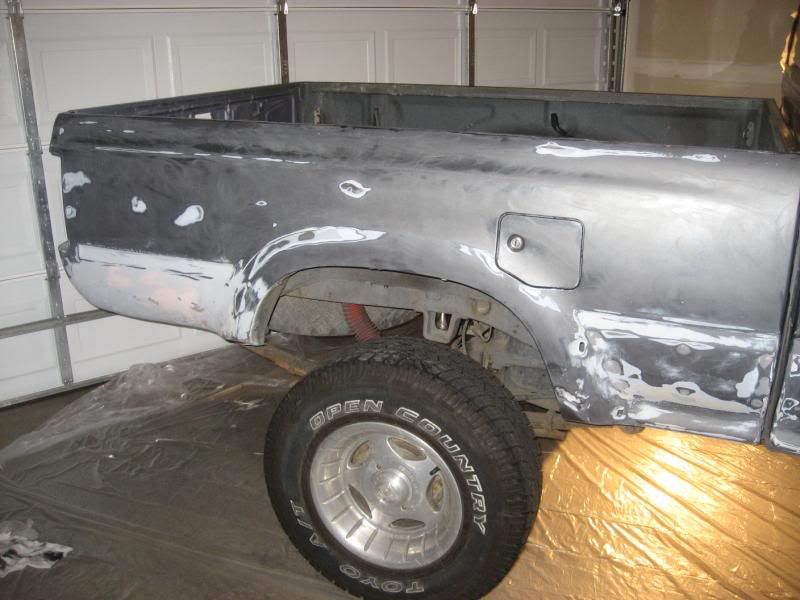
It was bubbly as hell, but I assumed (correctly) that the bubbles would probably resolve themselves as the instructions never mention to pop them or roll over them again (like some people on the internet suggest). Here's one side completely done:
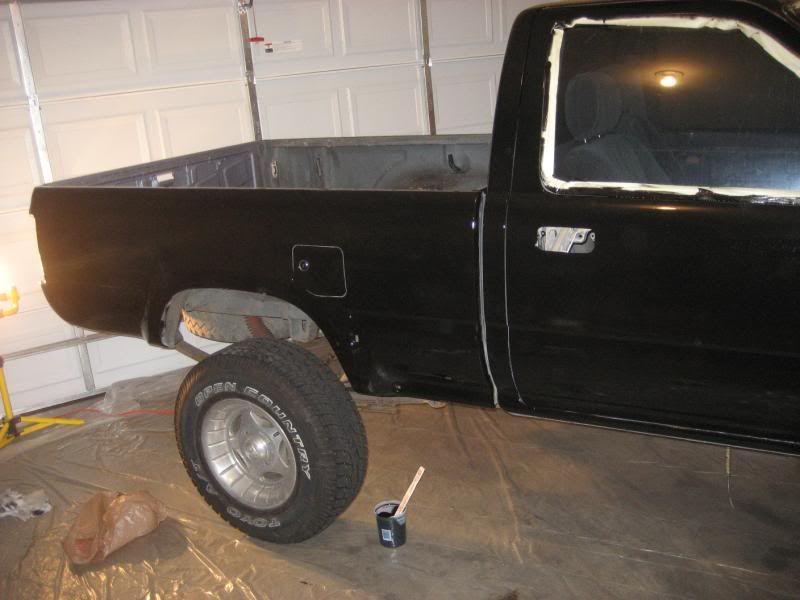
And here it is completely done, only about an hour later, though it looks like I photoshopped it or something:
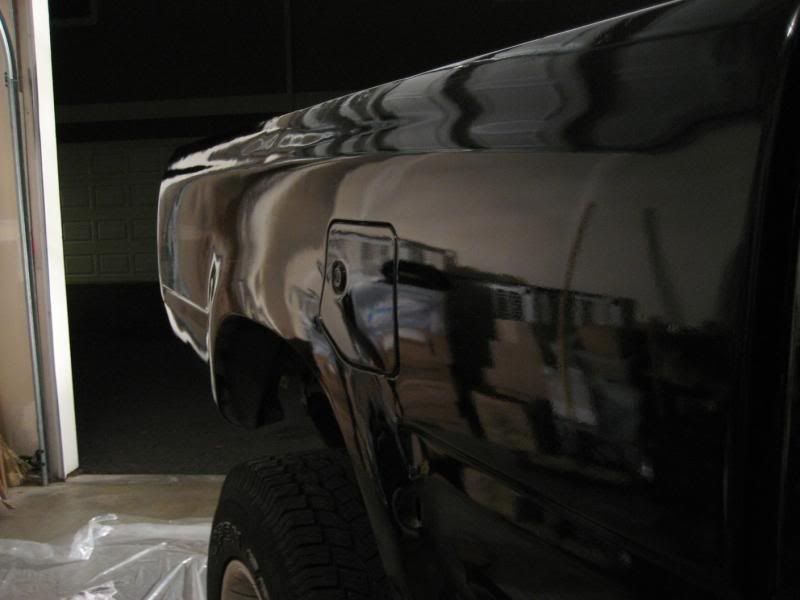
The best part? This is the first of three or four coats, and look at how glossy it is about an hour into drying, thinned 10%, without any sanding whatsoever:
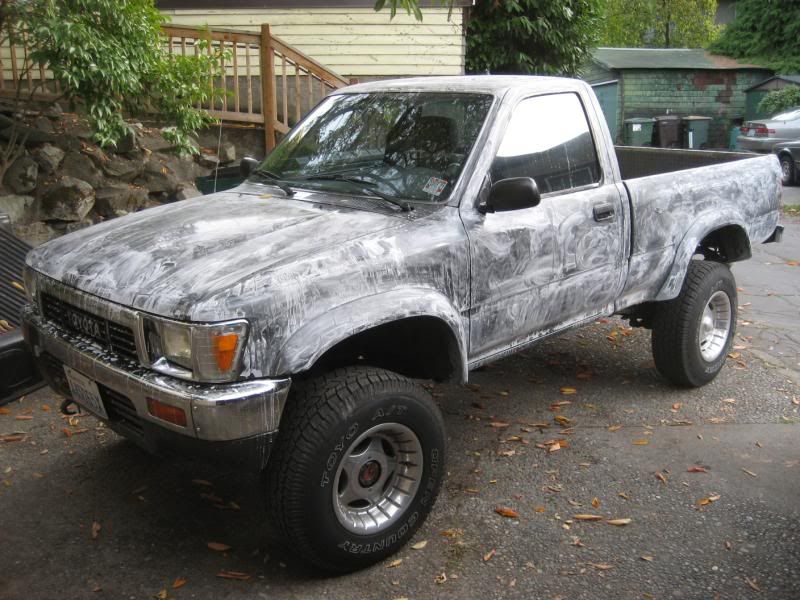
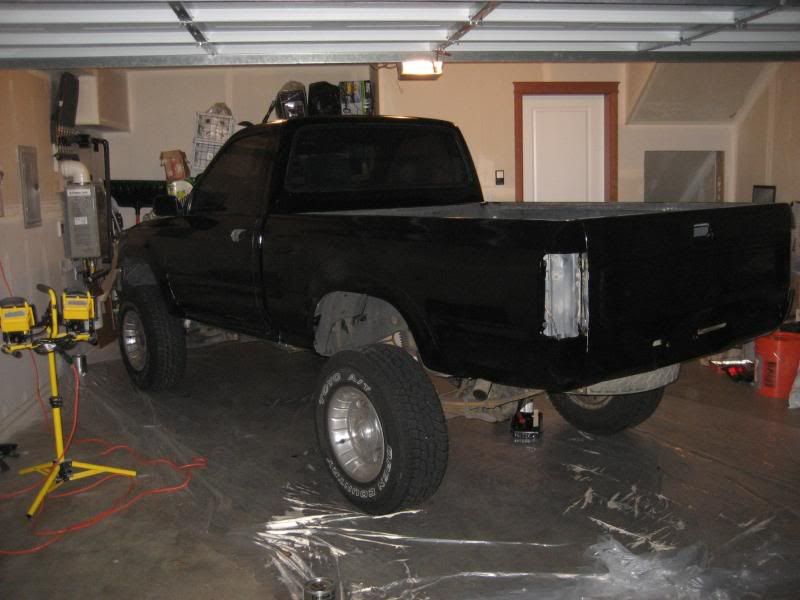
And the next day, here it is outside:

It needs a little bit of touching up with some glazing putty in a few places, but I was quite happy with the first coat. The plan is to sand with 400 grit, recoat, sand with 600, recoat, and sand with 1000, then 1500. Then I'll take it to a detailer for a final cut and polish.
Here's what she looked like at this point, on the last wet sand:
It was also time to get rid of my tailgate. The previous pictures make it look just fine, but in reality the tailgate is in really bad shape. The previous owner had welded a diamond plate to it, preventing access to the hardware and handle (which was broken). He must have also carried something really heavy, because it was totally bent out in a "C" shape. Here are a few pictures, but it's hard to tell. Did I mention there was also about 50 dents that I would have had to fix?
So, I drove up to Arlington and picked up a new tailgate in awesome condition, with a black handle just like I wanted all along.
Proceeded to take it home, install it, remove the lettering, and wet sand it down:
Now it was time for paint, at long last!!!
For this I chose Interlux Brightside topside yacht paint and foam rollers as the method of application. It sounded sooo ghetto when I first read about it, but I became convinced after the 3rd or 4th hour of research and seeing the results people were getting. It's kind of expensive stuff -- I paid $40/quart at a local store (should have ordered online) and bought two quarts. I thinned it with mineral spirits at 10% according to the instructions on the can. So, total cost for foam rollers, trays, plastic paint mixers, and the paint itself came to $100. Was it worth it? Keep reading.
Here are the pictures before the truck was painted:
Just about to start:
Here's the first application, on the passenger rear panel:
It was bubbly as hell, but I assumed (correctly) that the bubbles would probably resolve themselves as the instructions never mention to pop them or roll over them again (like some people on the internet suggest). Here's one side completely done:
And here it is completely done, only about an hour later, though it looks like I photoshopped it or something:
The best part? This is the first of three or four coats, and look at how glossy it is about an hour into drying, thinned 10%, without any sanding whatsoever:
And the next day, here it is outside:
It needs a little bit of touching up with some glazing putty in a few places, but I was quite happy with the first coat. The plan is to sand with 400 grit, recoat, sand with 600, recoat, and sand with 1000, then 1500. Then I'll take it to a detailer for a final cut and polish.
10-22-2009, 01:21 PM
#55
Registered User
iTrader: (1)
Join Date: Dec 2008
Location: Calgary, AB, Canada
Posts: 94
Likes: 0
Received 0 Likes
on
0 Posts
DAYUUUMMMM !!! My kinda FIXX!!! That looks just FINE from what I can see. ill be saving this thread as I've got similiar plans and problems. Well Done, Very Well Done!!
10-27-2009, 10:49 AM
#57
Registered User
Thread Starter
Thanks guys for the feedback. Yes, I can't believe how good the paint looks either for being roll on. You literally cannot tell looking at it. My dad has been hearing about this project here and there and he checked it out the other day. He's got professionally restored classic cars (70 Chevelle SS and 62 Impala) and he couldn't believe how good the paint looked, even only 30% finished. He's spent $6k+ on a paint job before (absolutely NO orange peel) so I was happy to hear him say that.
I've been busy with other things in life but will be tackling the truck tonight and tomorrow hopefully. In the meantime, since I remembered, here's a picture of that IFS truss everyone wanted to see:
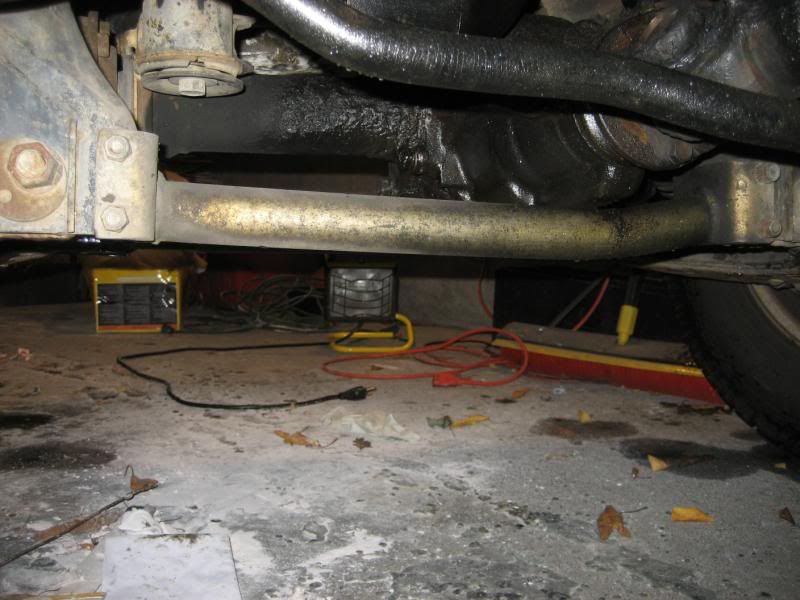
I've been busy with other things in life but will be tackling the truck tonight and tomorrow hopefully. In the meantime, since I remembered, here's a picture of that IFS truss everyone wanted to see:
10-28-2009, 09:22 AM
#59
Great thread. I've been debating on painting my truck myself. Seeing the results of your work with fiberglass has instilled some confidence in going this route.
I've subscribed to this thread so keep the information coming.
Thanks.
I've subscribed to this thread so keep the information coming.
Thanks.


