Jagger's Build, Shine Runner.
 03-14-2013, 11:51 AM
#1
Registered User
Thread Starter
Join Date: Jan 2013
Location: Peterborough Ontario
Posts: 104
Likes: 0
Received 0 Likes
on
0 Posts
Jagger's Build, Shine Runner.
I'm new-ish to yotatech. I started my build thread in the 86-95 tech, didn't realize there was an actual build up section, so from now on i'll be posting here.
Before anyone says it, yes it needs quite a bit of work. Been getting a lot of flame for that. I bought it for $300 + the delivery from the PO, because my trailer was out of commission. When bought it ran with gas in the throttle body. There was an issue in the fuel pump wiring. Found to be bad wires. I bought it with no ownership sadly, however I can get one from what i have, i was told it was an '88 runner, but turns out to be an '87! No e-test for me!
Came up with the name watching moonshiners. Shine runner.
Now on to the pictures:
Pictures the PO had:
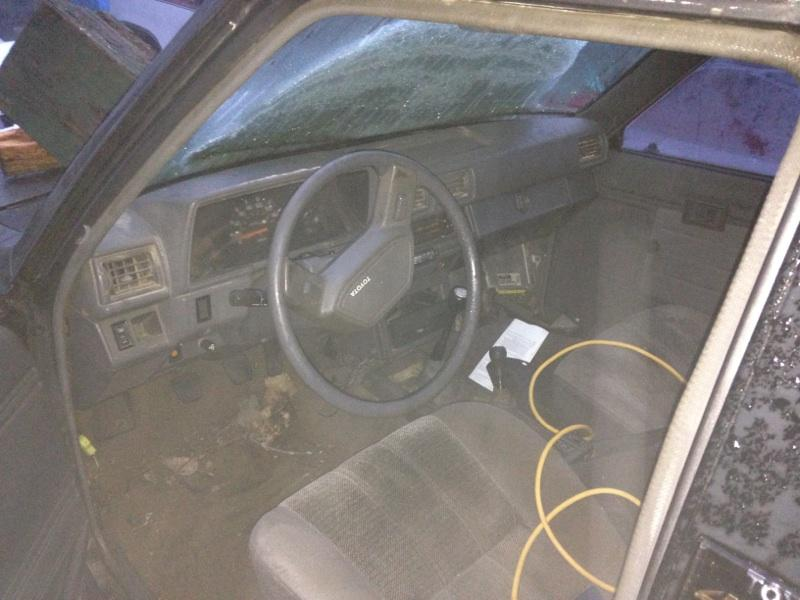
Day i brought it home, exhaust got hung up on the trailer coming off.... Back tire is stuffed because the back right is flat...

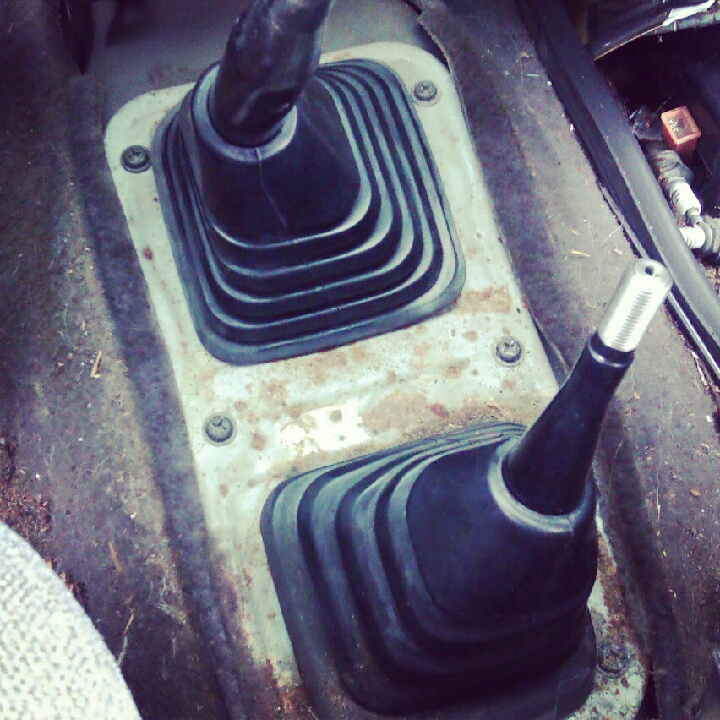
Never knew there was the way better looking rubber shift boots under the crappy leather ones!
Shiftknobs on!
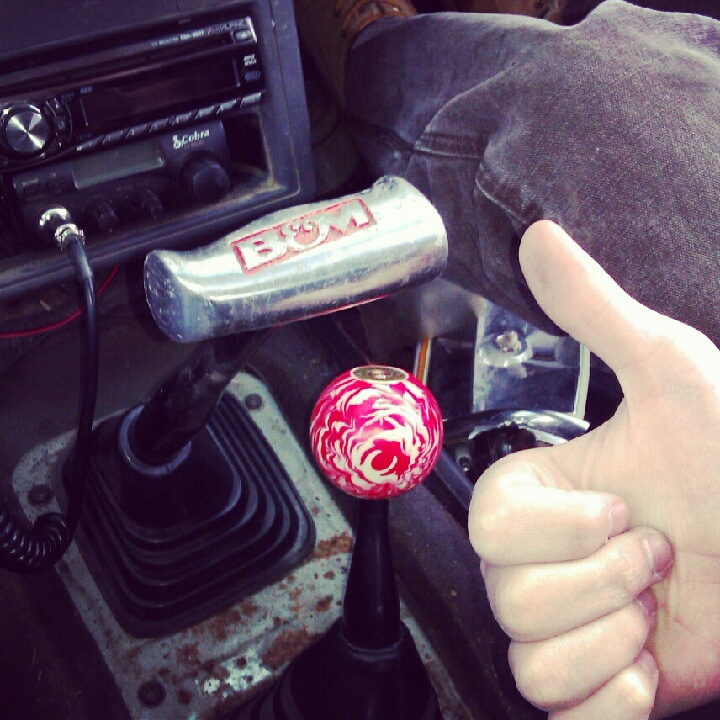
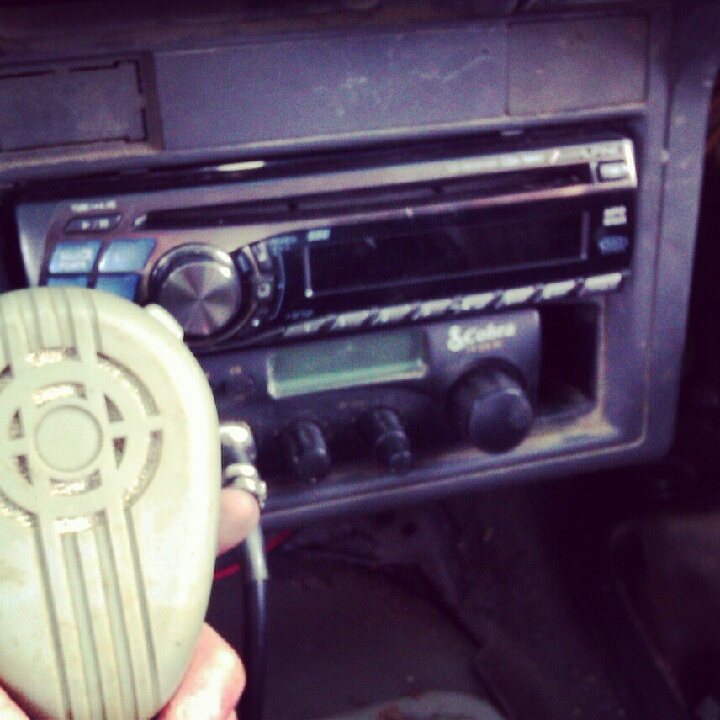
Radio and cb in!
Truck nuts haha
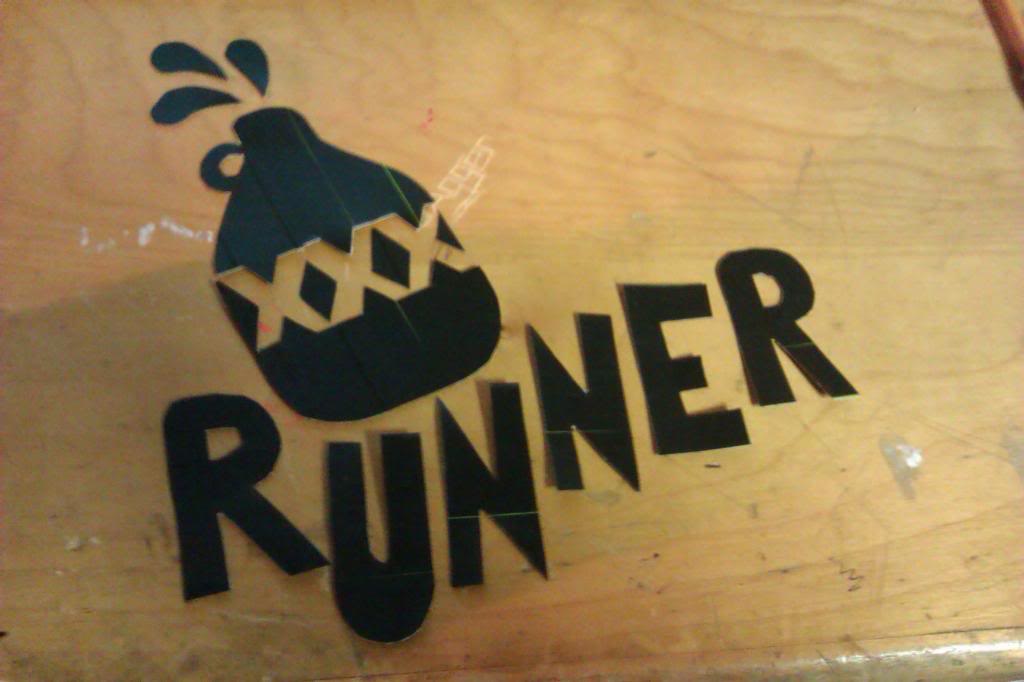
Made the rightful sticker
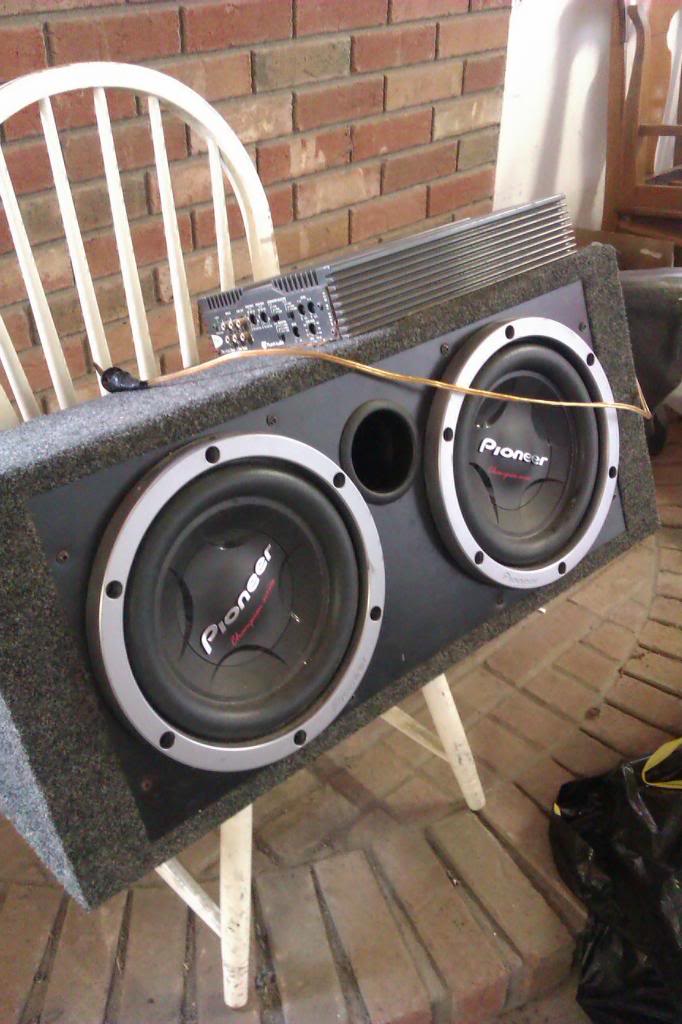
Will be taking these outta the box and putting them in the back side walls.
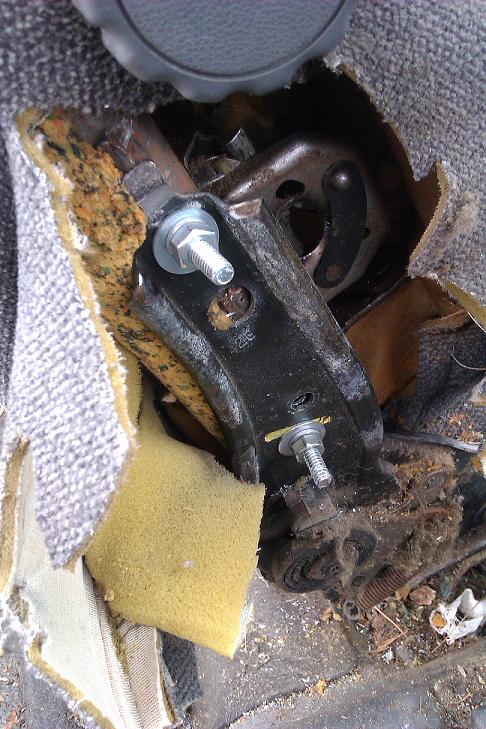
Broken seat fix, looks like crap, but I'm gunna make some seat covers for them.
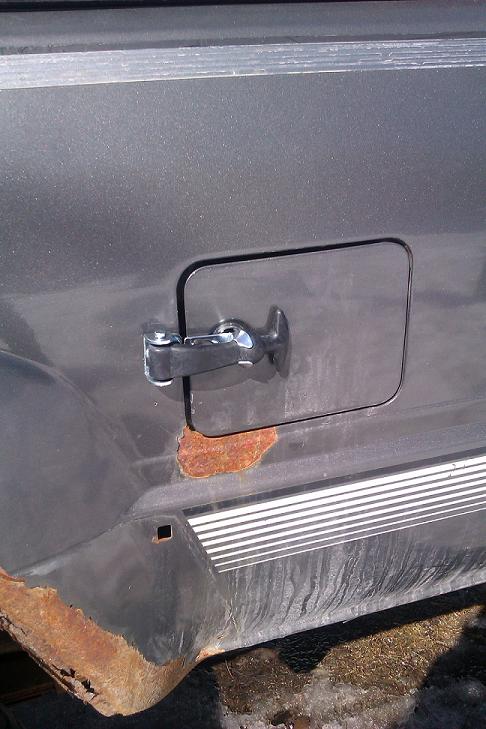
Gas cap door fix, was missing lock.
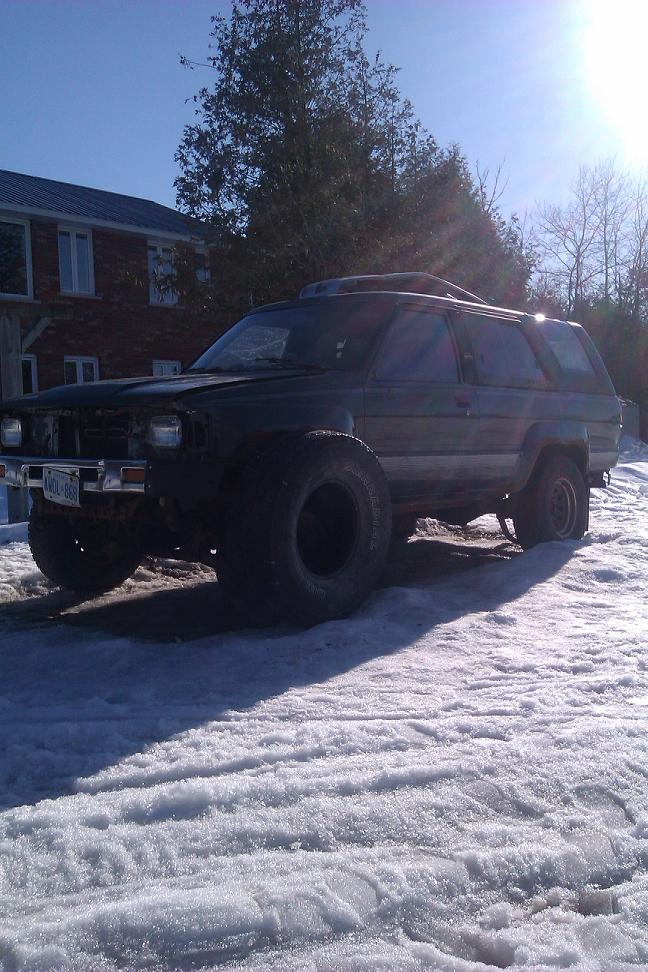
Gunna need some lift
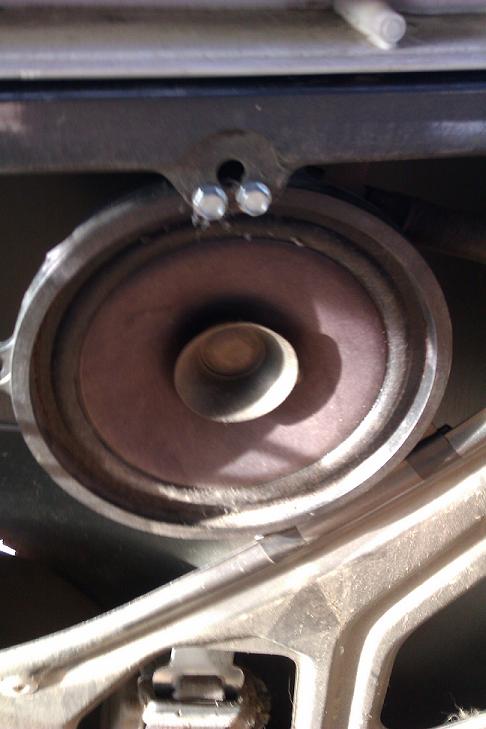
Was missing my rear speakers so i added these in.
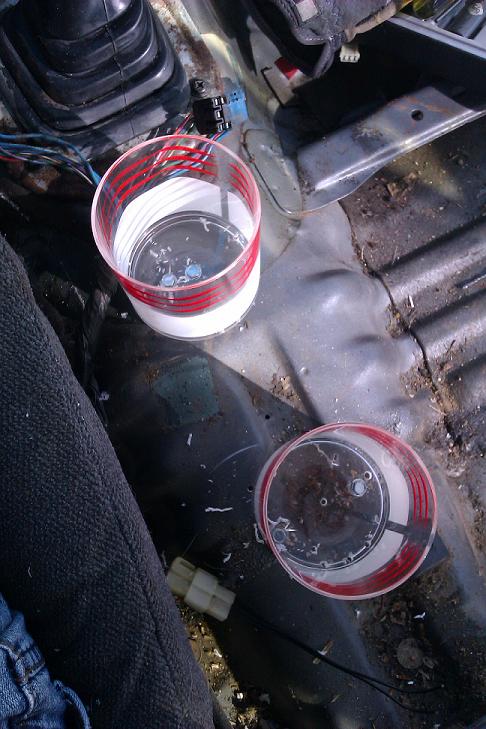
Center console and heater i took out, console was wrecked, and the heater didn't work. New cup cup holders
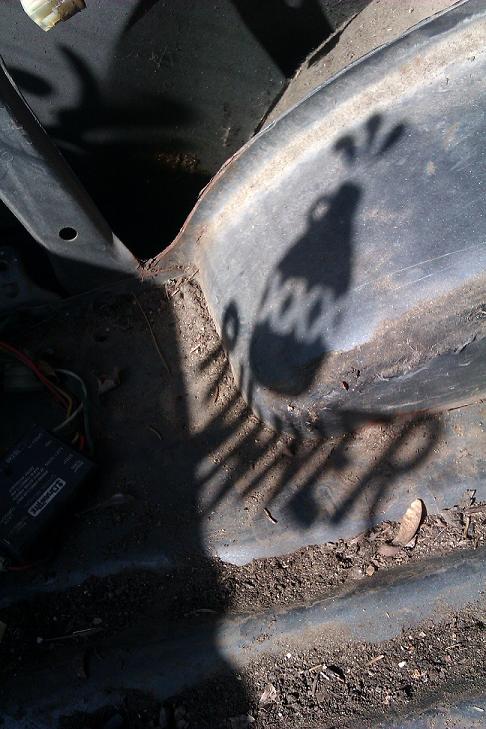
Cool Shadow
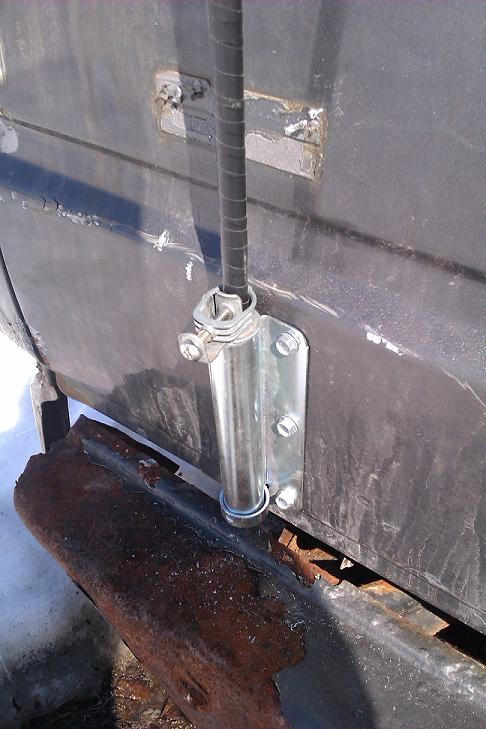
My flag pole, made from a chimney sweeper rod, and some sort of "Barrel mount" Not 100% on actual name of mount.
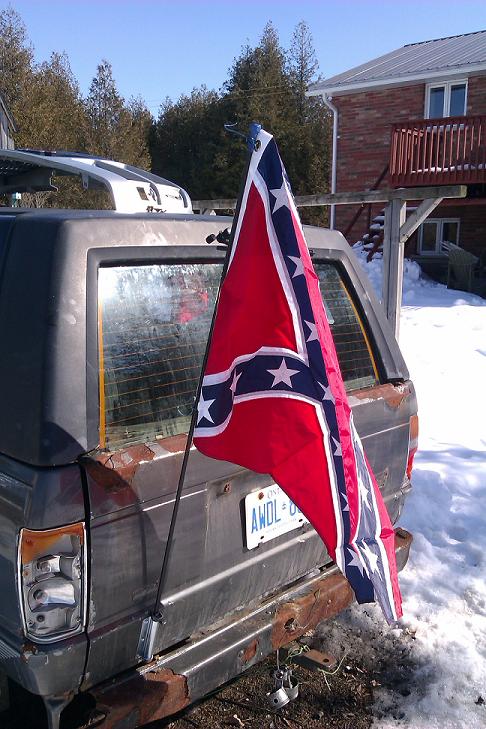
With flag on:
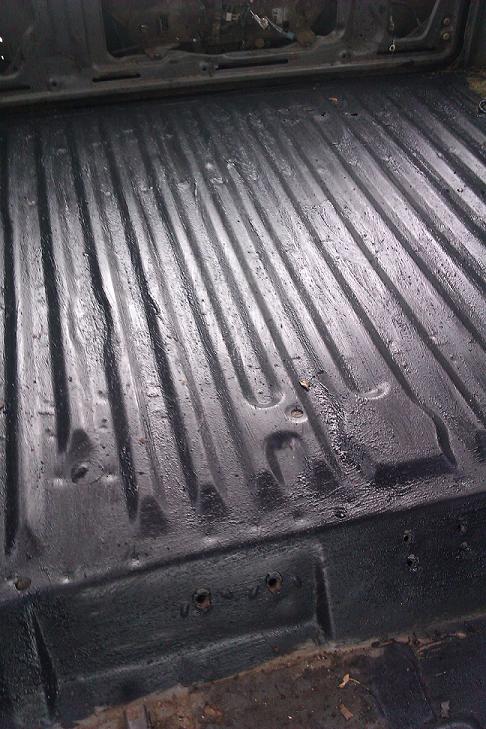
Tore out the grungy carpet, so I'm bedlining everything.
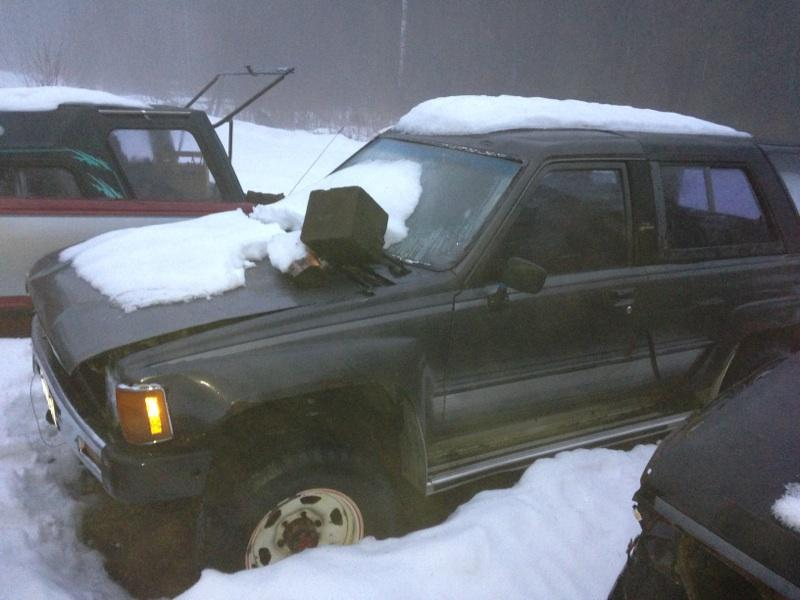
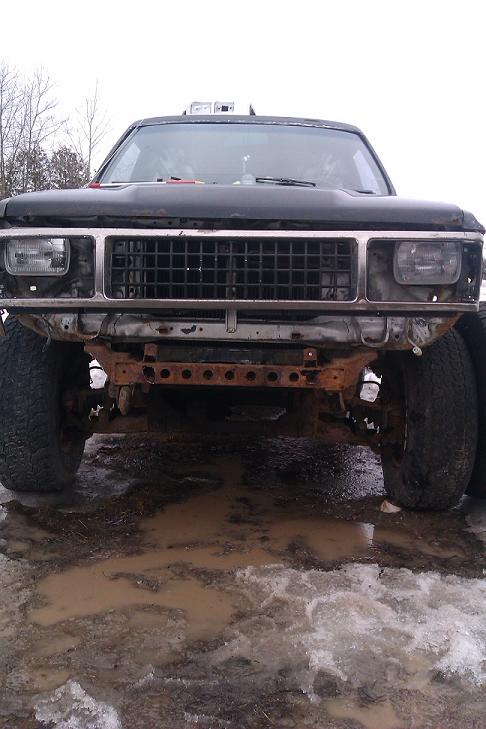
Could not get the actual grill for it, so i got this isuzu trooper one for free, (Found it at the junk yard) Not direct fit, but i like the look, so I'll make it work.
Total in so far- $300. I am a highschool student so I'm trying to keep it as cheap as possible.
Before anyone says it, yes it needs quite a bit of work. Been getting a lot of flame for that. I bought it for $300 + the delivery from the PO, because my trailer was out of commission. When bought it ran with gas in the throttle body. There was an issue in the fuel pump wiring. Found to be bad wires. I bought it with no ownership sadly, however I can get one from what i have, i was told it was an '88 runner, but turns out to be an '87! No e-test for me!
Came up with the name watching moonshiners. Shine runner.
Now on to the pictures:
Pictures the PO had:
Day i brought it home, exhaust got hung up on the trailer coming off.... Back tire is stuffed because the back right is flat...
Never knew there was the way better looking rubber shift boots under the crappy leather ones!
Shiftknobs on!
Radio and cb in!
Truck nuts haha
Made the rightful sticker
Will be taking these outta the box and putting them in the back side walls.
Broken seat fix, looks like crap, but I'm gunna make some seat covers for them.
Gas cap door fix, was missing lock.
Gunna need some lift
Was missing my rear speakers so i added these in.
Center console and heater i took out, console was wrecked, and the heater didn't work. New cup cup holders
Cool Shadow
My flag pole, made from a chimney sweeper rod, and some sort of "Barrel mount" Not 100% on actual name of mount.
With flag on:
Tore out the grungy carpet, so I'm bedlining everything.
Could not get the actual grill for it, so i got this isuzu trooper one for free, (Found it at the junk yard) Not direct fit, but i like the look, so I'll make it work.
Total in so far- $300. I am a highschool student so I'm trying to keep it as cheap as possible.
Last edited by Jagger_MeisterJE; 04-20-2013 at 10:54 AM.
 03-15-2013, 01:36 PM
#2
Registered User
Thread Starter
Join Date: Jan 2013
Location: Peterborough Ontario
Posts: 104
Likes: 0
Received 0 Likes
on
0 Posts
It is freakin' cold out today! Finally got myself a newer battery. My old one was dying out by the time i wake up in the morning. No pictures of the battery, not that its really needed, a buddy of mine got it from work out of a toyota industrial thing (not sure what) they were replacing it so he asked if i wanted it. Things almost brand new!
I've been tinkering around with the grill. I'm really likin' how it's turning out. Original turn signals fit vertically really good. Just need to mount the headlights a little lower. I am using the cornering lights out of a Chev 1500, they seem to fit perfectly.
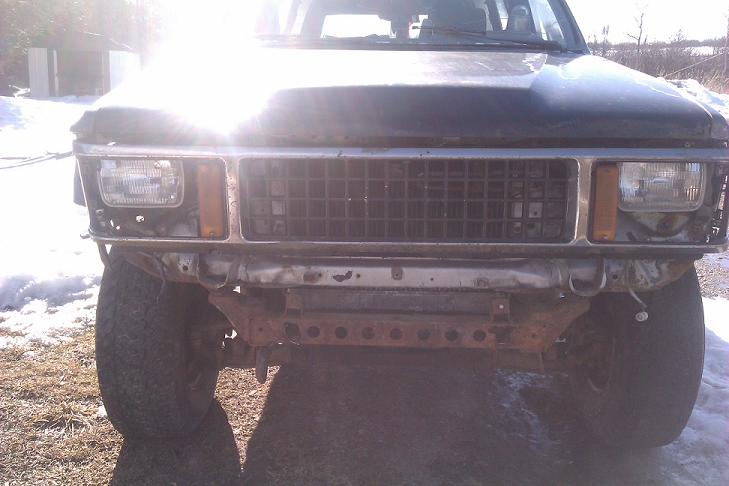
I've been tinkering around with the grill. I'm really likin' how it's turning out. Original turn signals fit vertically really good. Just need to mount the headlights a little lower. I am using the cornering lights out of a Chev 1500, they seem to fit perfectly.
Last edited by Jagger_MeisterJE; 03-15-2013 at 01:37 PM.
 03-16-2013, 10:09 AM
#4
Registered User
Thread Starter
Join Date: Jan 2013
Location: Peterborough Ontario
Posts: 104
Likes: 0
Received 0 Likes
on
0 Posts
Got my grant wheel in
That blue feather at the top right is hand tooled leather. Wish i knew how to do that stuff, looks like it could be fun!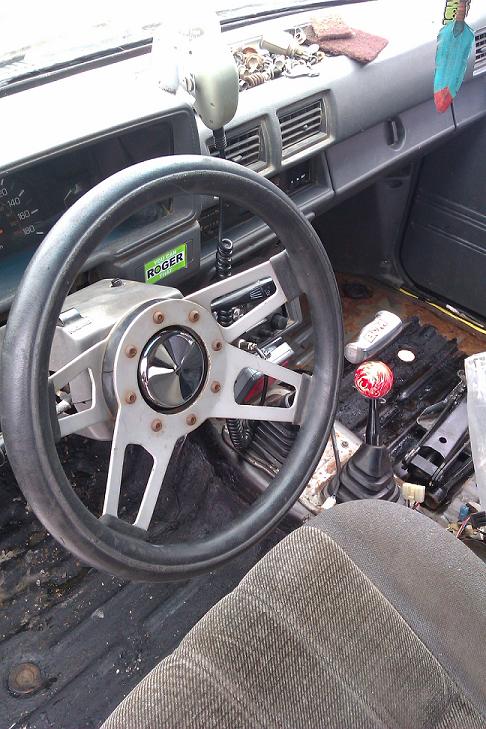 03-16-2013, 02:14 PM
#5
Registered User
Thread Starter
Join Date: Jan 2013
Location: Peterborough Ontario
Posts: 104
Likes: 0
Received 0 Likes
on
0 Posts
Since i switched out the steering wheel i needed a new horn button. So i made this , (I have a little box cover to hide it.)
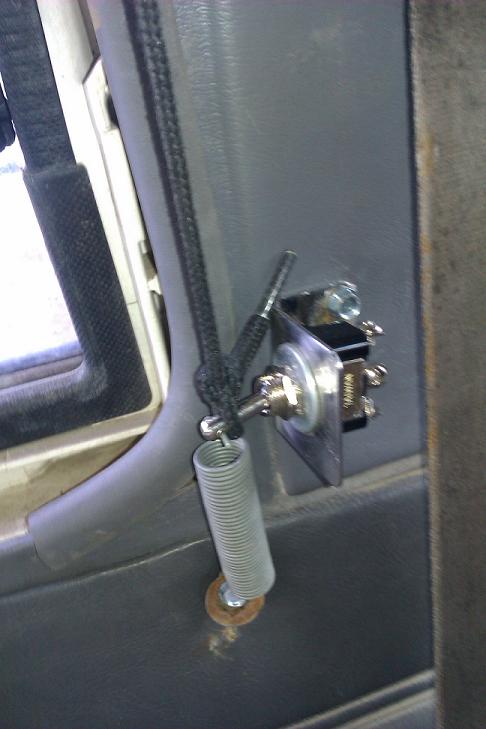
Which went to a little "pulley figure 8"
Anyone say truck horn?! Going to get one of those wolo air horn kits.

The string is just temporary, i will have steel cable soon.
Which went to a little "pulley figure 8"
Anyone say truck horn?! Going to get one of those wolo air horn kits.
The string is just temporary, i will have steel cable soon.
Trending Topics
03-16-2013, 11:40 PM
#8
Registered User
Thread Starter
Join Date: Jan 2013
Location: Peterborough Ontario
Posts: 104
Likes: 0
Received 0 Likes
on
0 Posts
Its been drilled to metal and is sturdy. I have a little plastic box that im going to fit over it so people in the back dont mess with the horn. Make it look more finished too.
03-16-2013, 11:44 PM
#9
Registered User
Thread Starter
Join Date: Jan 2013
Location: Peterborough Ontario
Posts: 104
Likes: 0
Received 0 Likes
on
0 Posts
But itd still be nice, id be way closer to a presentable rig! Lol I need to fab up some bumpers here soon!...
03-17-2013, 12:26 PM
#12
Registered User
Thread Starter
Join Date: Jan 2013
Location: Peterborough Ontario
Posts: 104
Likes: 0
Received 0 Likes
on
0 Posts
(at the still open one) This new place i've discovered has been closed for 4 or 5 years now. Only people that have gone to get parts are me and my buddy. Theres tons of cool stuff out there. It doesn't stop at cars and trucks either. One of the small buildings has a ton of full exhaust systems in it.
03-17-2013, 03:28 PM
#13
Registered User
Thread Starter
Join Date: Jan 2013
Location: Peterborough Ontario
Posts: 104
Likes: 0
Received 0 Likes
on
0 Posts
Not much was done today, Started dialling in my radio, rear speakers work great! Front speakers. Ones okay, other rattled like hell! Completely busted upon inspection. I have replacements to put in.
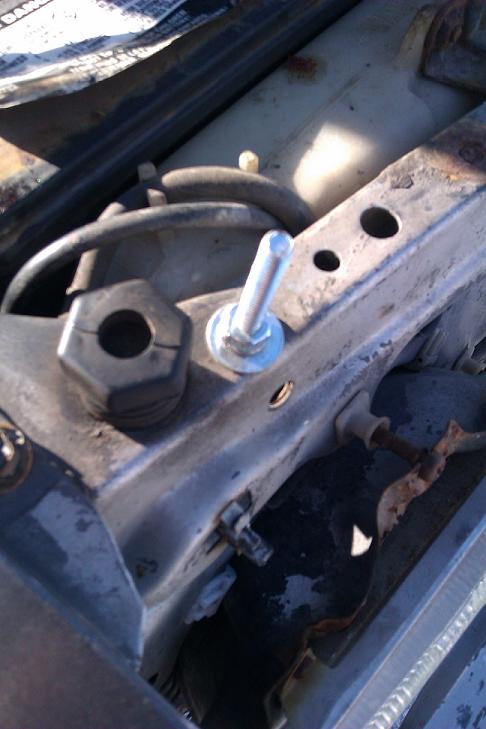
My hood was being a pain with opening and closing. Drove me nuts. The mech. out front was worn out. So i just scrapped it and put hood tie downs. But being on the cheap i just drilled holes and used bolts I will be using wing nuts. Just gotta make them.
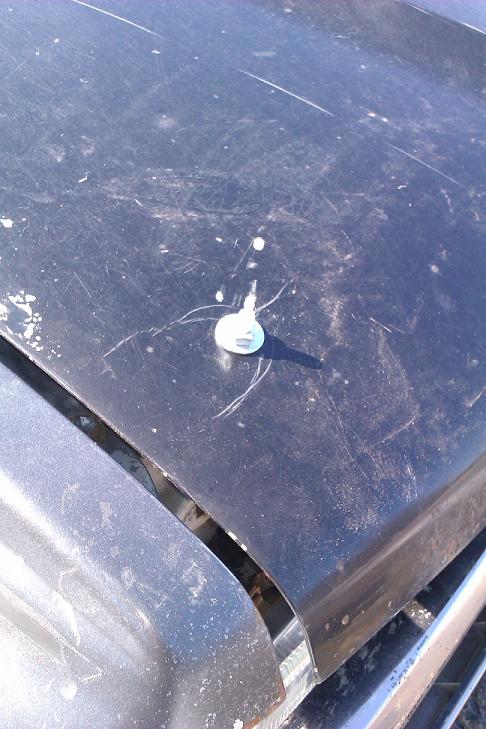
My hood was being a pain with opening and closing. Drove me nuts. The mech. out front was worn out. So i just scrapped it and put hood tie downs. But being on the cheap i just drilled holes and used bolts
I will be using wing nuts. Just gotta make them.
Last edited by Jagger_MeisterJE; 03-17-2013 at 03:44 PM.
03-18-2013, 03:49 PM
#17
Registered User
Thread Starter
Join Date: Jan 2013
Location: Peterborough Ontario
Posts: 104
Likes: 0
Received 0 Likes
on
0 Posts
03-18-2013, 10:39 PM
#18
Yep classic hood pins. You can drill that out for a cotter pin style, then it's completely retro, well would be if you ground the bolt down to a bullet style.
You should post the pictures of where that is mounted on the cross brace, somebody might be interested in reproducing it.
You should post the pictures of where that is mounted on the cross brace, somebody might be interested in reproducing it.
03-19-2013, 09:38 AM
#19
Registered User
Thread Starter
Join Date: Jan 2013
Location: Peterborough Ontario
Posts: 104
Likes: 0
Received 0 Likes
on
0 Posts
Yep classic hood pins. You can drill that out for a cotter pin style, then it's completely retro, well would be if you ground the bolt down to a bullet style.
You should post the pictures of where that is mounted on the cross brace, somebody might be interested in reproducing it.
You should post the pictures of where that is mounted on the cross brace, somebody might be interested in reproducing it.
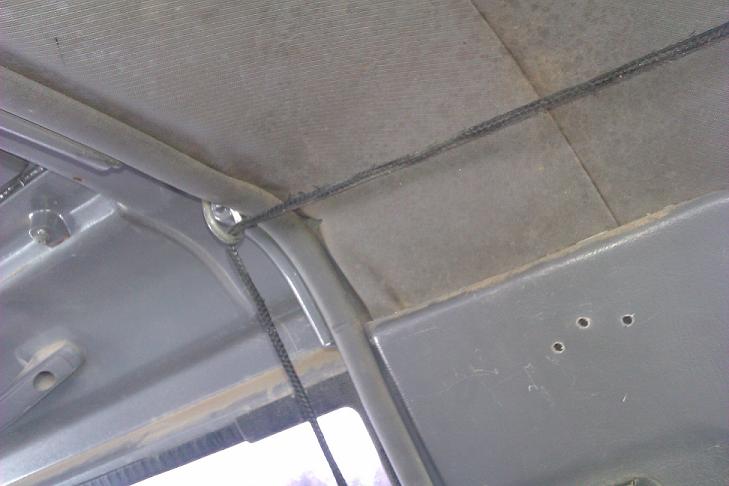
I only drilled one hole. the other was already there which is right beside the round rubber hood pad on the rad support, id say about an inch from it.
03-20-2013, 02:52 PM
#20
Registered User
Thread Starter
Join Date: Jan 2013
Location: Peterborough Ontario
Posts: 104
Likes: 0
Received 0 Likes
on
0 Posts
It's been really freaking cold here lately. So work has been down to the minimal. Wired in a push button start instead of key start. That I had a cool button i was planning to use originally, but with so much fuss it gave me. When plug in, it would connect the wires then all you had to do was hit the clutch. Which was a pain because i thought i had wired everything up wrong (it was a brand new switch that worked a month ago in my ford). Sitting there frustrated for an hour tinkering with little things i decided to try another button. Just a little light up one from Home Hardware. Works great ads a lil pizazz to the dash. (Was unable to flick a picture for now.)
On with the pictures!
For anyone wondering where i put the bolts for the hood tie down. On the right side by the air filter there was a hole perfect size perfect place so i only had to drill one. Its about an inch from the rubber pad.
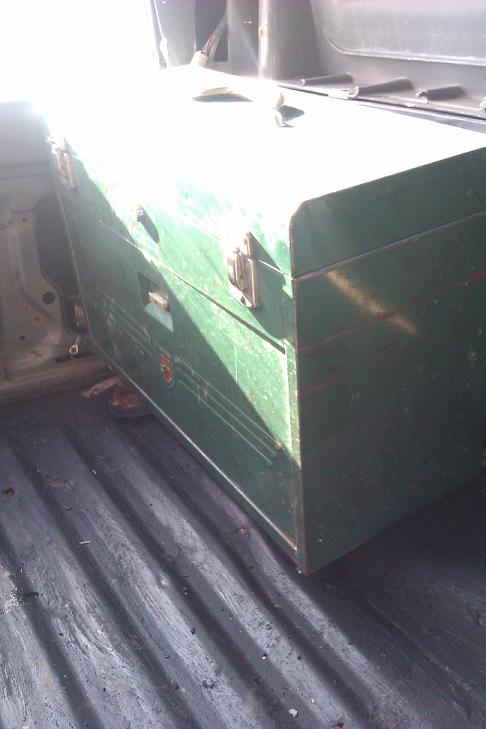
It seems to be really warm in the rig no matter how cold it is, so i fooled around with some ideas! Had my little tool box that i am going to mount here. Doesn't portrude out from the wheel well (does in picture because it isn't completely up against the side wall), so it can stay in while i sleep in there. (Camping plans for the summer.)
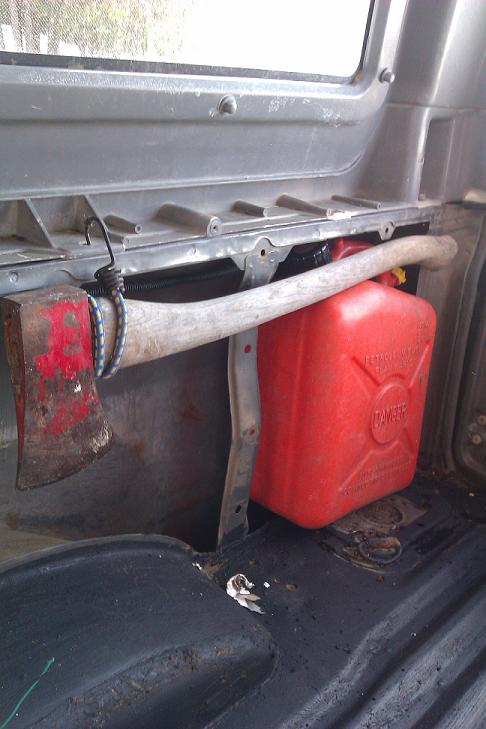
Also placed the axe and gastank where they are going. Will have better mounts soon. My smaller shovel busted so it will have to wait to mount one. Good thing there is a million broken shovels at work, ill just cut one down to a perfect size and add a handle.
ads a lil pizazz to the dash. (Was unable to flick a picture for now.)On with the pictures!
For anyone wondering where i put the bolts for the hood tie down. On the right side by the air filter there was a hole perfect size perfect place so i only had to drill one. Its about an inch from the rubber pad.
It seems to be really warm in the rig no matter how cold it is, so i fooled around with some ideas! Had my little tool box that i am going to mount here. Doesn't portrude out from the wheel well (does in picture because it isn't completely up against the side wall), so it can stay in while i sleep in there. (Camping plans for the summer.)
Also placed the axe and gastank where they are going. Will have better mounts soon. My smaller shovel busted so it will have to wait to mount one. Good thing there is a million broken shovels at work, ill just cut one down to a perfect size and add a handle.
Last edited by Jagger_MeisterJE; 03-20-2013 at 02:53 PM.


