EmazingOregonYota's 1984 Extended Cab Pickup Buildup
 01-14-2013, 07:31 PM
#1
Registered User
Thread Starter

Join Date: Jan 2013
Location: Roseburg, Oregon
Posts: 38
Likes: 0
Received 0 Likes
on
0 Posts
EmazingOregonYota's 1984 Extended Cab Pickup Buildup
Ive had my truck for about a year now. Bought it for $1800. Replaced the Clutch Master and slave cylinders. Put my lift on. Rebuilt the drag link ends. Drive shaft Center bearing went out and replaced that too.
This whole time the interior has been completely trashed. Now a year later, my clutch has gone out and i have decided it is time to fix eveything that needs to be. This started as taking out the interior to clean and fix my heater core, repaint my dash and grind out all the rust i found on the floorboard under my vinal floormat . I decided to spray rubberized undercoating on my floor after i strip it down.
Now i dropped the transmission to change the clutch and noticed some oil in the bell housing. Seems to be the Front bearing retainer seal. Im gonne throw some RTV on it and paint the transmission and transfer case green
Pictures Soon..........
This whole time the interior has been completely trashed. Now a year later, my clutch has gone out and i have decided it is time to fix eveything that needs to be. This started as taking out the interior to clean and fix my heater core, repaint my dash and grind out all the rust i found on the floorboard under my vinal floormat
. I decided to spray rubberized undercoating on my floor after i strip it down. Now i dropped the transmission to change the clutch and noticed some oil in the bell housing. Seems to be the Front bearing retainer seal. Im gonne throw some RTV on it and paint the transmission and transfer case green
Pictures Soon..........

 01-14-2013, 10:29 PM
#3
Registered User
Thread Starter
Join Date: Jan 2013
Location: Roseburg, Oregon
Posts: 38
Likes: 0
Received 0 Likes
on
0 Posts
Here she is

Another shot from the other side and the shop

Transmission out

And some of the fantastic Interior that is gong to be refinished


Driver Side interior

Passenger Side Interior

Another shot from the other side and the shop
Transmission out
And some of the fantastic Interior that is gong to be refinished
Driver Side interior
Passenger Side Interior
01-14-2013, 10:44 PM
#4
Registered User
Thread Starter
Join Date: Jan 2013
Location: Roseburg, Oregon
Posts: 38
Likes: 0
Received 0 Likes
on
0 Posts
Pulled off the quarter panels and found that underneath the previous owner had welded, more like burnt through the metal and left it to rust..
I dealt with that with my 4 1/2 inch angle grinder with a wire wheel
So I ground, then welded, then ground, then painted and got this

Well at least its a lot better than it was
I dealt with that with my 4 1/2 inch angle grinder with a wire wheel
So I ground, then welded, then ground, then painted and got this
Well at least its a lot better than it was
01-14-2013, 10:52 PM
#5
Registered User
Thread Starter
Join Date: Jan 2013
Location: Roseburg, Oregon
Posts: 38
Likes: 0
Received 0 Likes
on
0 Posts
Can't forget to mention the Rats nest of a wiring job that I'm going to make a custom harness for in the near future. Was overcharging at 18v for awhile too till i fixed that last year.

And my spare bag of 1983 2wd harness wire to help make the new Custom Harness.

And my spare bag of 1983 2wd harness wire to help make the new Custom Harness.
01-15-2013, 07:54 AM
#6
Super Moderator
Staff
iTrader: (1)
Join Date: Aug 2008
Location: Anderson Missouri
Posts: 11,788
Likes: 0
Received 22 Likes
on
20 Posts
Alot of the picture above look familiar, my harness was all a mess. If yo can find a good harness, changing it out isnt bad at all, especially for as far as you have it now. Loking frward to your build. Welcome to Yotatech.
01-15-2013, 11:36 AM
#7
Registered User
Thread Starter
Join Date: Jan 2013
Location: Roseburg, Oregon
Posts: 38
Likes: 0
Received 0 Likes
on
0 Posts
Thanks guys. I look toward to trying to make a good build thread for my truck so when Im done I can see everything I've done. And maybe help out some future builders with some ideas from what I do.
Im pretty sure that both of my harnesses are melted around the hot wire coming from the alternator. And I think I can make a more efficient harness than stock, of atleast simpler. And more water proof. And if I do I'll try to make a color coded wiring diagram which I have found impossible to find for a 22r.
Anyway I am excited to be a part of Yotatech, and look toward to keeping you guys posted.
Trending Topics
01-17-2013, 04:05 PM
#8
Registered User
Thread Starter
Join Date: Jan 2013
Location: Roseburg, Oregon
Posts: 38
Likes: 0
Received 0 Likes
on
0 Posts
About to head to the building store to get some paint and a new wire wheel. Gonna grind down and paint my floor and drivers side engine compartment. Will Try and get some pics up later tonight.
01-21-2013, 05:46 PM
#9
Registered User
Thread Starter
Join Date: Jan 2013
Location: Roseburg, Oregon
Posts: 38
Likes: 0
Received 0 Likes
on
0 Posts
OK for real. TONIGHT I am going to post a bunch of pictures up to date. My buddy troy is down and were gonna tear into it tomorrow and tonight and I'm gonna be sure to take a bunch of pictures.
01-21-2013, 08:25 PM
#10
Registered User
Thread Starter
Join Date: Jan 2013
Location: Roseburg, Oregon
Posts: 38
Likes: 0
Received 0 Likes
on
0 Posts
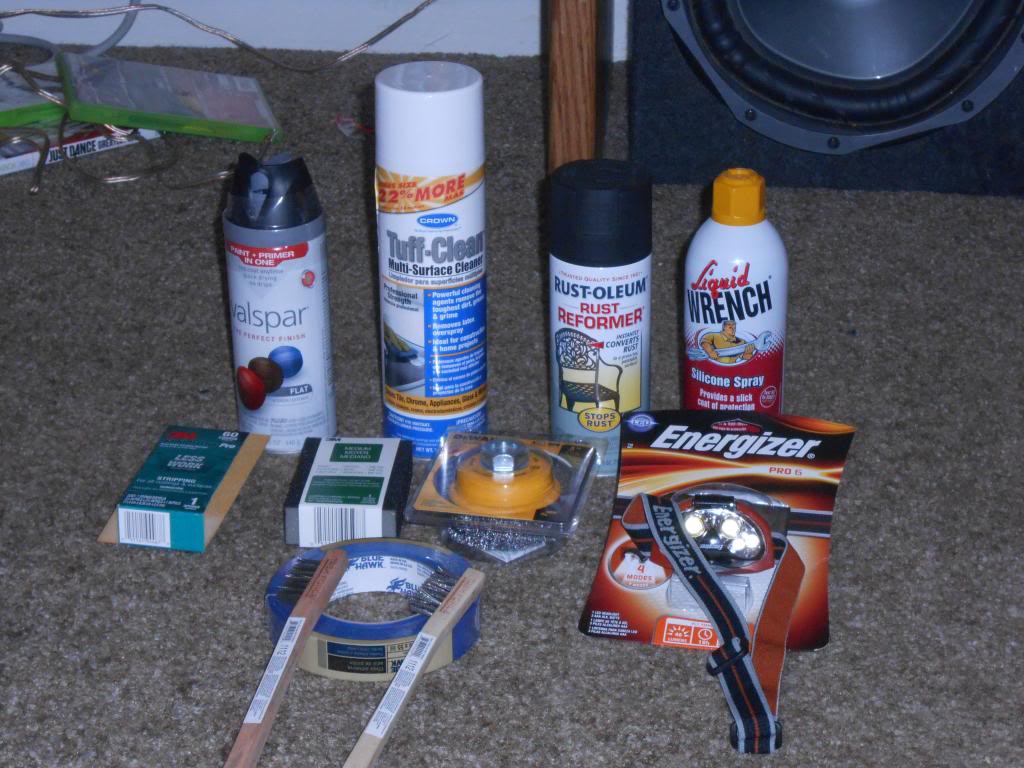
My supplies i snagged from the store.
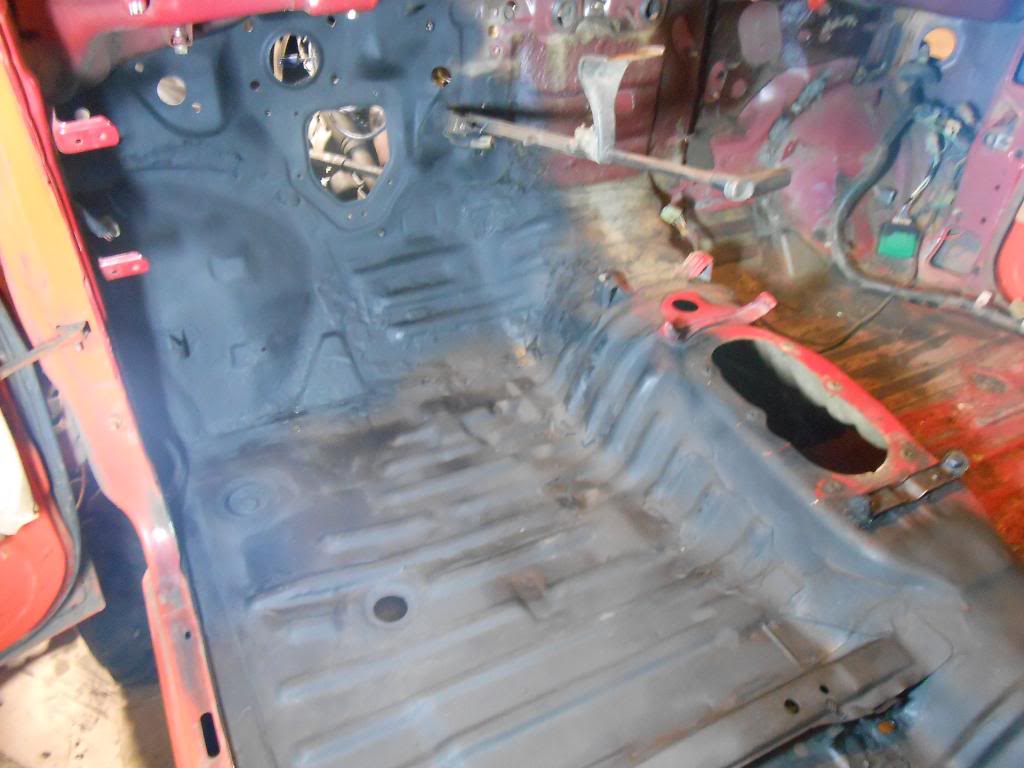
Driver Side Interior after paining first coat of Rust Converting Paint and a coat of Rubberized Undercoating.
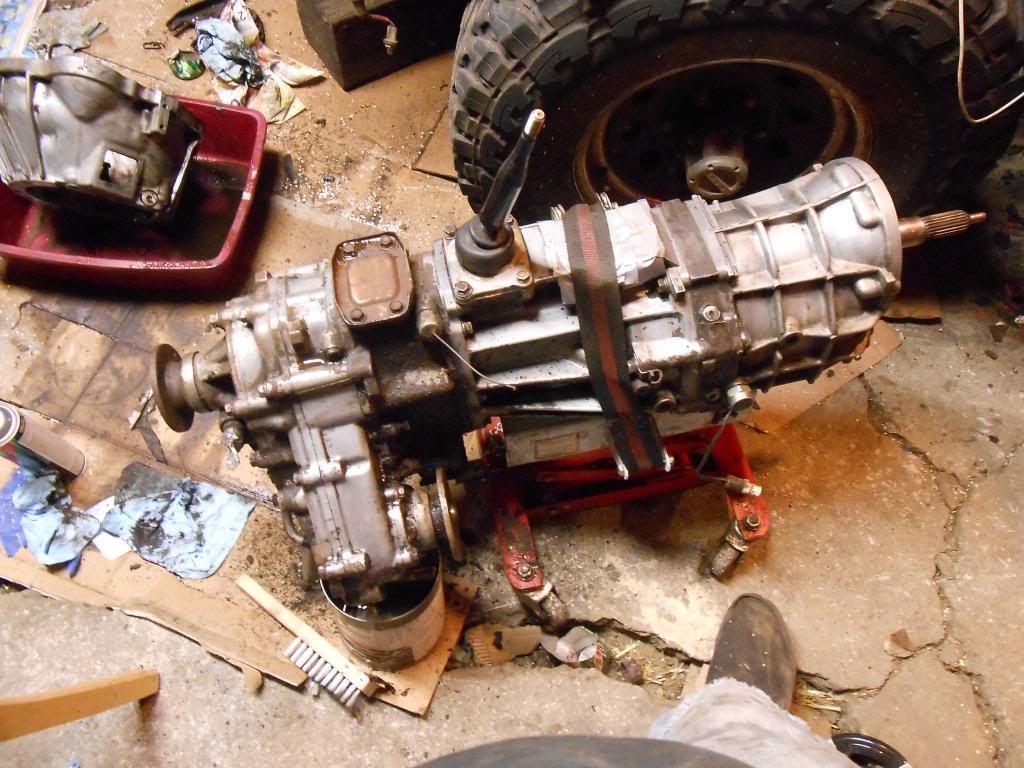
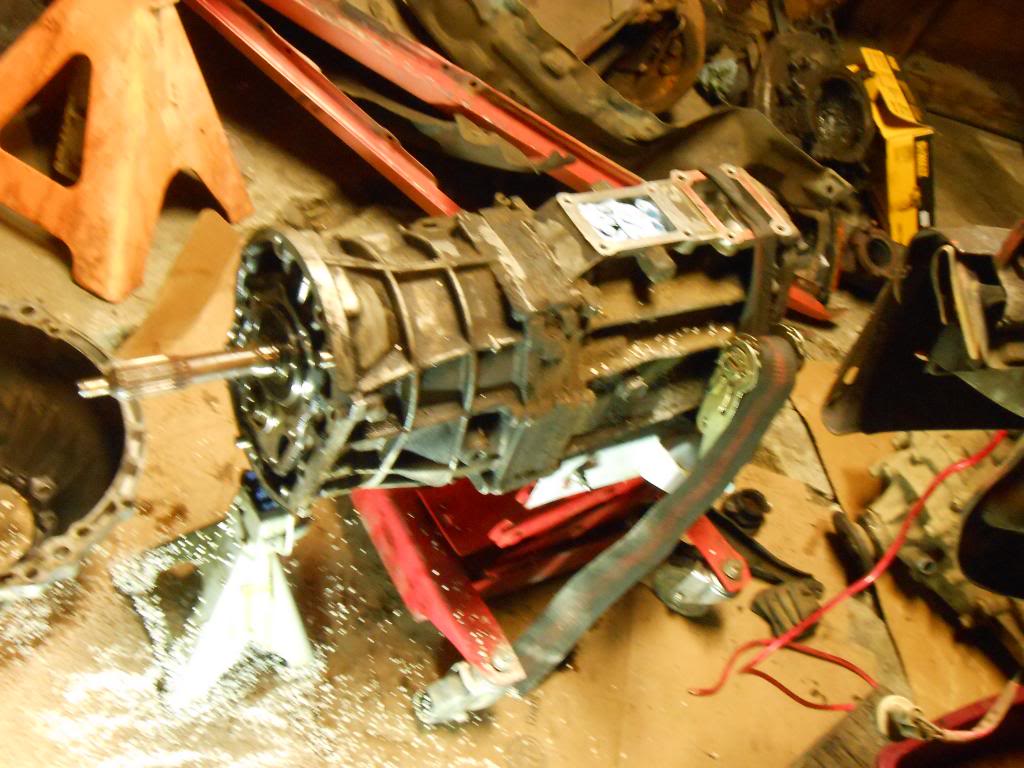
Transmission after cleaning with brake cleaner. Needs a lot more scrubbing then I'm gonna paint her green.
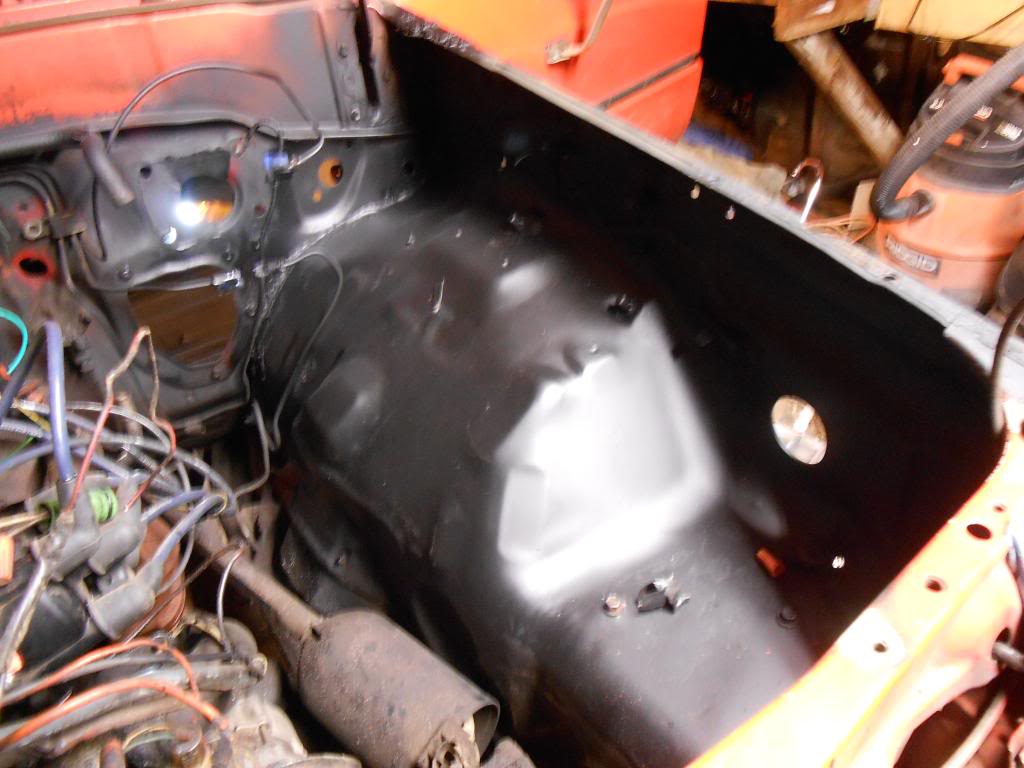
Under hood where the rats nest was. Now a little cleaned up and painted
Driver Side Interior after paining first coat of Rust Converting Paint and a coat of Rubberized Undercoating.
Transmission after cleaning with brake cleaner. Needs a lot more scrubbing then I'm gonna paint her green.
Under hood where the rats nest was. Now a little cleaned up and painted
02-01-2013, 10:29 PM
#11
Registered User
Thread Starter
Join Date: Jan 2013
Location: Roseburg, Oregon
Posts: 38
Likes: 0
Received 0 Likes
on
0 Posts
Sorry its been a while. As you all know life tends to get in the way so things end up going a lot slower than you plan.
Anyway, lots of stuff has gotten done. Mostly scrubbing all the 1/4" of thick grease and clay/mud that was hardened on all around the transfer case and transmission off. Finally got everything painted today thanks to a break in weather
Bell housing has all 3 coats
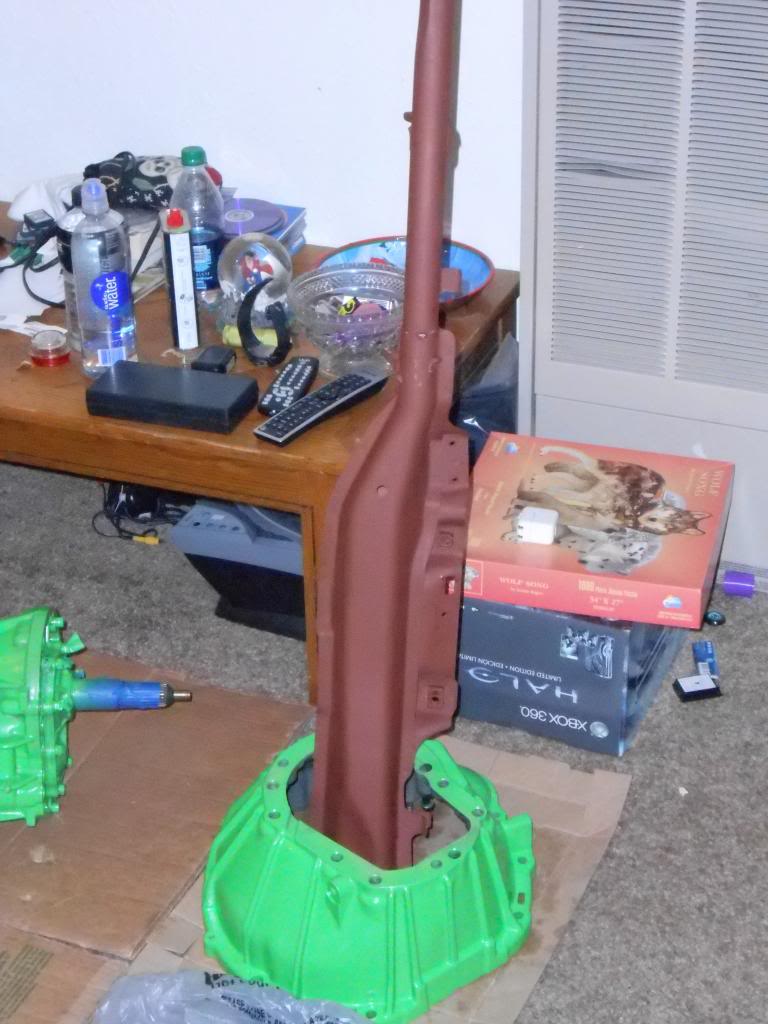
It looks really nice. A lot nicer than i expected. I painted the metal dash support as well (With a rust converting paint cause it was all sorts of surface rusty) and its curing in the house along with everything else. YES my girlfriend is awesome and lets me cure painted parts in the living room
Now for the transmission-
---BEFORE---(Already after alot of scrubbing)
-----AFTER-----
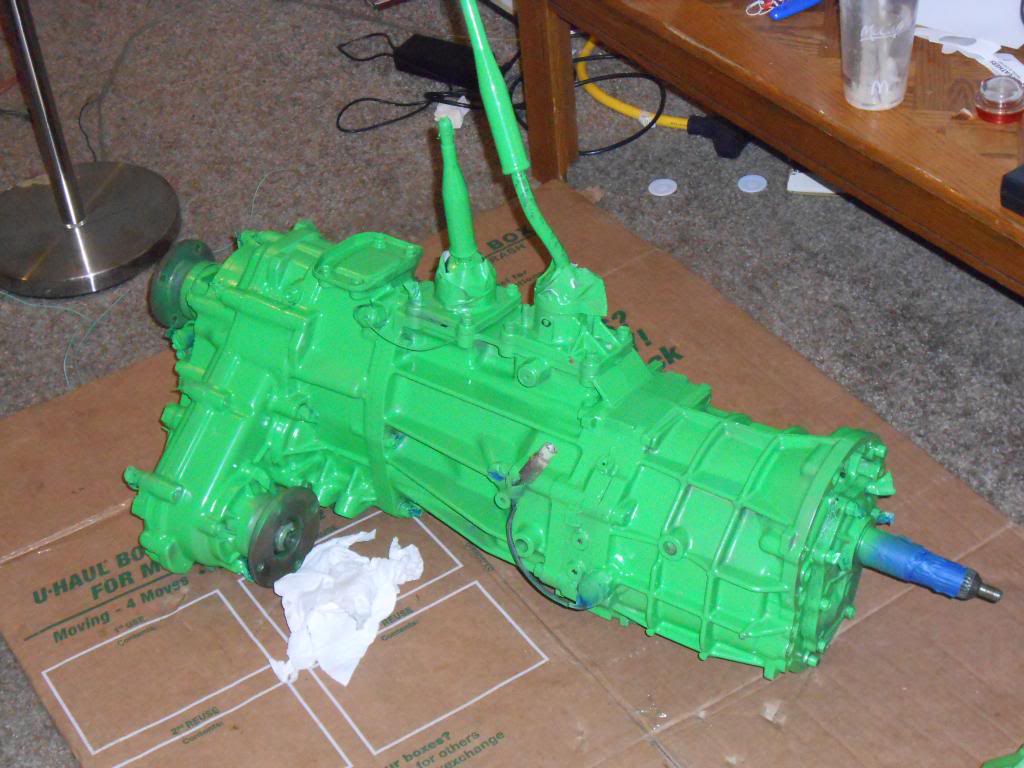
I am very impressed with VHT Engine enamel Grabber Green. and the transmission only has 1 1/2 coats because it was getting dark here and i couldn't finish. After it cures im gonna put on the other 2 coats and its gonna be the best looking thing under my truck
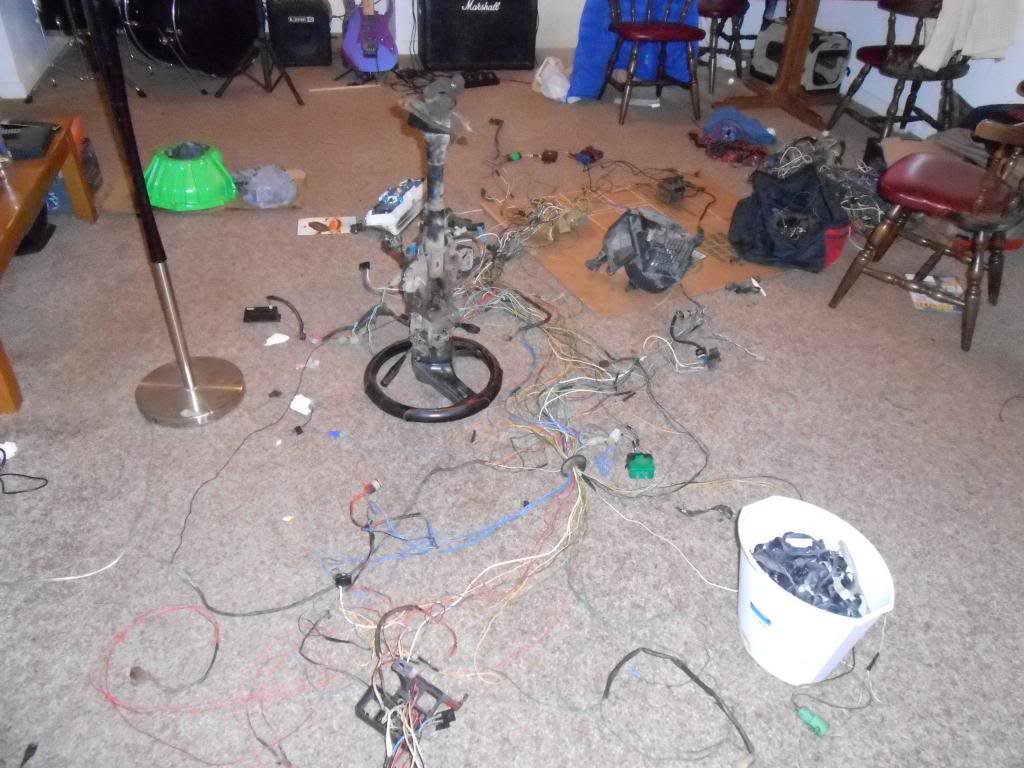
And of course all my wires in my truck spread out from the kitchen table to the front door. Now i have a general idea of whats needed where. Now to simplify
And that's all for tonight. ill try and keep more posted when i do things and take more pictures as i go. Gotta go to sleep now so goodnight YotaTech!
Anyway, lots of stuff has gotten done. Mostly scrubbing all the 1/4" of thick grease and clay/mud that was hardened on all around the transfer case and transmission off. Finally got everything painted today thanks to a break in weather
Bell housing has all 3 coats
It looks really nice. A lot nicer than i expected. I painted the metal dash support as well (With a rust converting paint cause it was all sorts of surface rusty) and its curing in the house along with everything else. YES my girlfriend is awesome and lets me cure painted parts in the living room
Now for the transmission-
---BEFORE---(Already after alot of scrubbing)
-----AFTER-----
I am very impressed with VHT Engine enamel Grabber Green. and the transmission only has 1 1/2 coats because it was getting dark here and i couldn't finish. After it cures im gonna put on the other 2 coats and its gonna be the best looking thing under my truck
And of course all my wires in my truck spread out from the kitchen table to the front door. Now i have a general idea of whats needed where. Now to simplify
And that's all for tonight. ill try and keep more posted when i do things and take more pictures as i go. Gotta go to sleep now so goodnight YotaTech!
02-02-2013, 03:53 PM
#13
Registered User
Thread Starter
Join Date: Jan 2013
Location: Roseburg, Oregon
Posts: 38
Likes: 0
Received 0 Likes
on
0 Posts
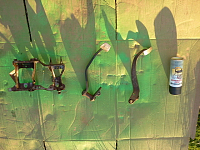
Sun is out again here today so.I though I might as well repaint my brake and clutch pedals. Im using Rustoleum rust reformer in black.
Here's prepped ready to paint
Here's prepped ready to paint

 02-15-2013, 06:48 AM
#15
Registered User
Thread Starter
Join Date: Jan 2013
Location: Roseburg, Oregon
Posts: 38
Likes: 0
Received 0 Likes
on
0 Posts
Okay so I know its been forever. But I finally got the new clutch on. The pilot bearing was being a pain but enough banging on a 8mm socket with wet paper pacing got her out. Putting the new one in seemed do easy after that lol.
But I have decided to reassemble and sell the orange pickup. I got a land cruiser and fell in love. So sadly I probly won't have this truck in a month.
I almost got the transmission bolted back on the engine. Its about an inch away from mating up and I just gotta wiggle it in at the right angle. But on Wednesday I also got my wisdom teeth pulled so I've been ordered by my dentist to not do any major lifting or auto work till Im healed up.
I can't wait to get back out there and finish getting it put back together.
03-02-2013, 11:32 PM
#16
Registered User
Thread Starter
Join Date: Jan 2013
Location: Roseburg, Oregon
Posts: 38
Likes: 0
Received 0 Likes
on
0 Posts
Okay. In the past week or so I have finished painting bed liner in the floor. Bought carpet for the truck. And put the wires back in. Bought new lead wires for battery terminals. Also got the desmogged harness back into the truck. Fixed the exhaust flange by getting a new bolt and got the transmission bolted in and the started.installed and wired in. Will crank but not turn over yet. Battery is close to dead so charging over night. And I painted the seats mounting brackets and prepped for install.
03-04-2013, 08:36 AM
#17
Registered User
Thread Starter
Join Date: Jan 2013
Location: Roseburg, Oregon
Posts: 38
Likes: 0
Received 0 Likes
on
0 Posts
Yesterday I got her to start. Found out that a bad ground on the igniter was the cause of no spark and when I fixed that, she fired up first crank.
Also bolted the drivers side seat in and got the carpet down in the back. I'll get some pictures today.
Also bolted the drivers side seat in and got the carpet down in the back. I'll get some pictures today.
03-07-2013, 05:10 PM
#18
Registered User
Thread Starter
Join Date: Jan 2013
Location: Roseburg, Oregon
Posts: 38
Likes: 0
Received 0 Likes
on
0 Posts
I almost had everything together enough to take a test drive. Then I got in and started her up. Pushed the brake and the pedal went to the floor. No pressure at all!!
Upon further inspection I found a break in the brake hard line above the gas tank near the frame.
Now I have to price this out and figure out this seemingly impossible task in the next few days.
Ideas? ?
Im gonna drop the gas tank and look further and I plan on replacing the entire line. Possibly in the whole truck including the front lines.
Input is always appreciated and thank you.


Thread
Thread Starter
Forum
Replies
Last Post
Road Bull
86-95 Trucks & 4Runners
23
10-10-2015 04:55 PM
Steezy96yota
86-95 Trucks & 4Runners (Build-Up Section)
1
07-06-2015 10:00 AM


