Chuck's 89 22RE 4Runner
 09-13-2019, 03:58 PM
#1
Chuck's 89 22RE 4Runner
Bought a 1st gen 4Runner with IFS for cheap. Changed all the fluids, got fresh spark plugs, brand new belts. Only lasted 2 months before it overheated. I found out why it was so cheap.
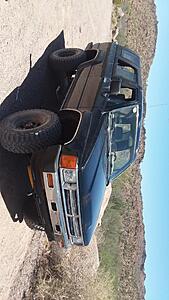
The interior is in great shape minus the dash and the lame plastic steering wheel.
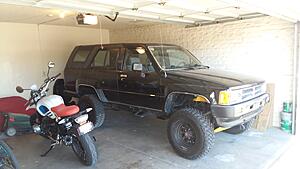
I will absolutely be getting rid of this cheap body lift. I have already removed the girly steps on the side.
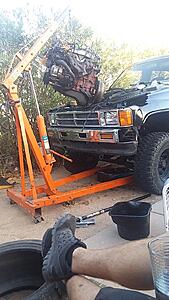
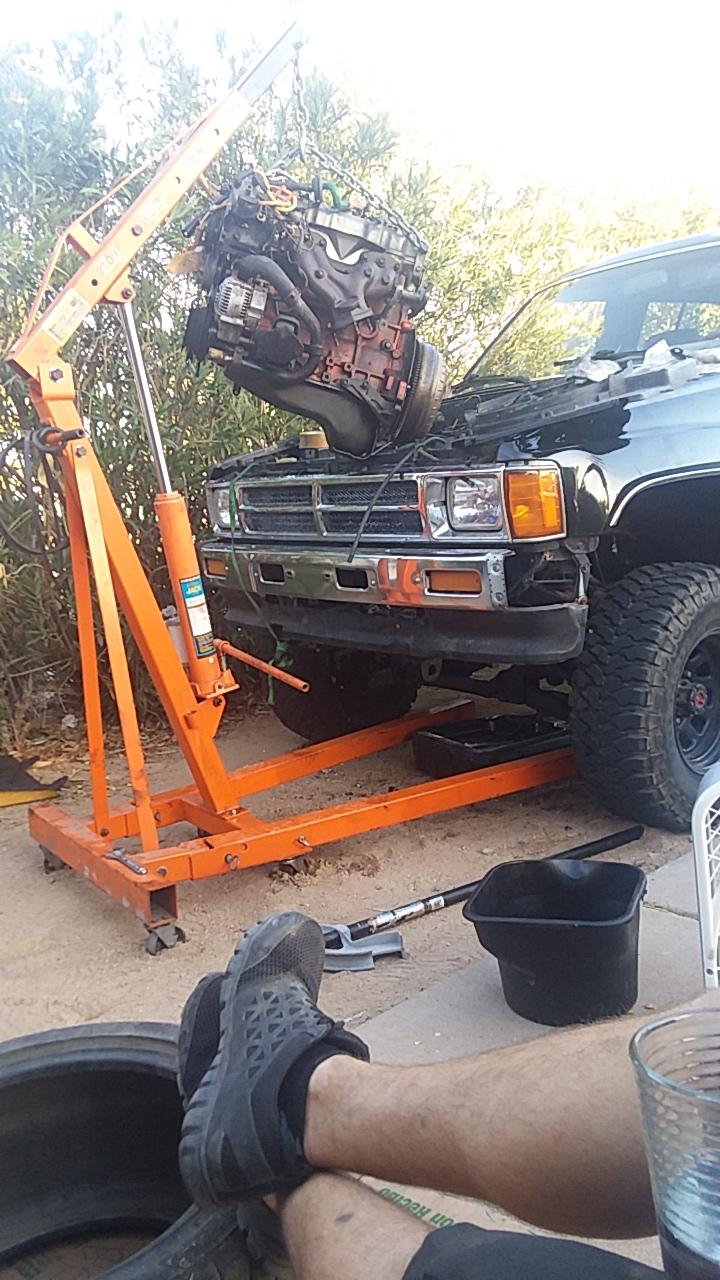
I don't recommend using a hoist in the dirt. Ended up hooking my roommates bike up via a tow strap to get it to move under the weight of the engine.
Did I mention this is my first rebuild? I recommend pulling the wiring harness from the ECU and pulling it with the engine. Fast forward to bringing it in to my shop.

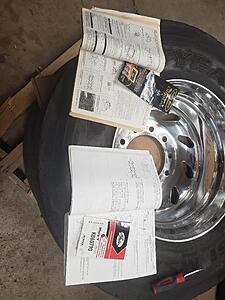
Don't forget your publications.
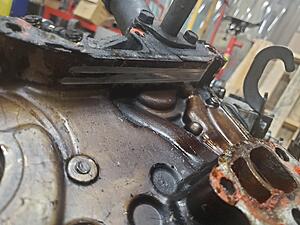
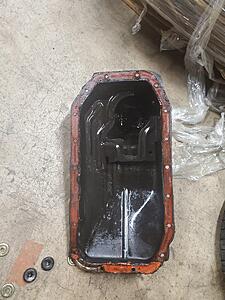
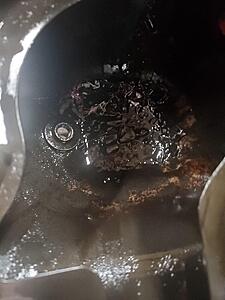
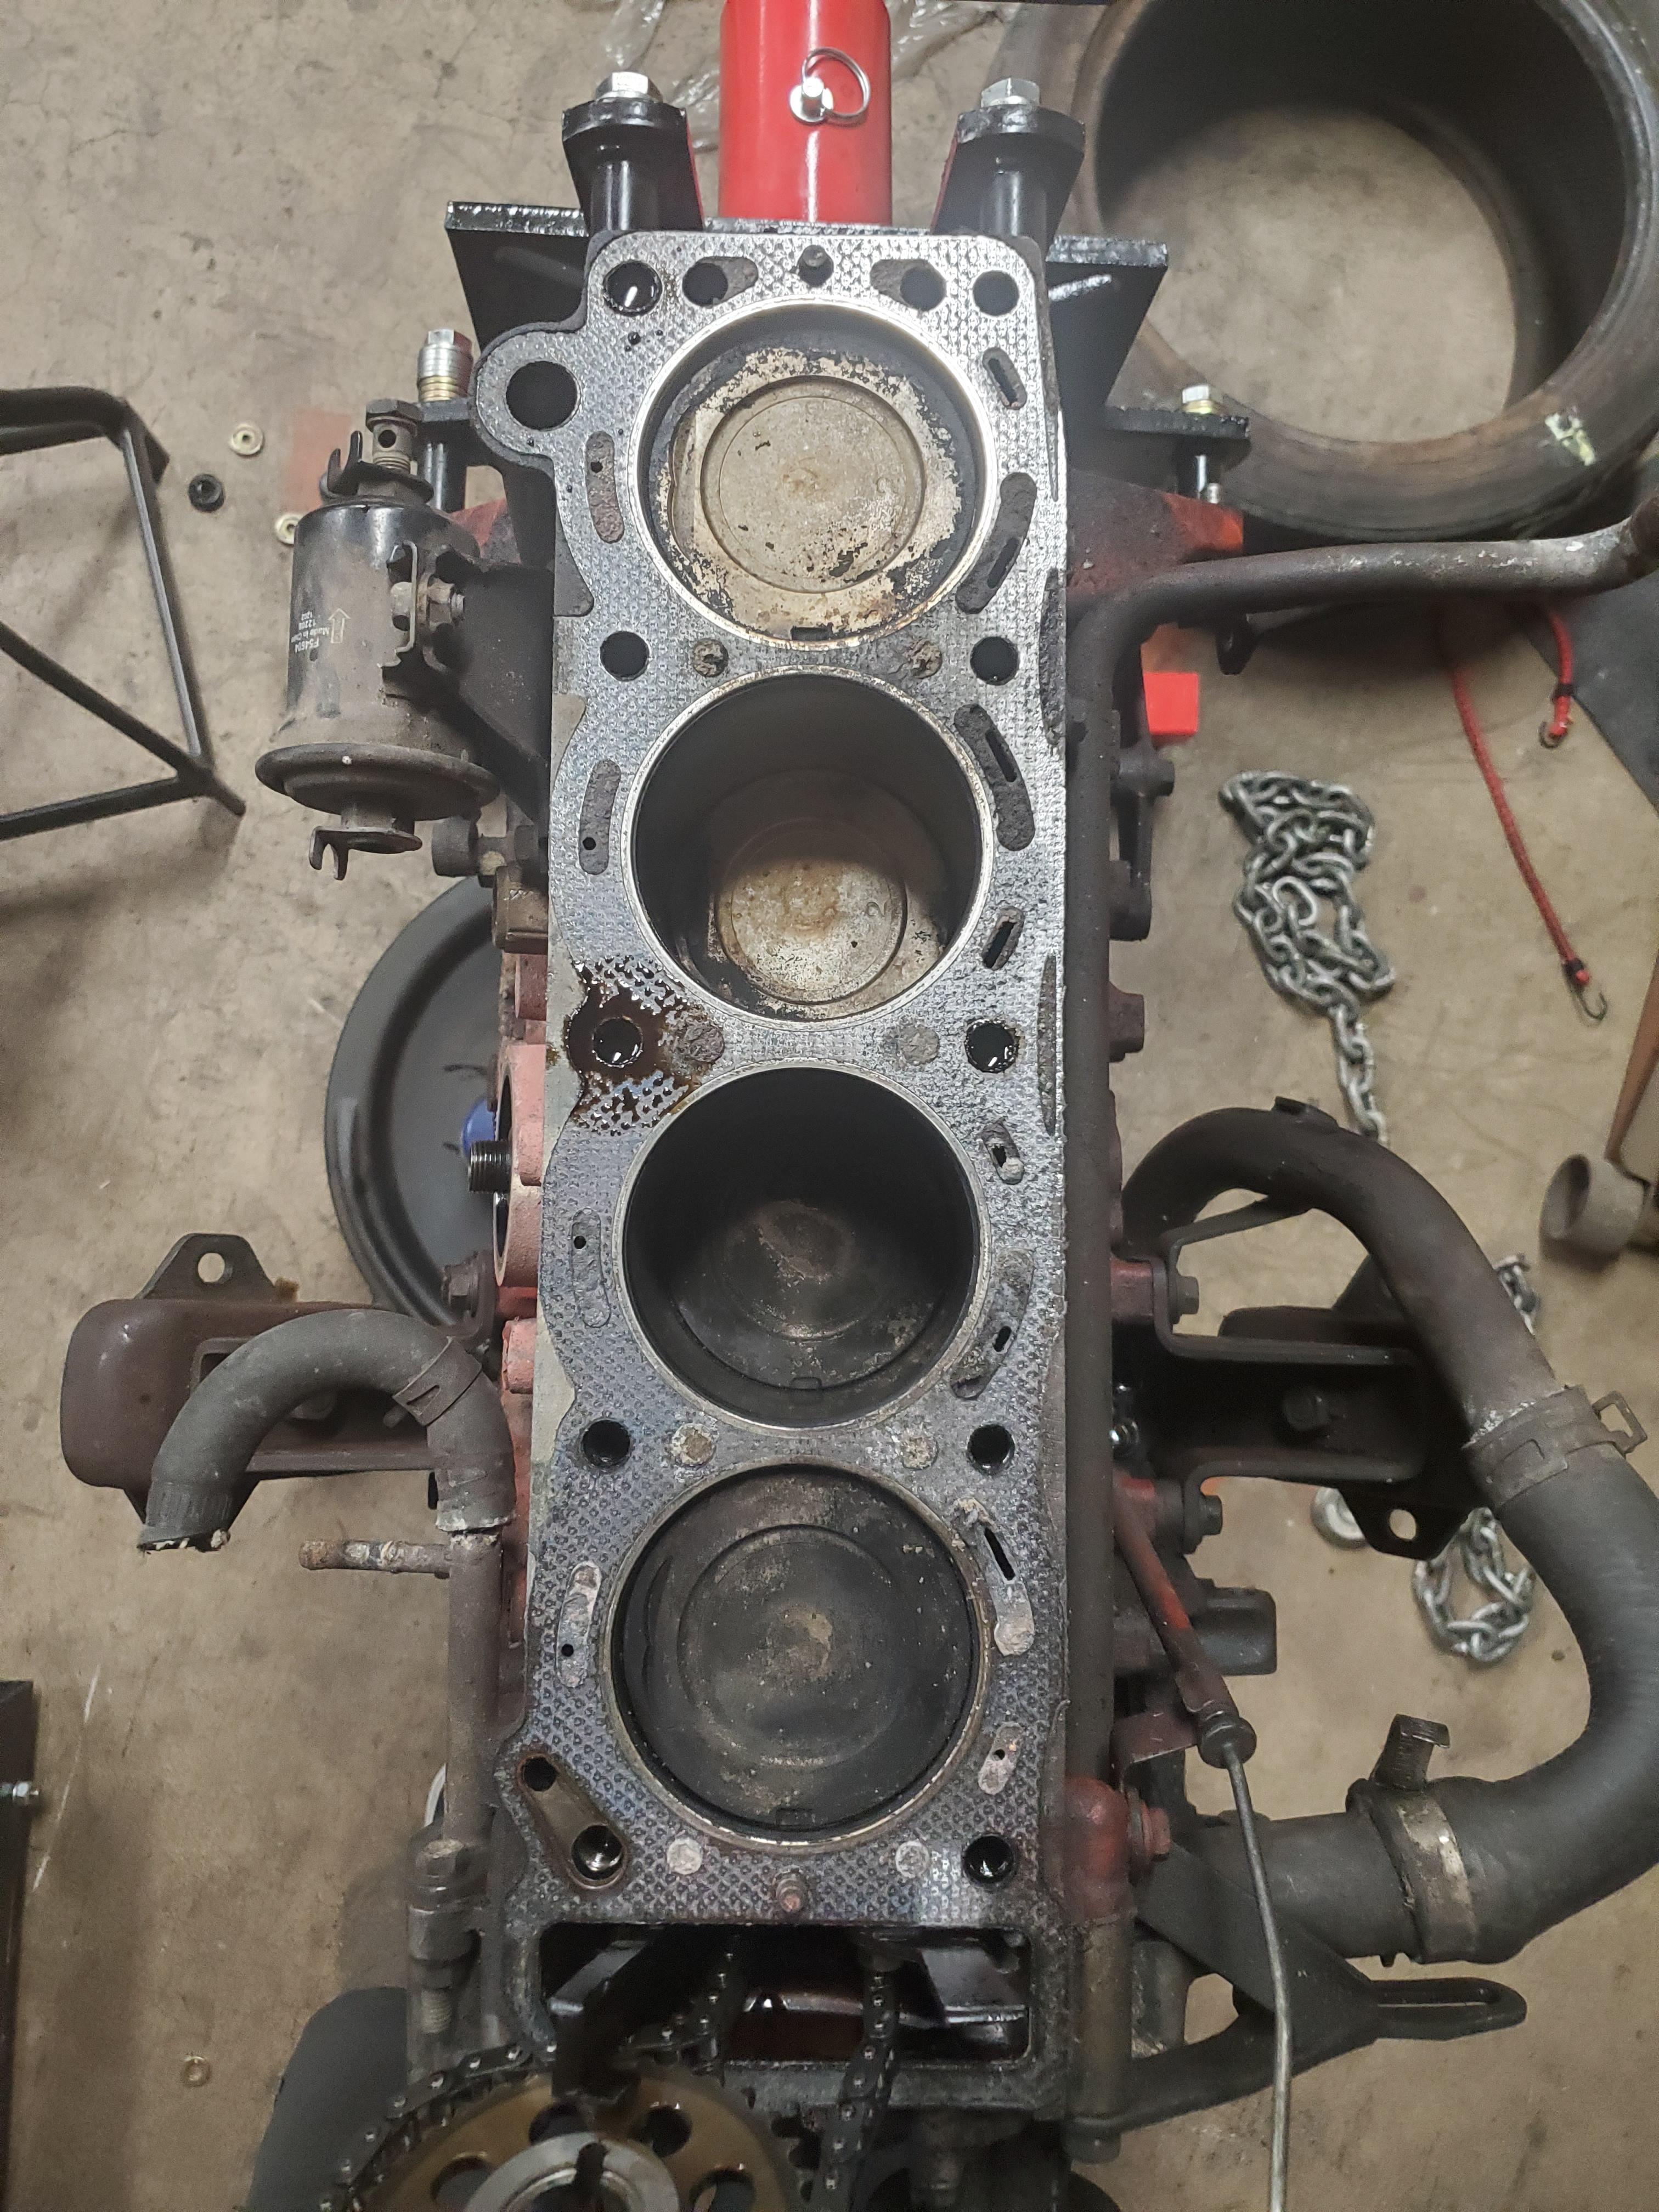
Check out the damage.

This is reusable, right?
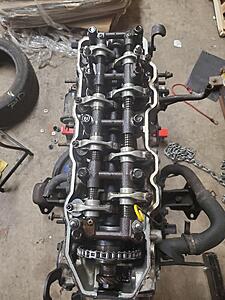
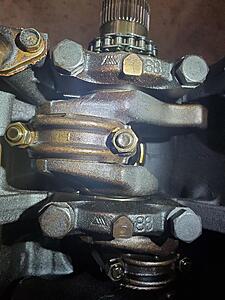
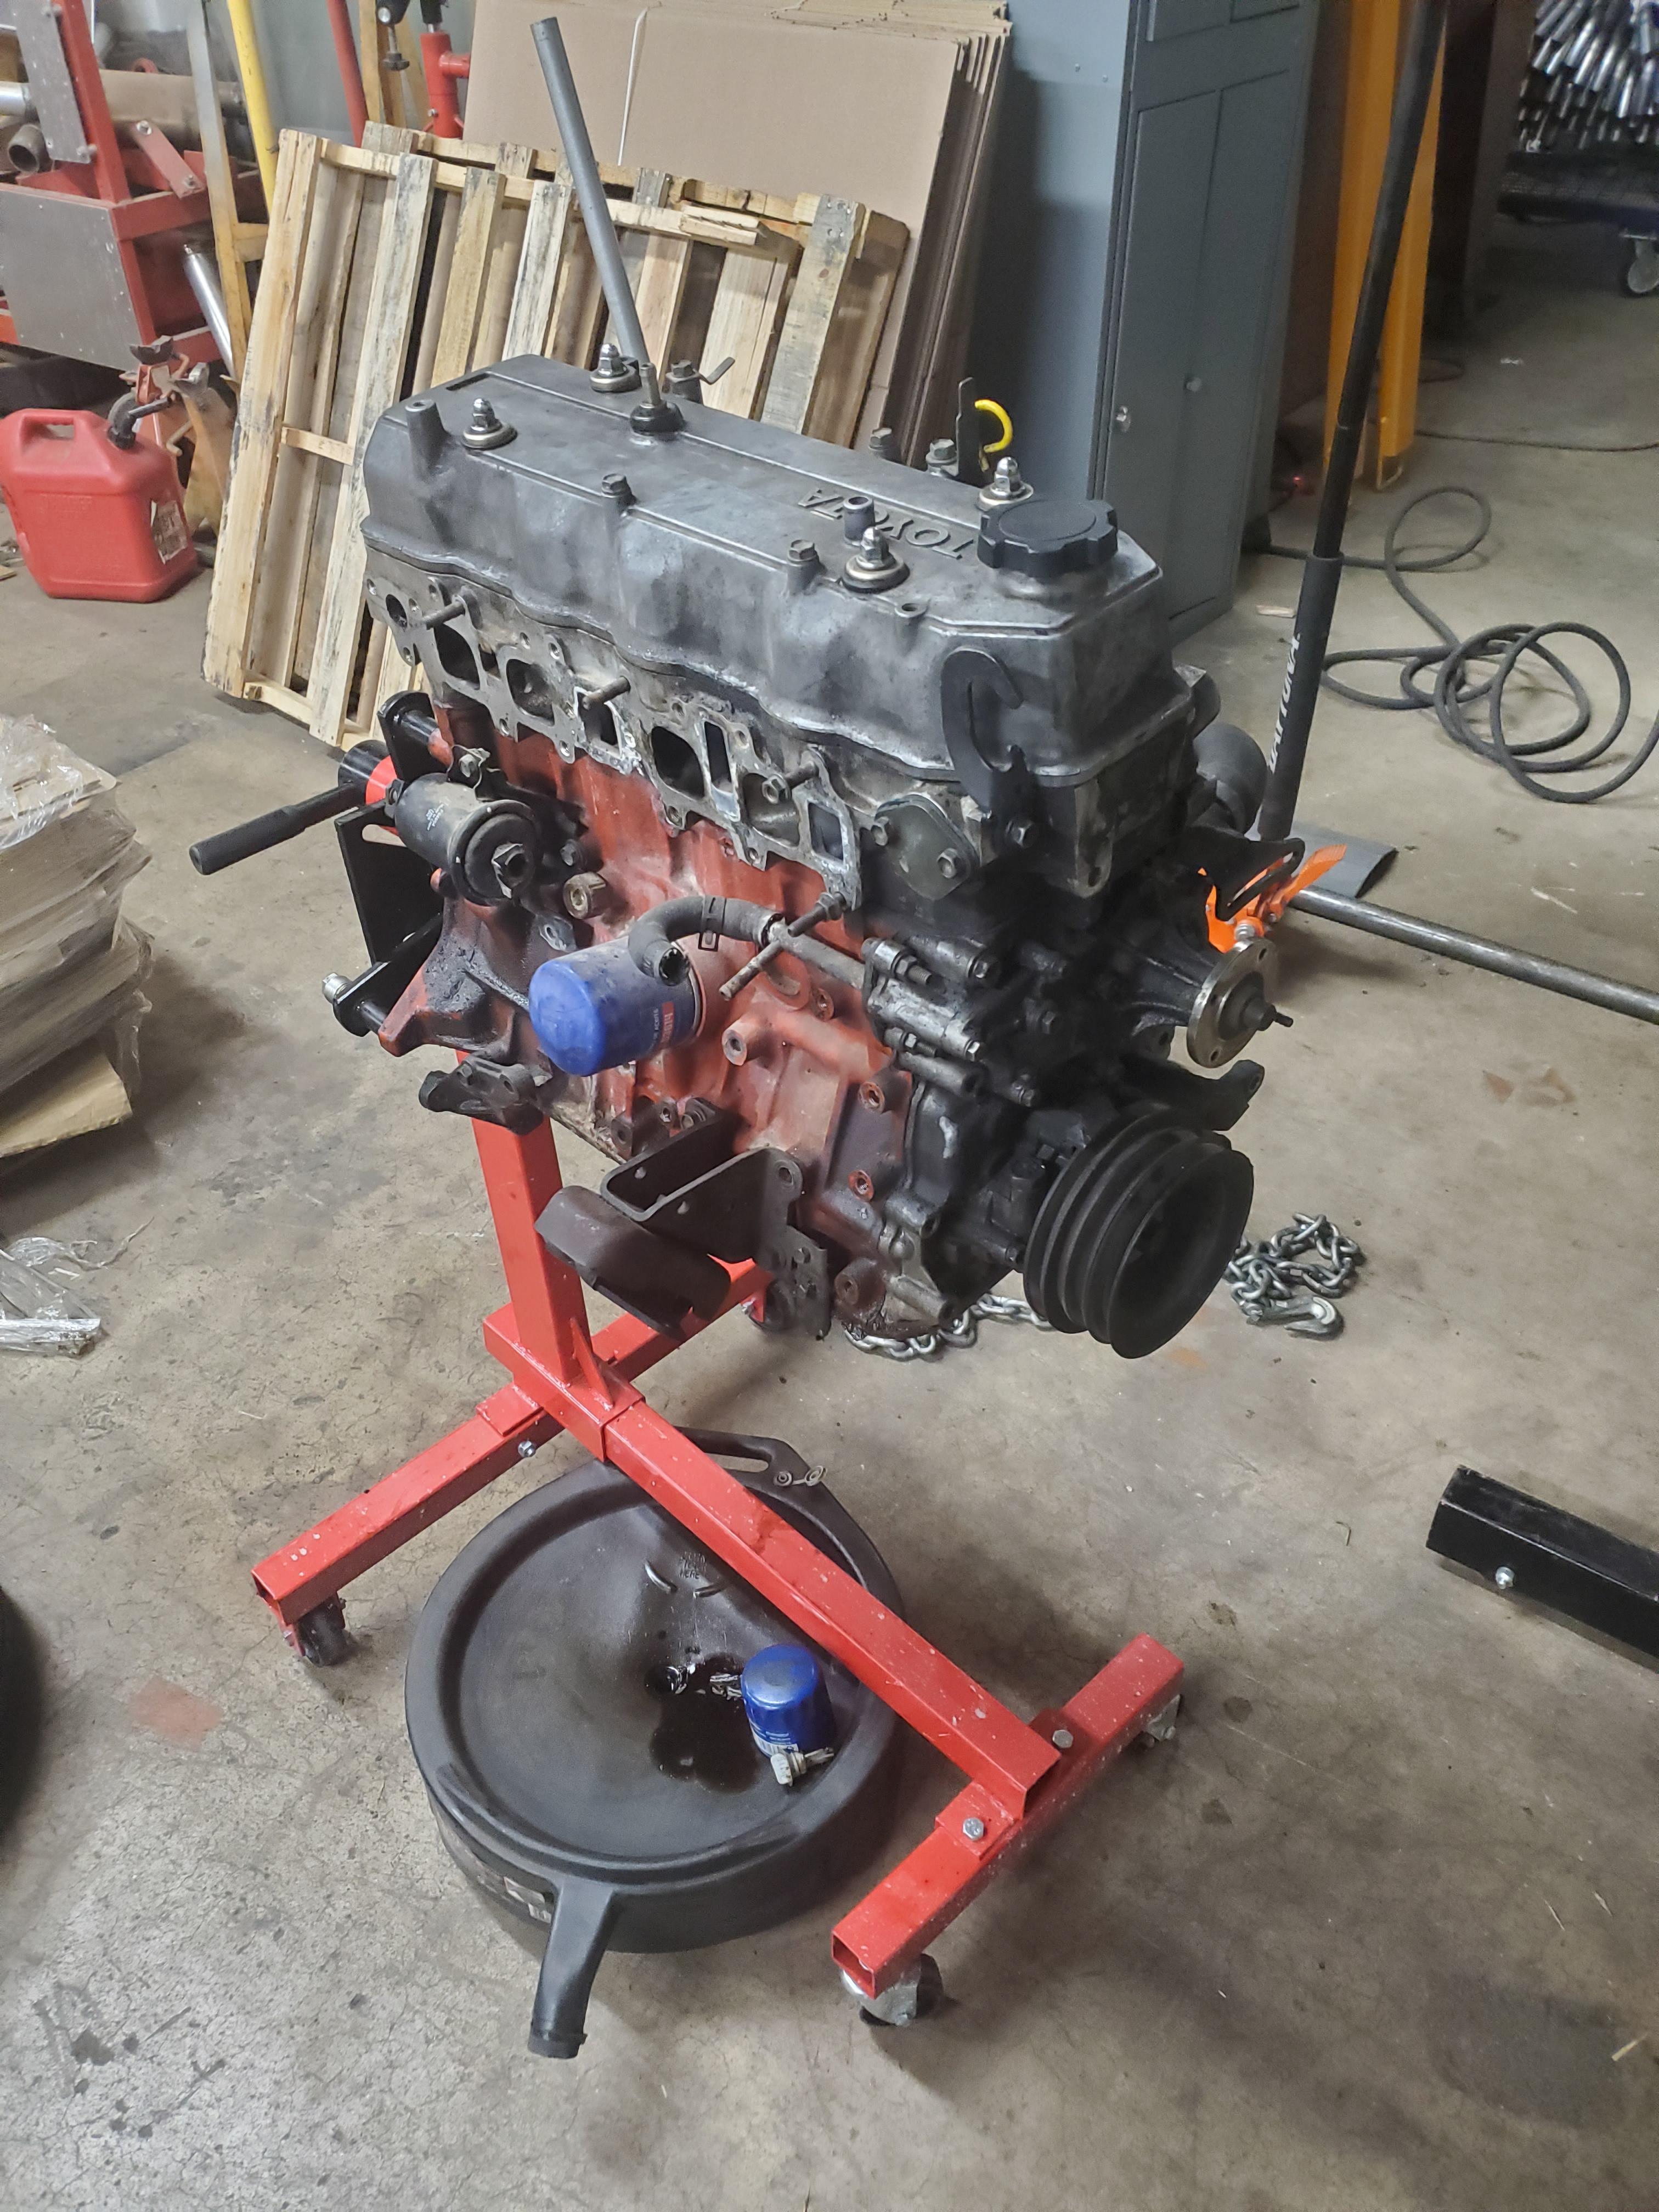
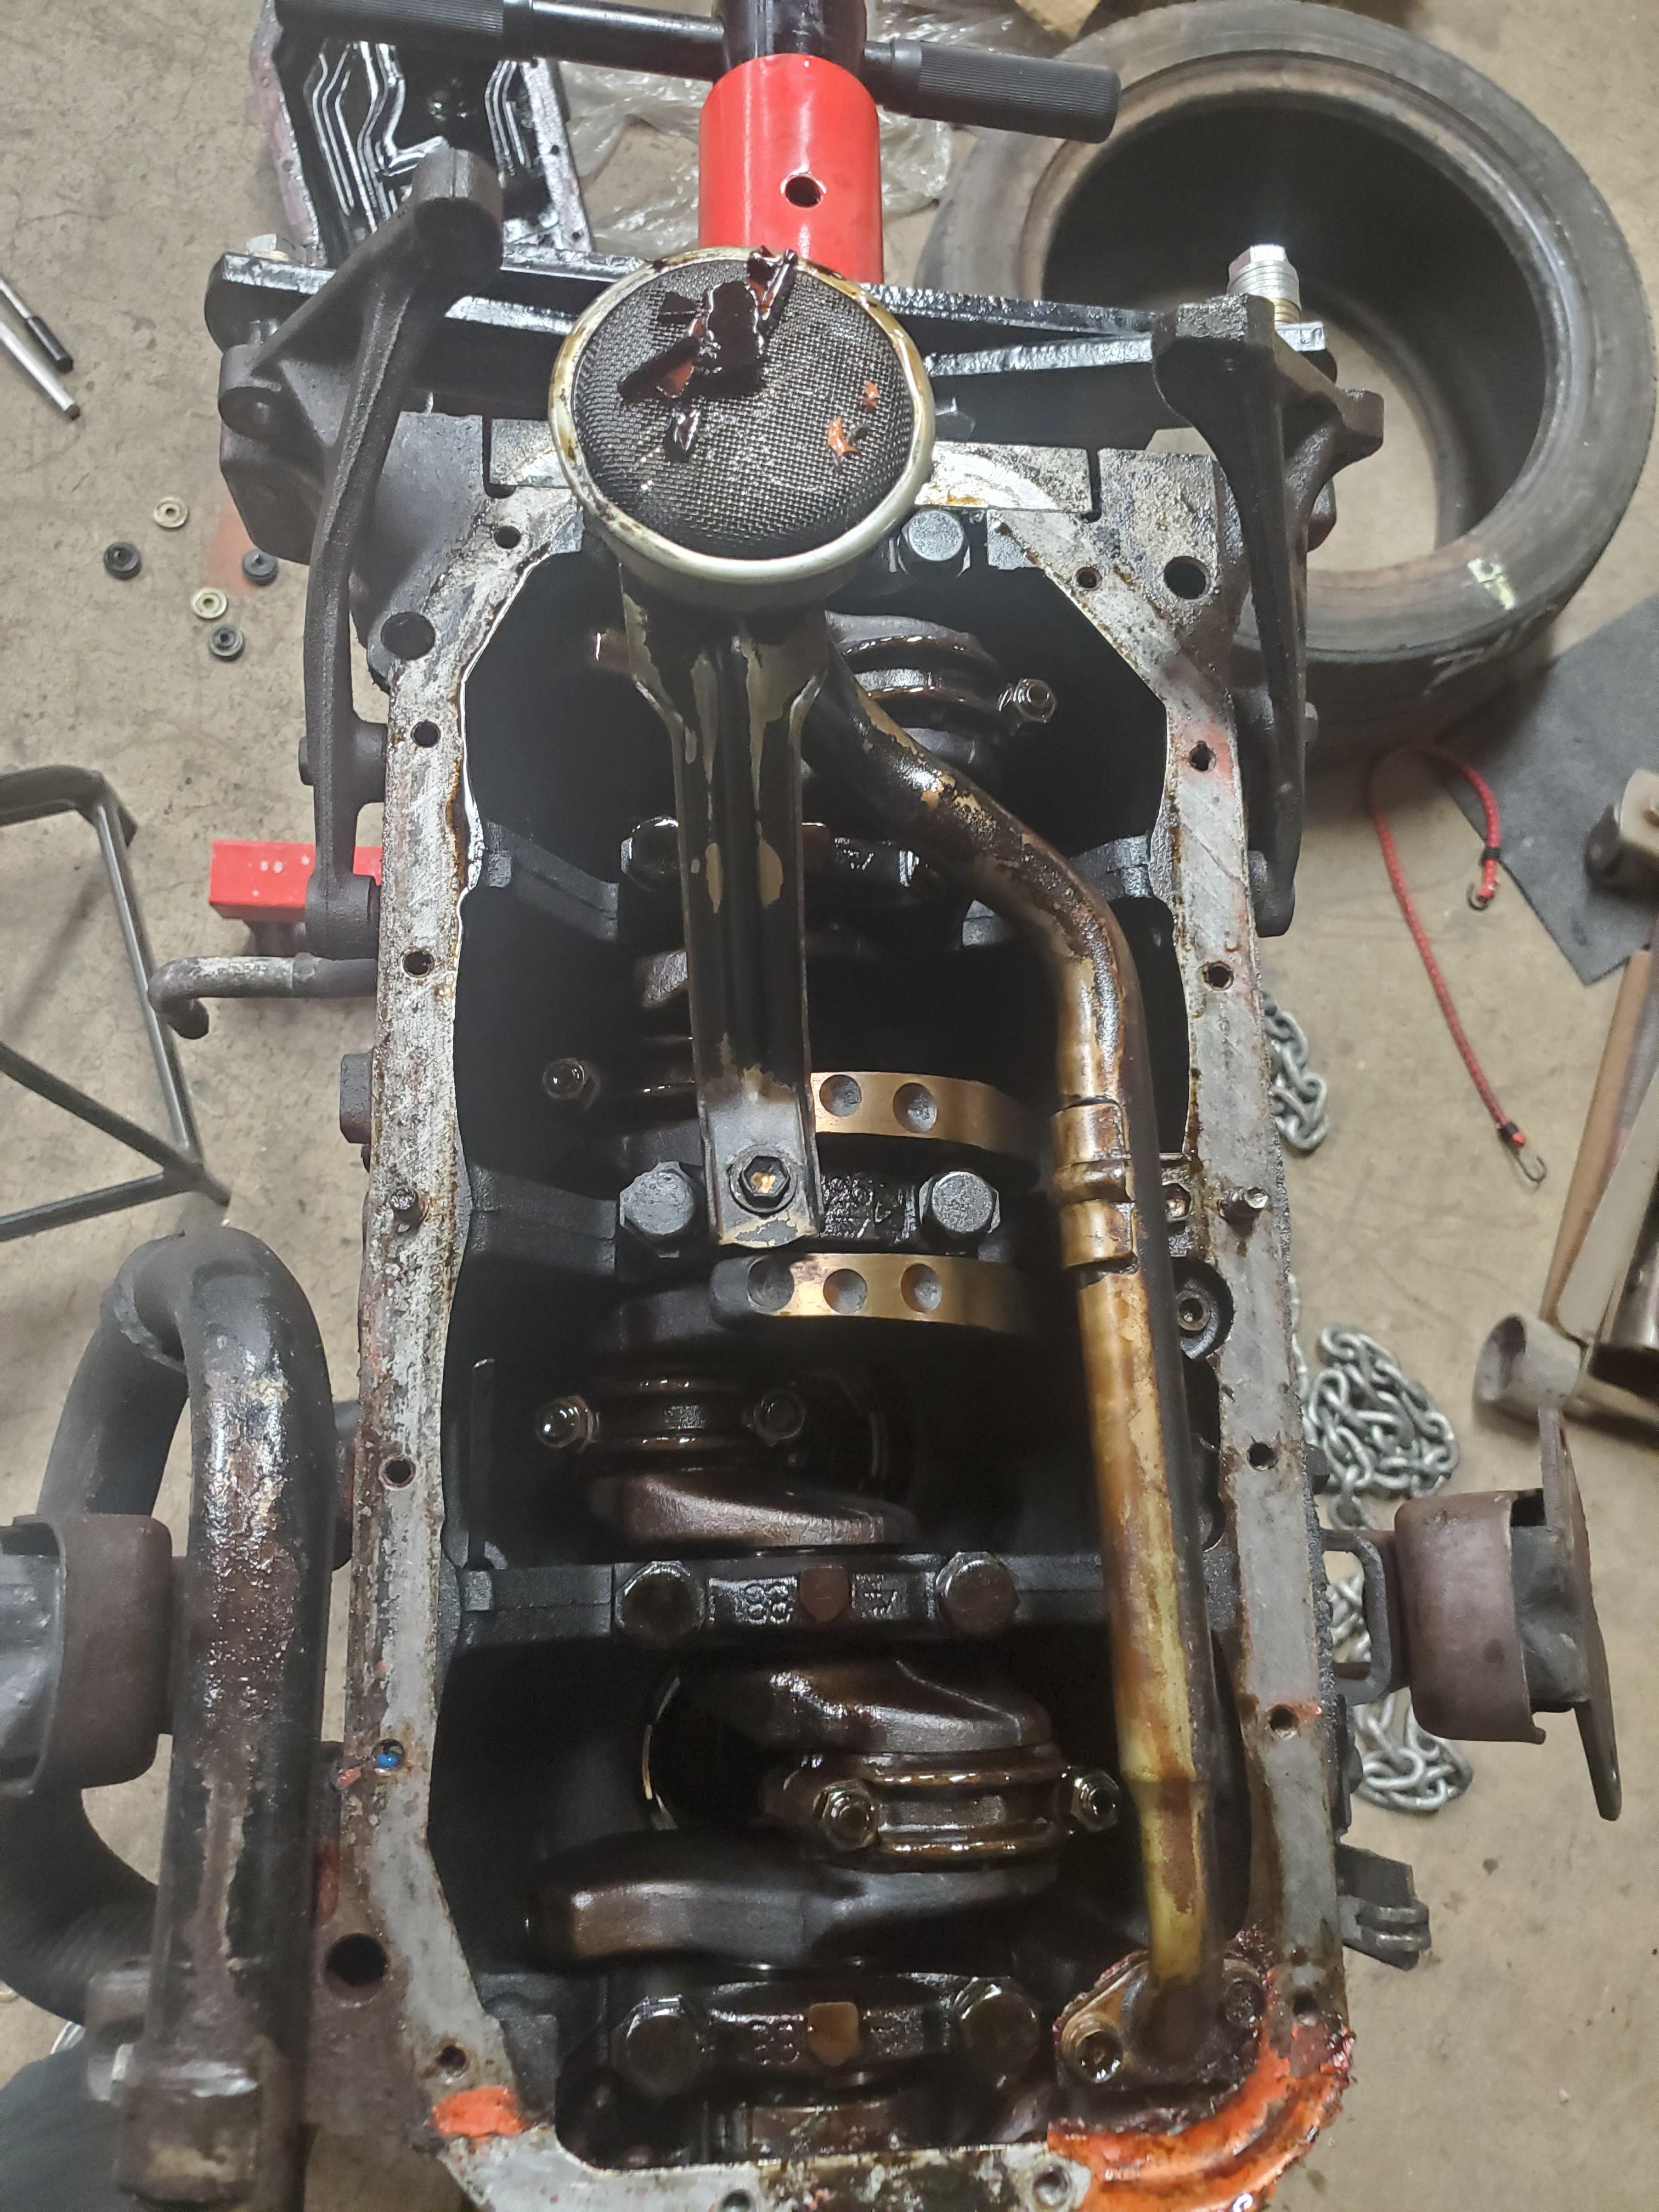
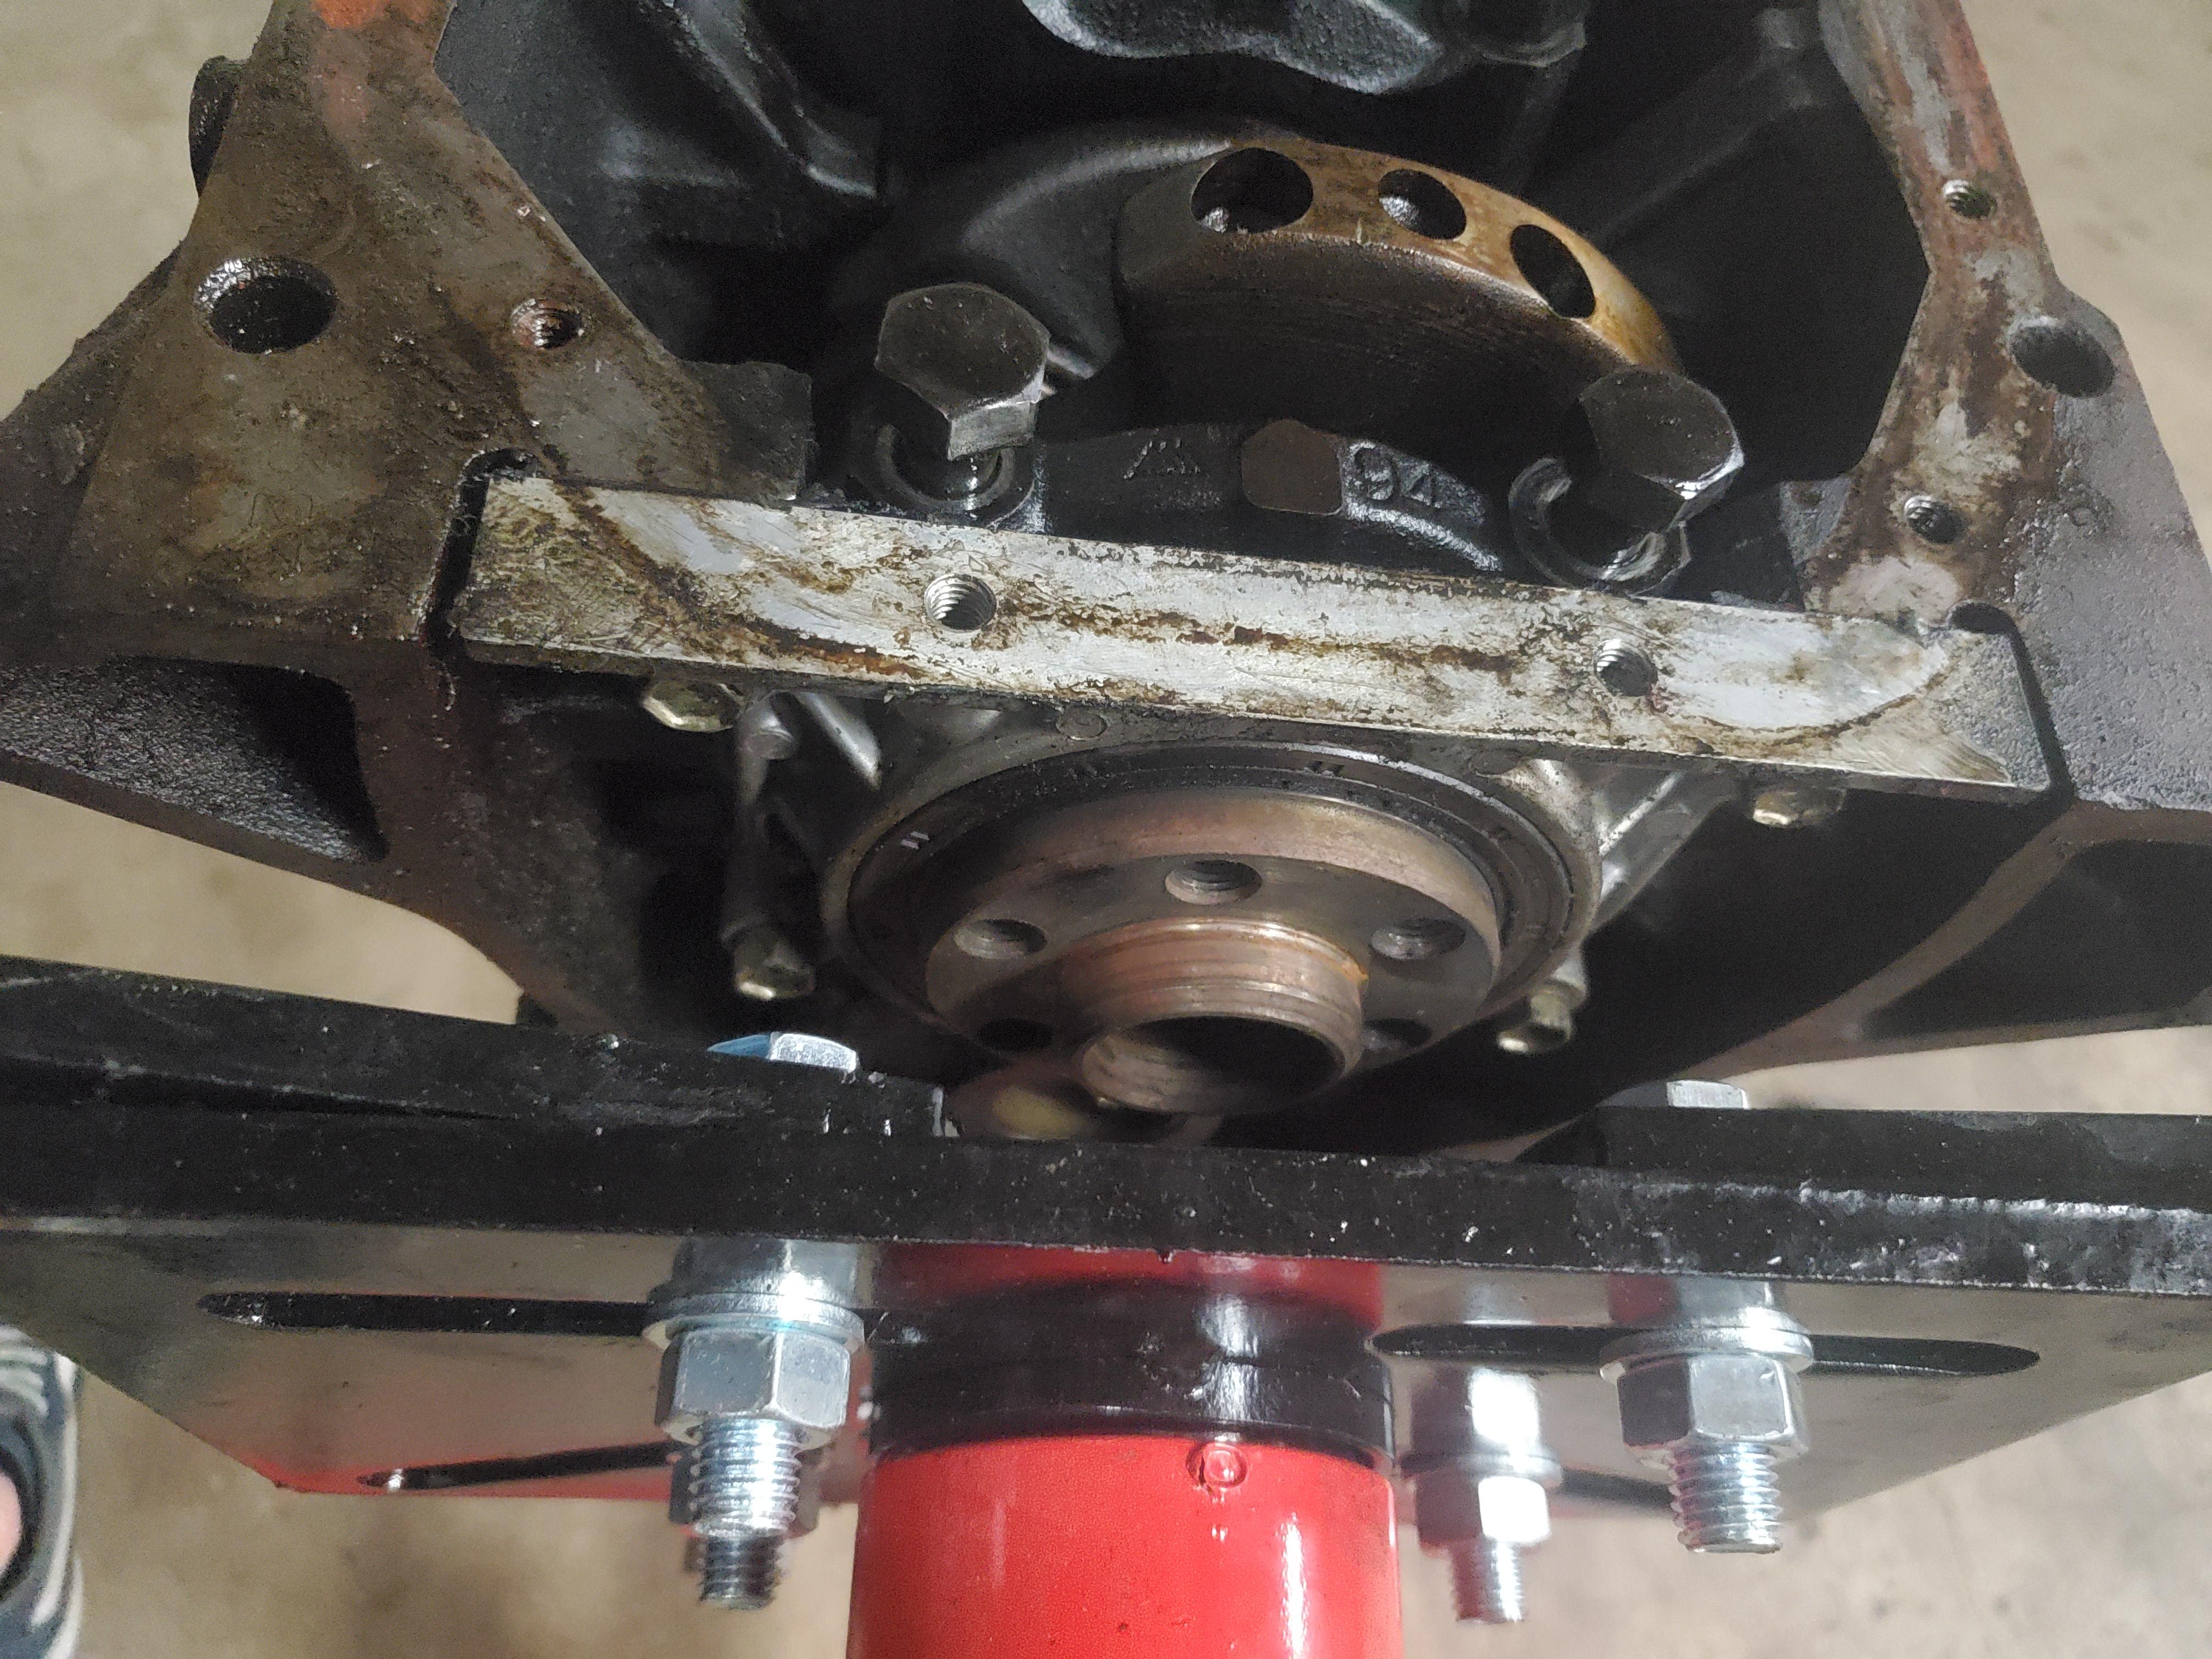
The low profile timing chain guide. Saves weight.
Unless you relocated it.
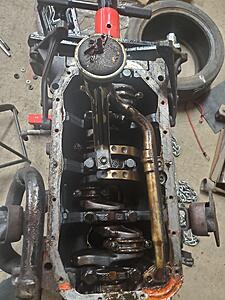
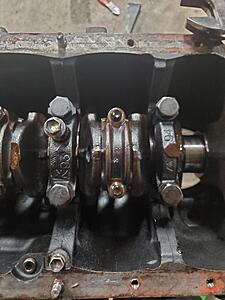
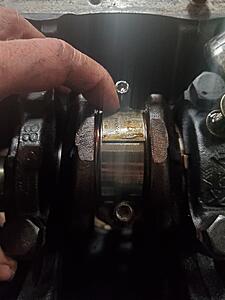
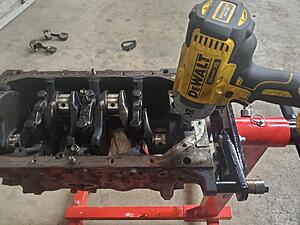
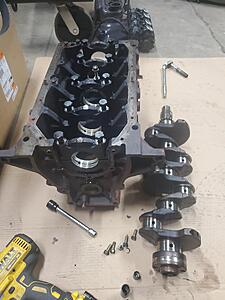
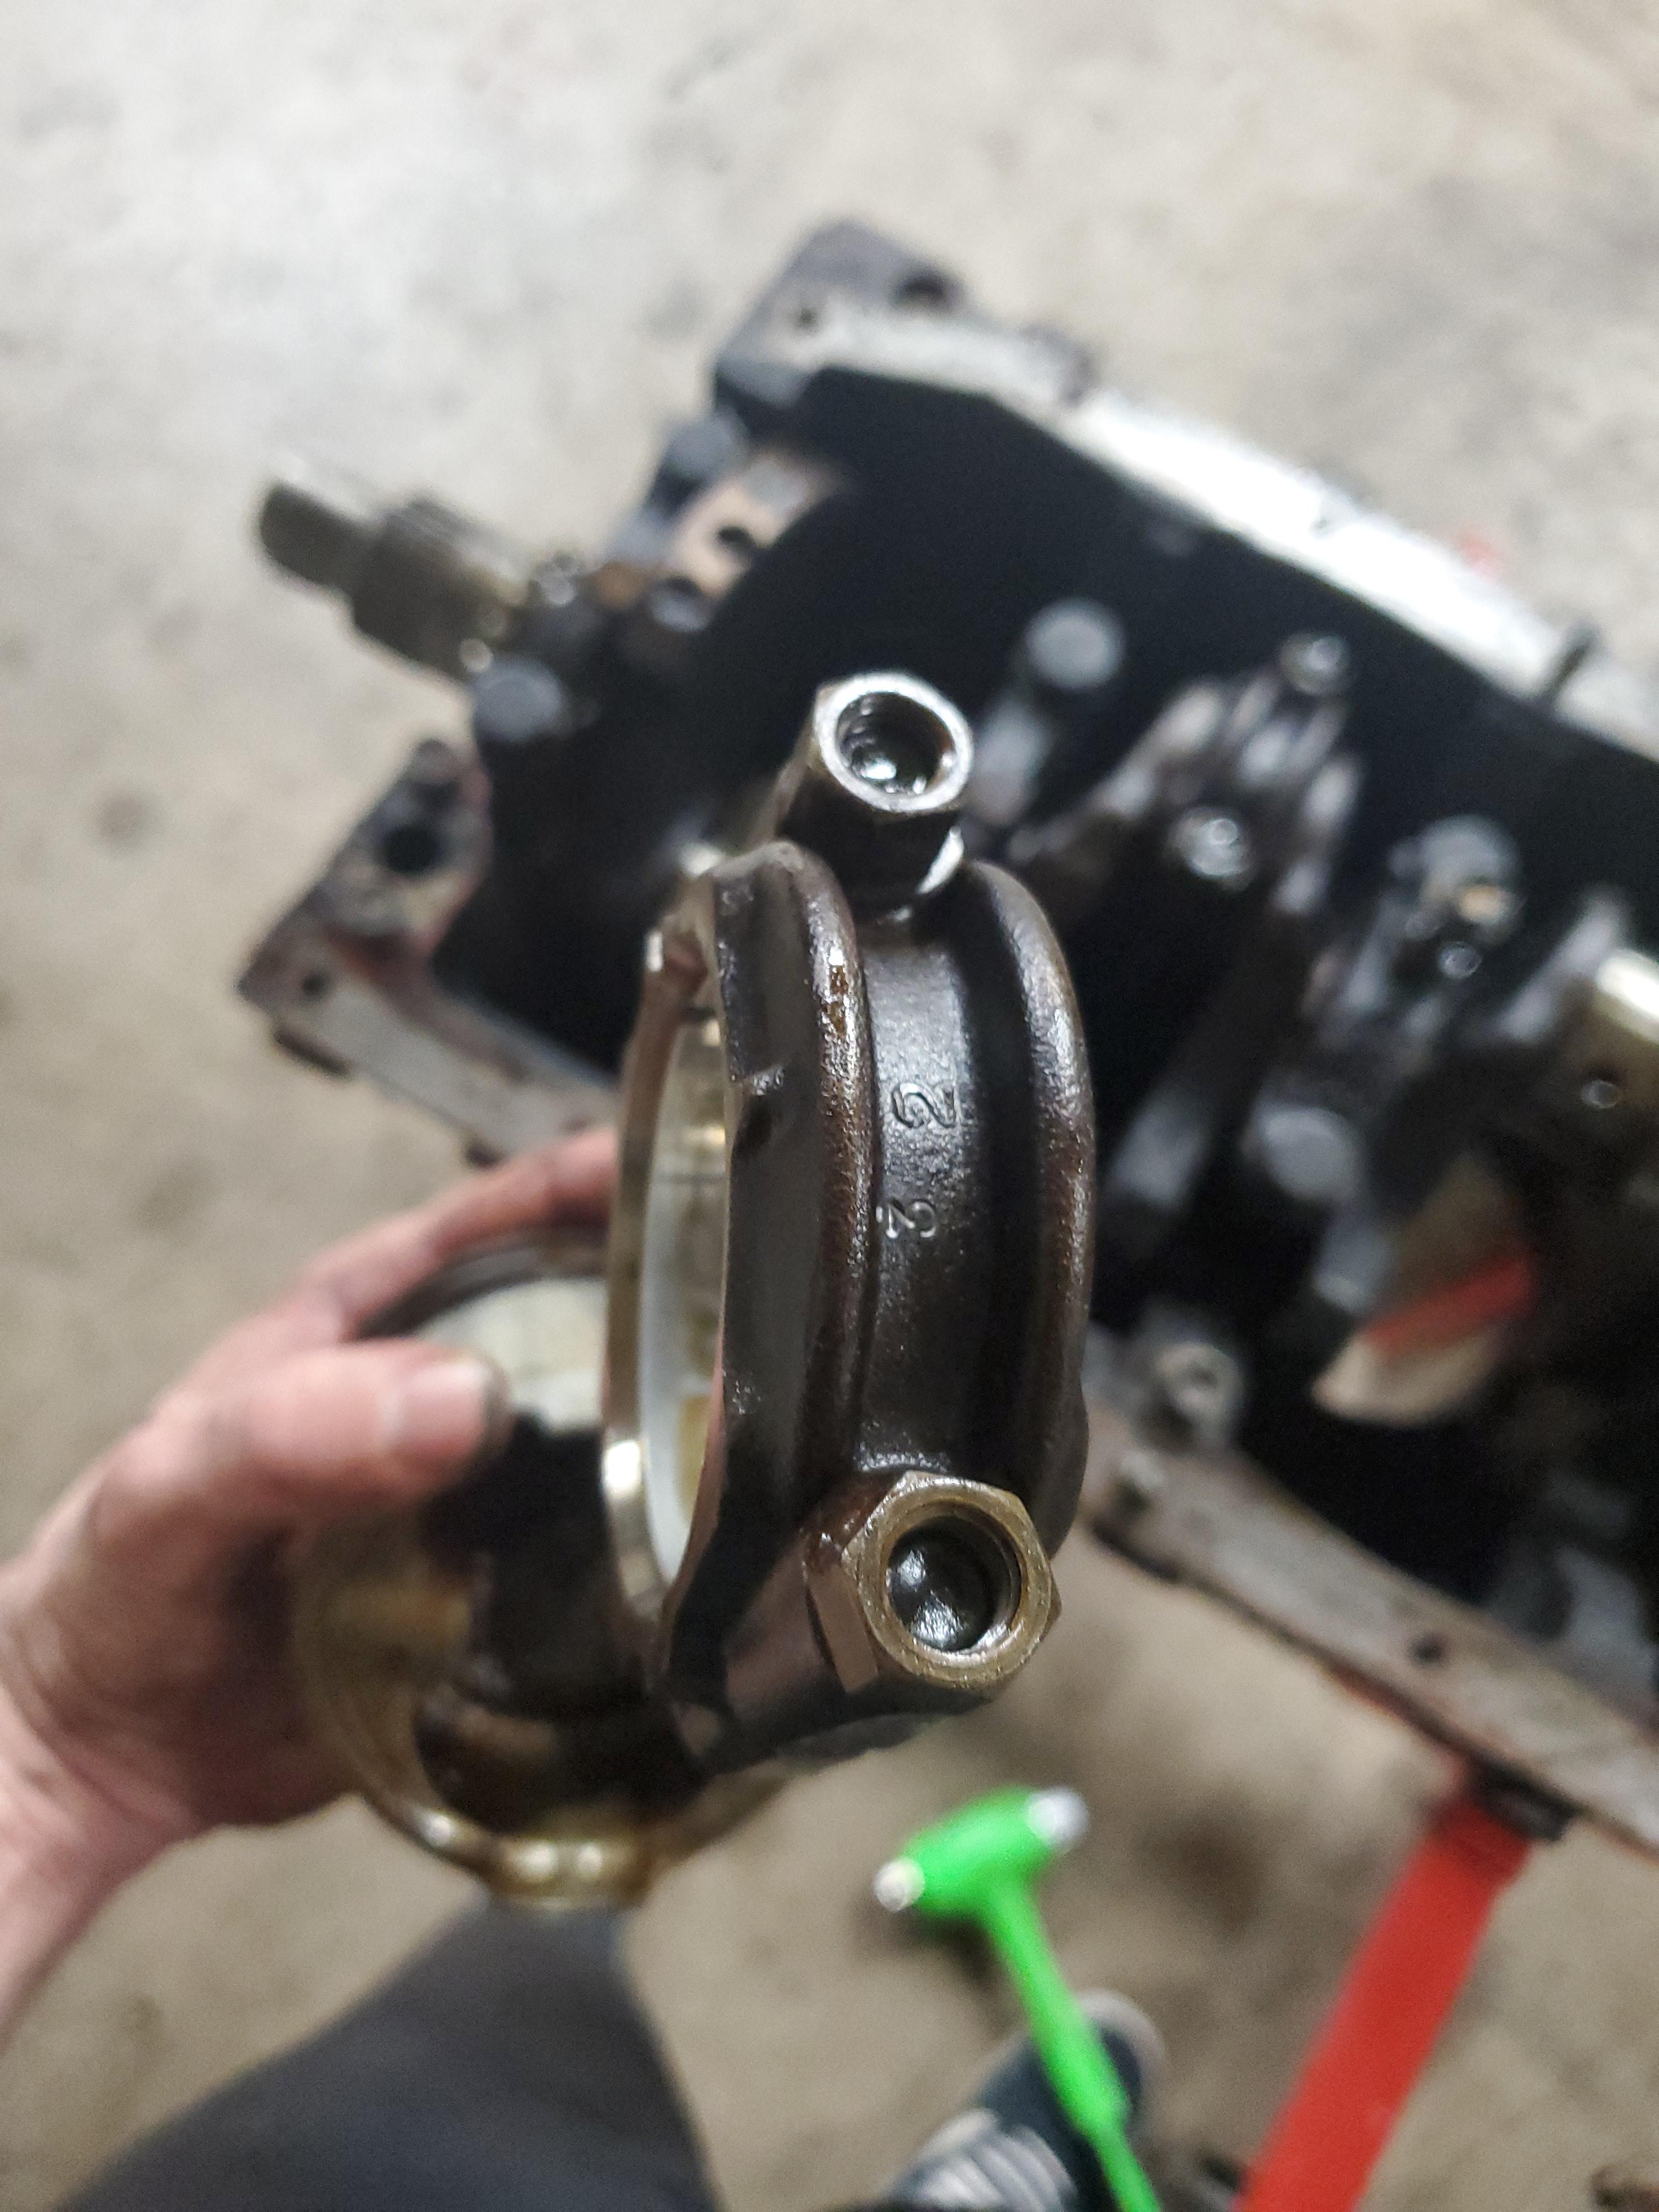
Number 1 Connecting Rod
Number 3? Looks like Previous Owner doesn't know how to count. 1-3-2-1 is my pattern from front to rear.

I want to make sure I put everything back in the same spot If anything is reusable. Almost forgot to take a picture of what I did, already had one piston out.
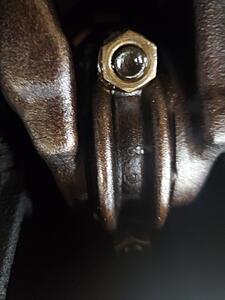
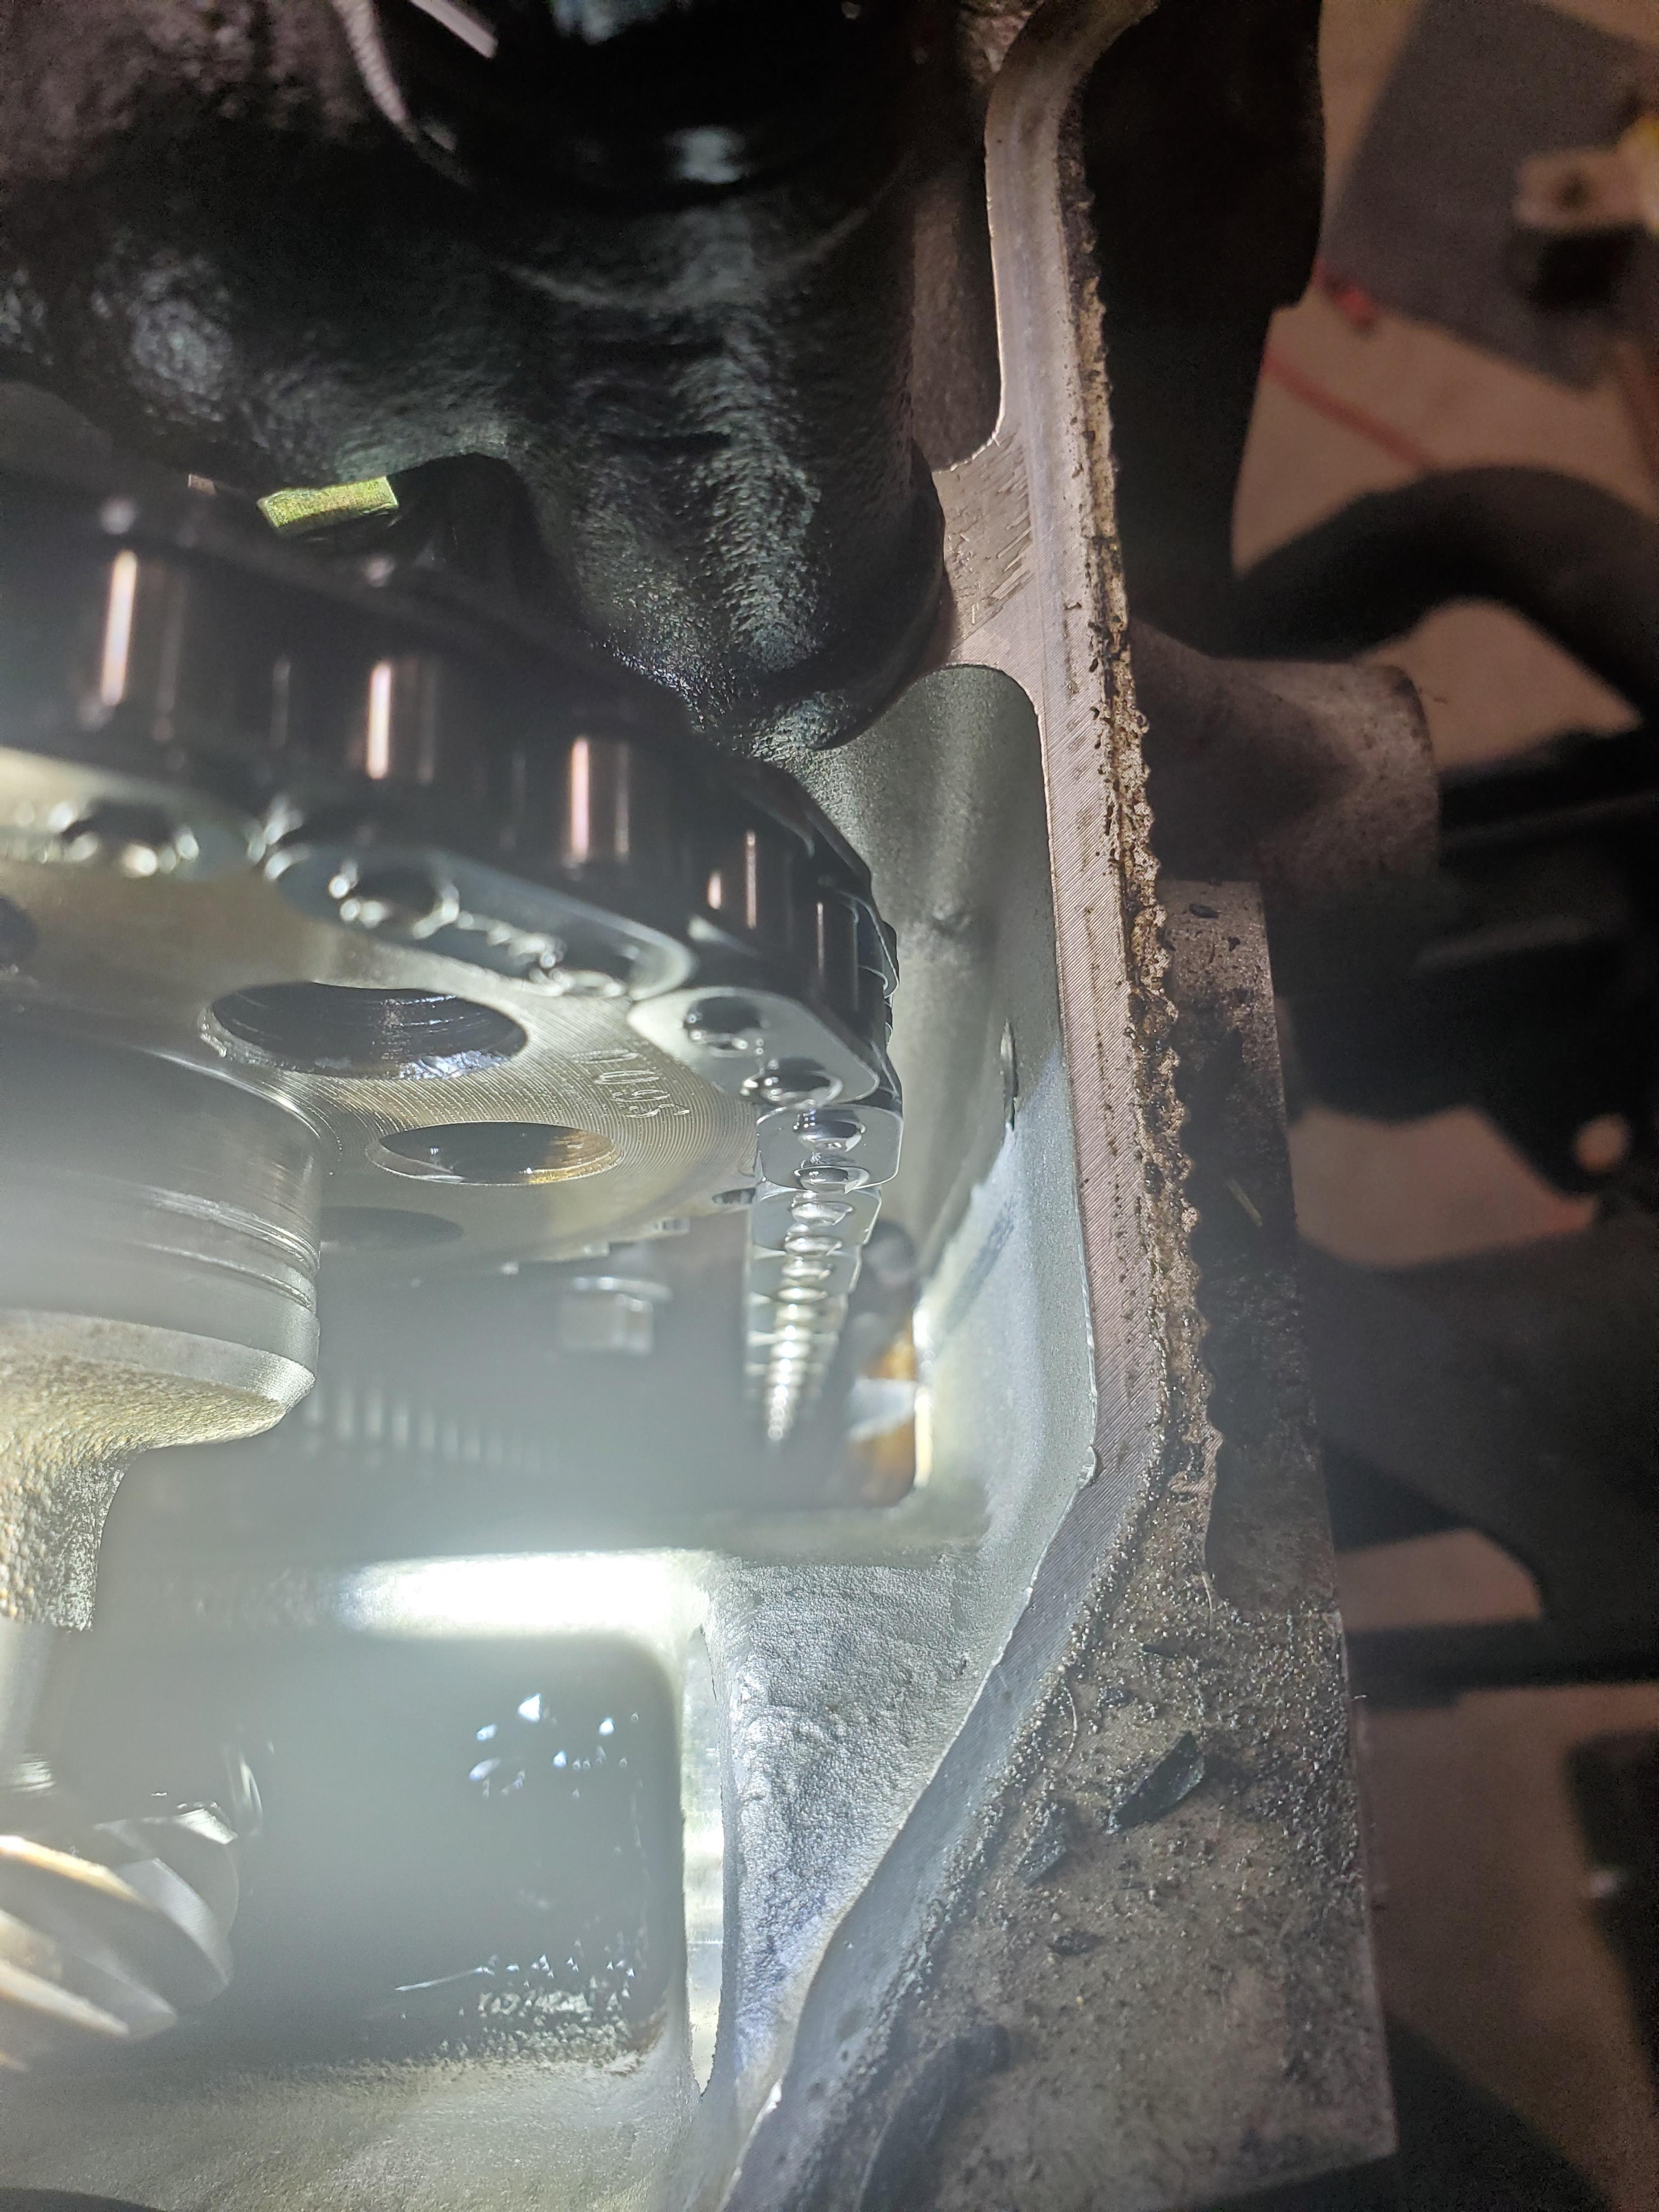
Bumped the bolt with a rubber mallet.
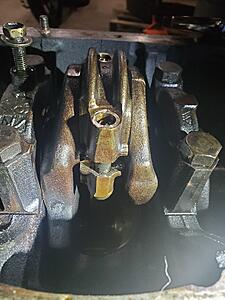

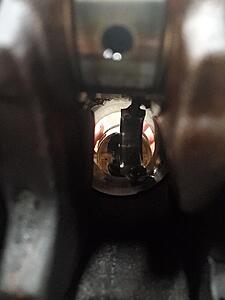
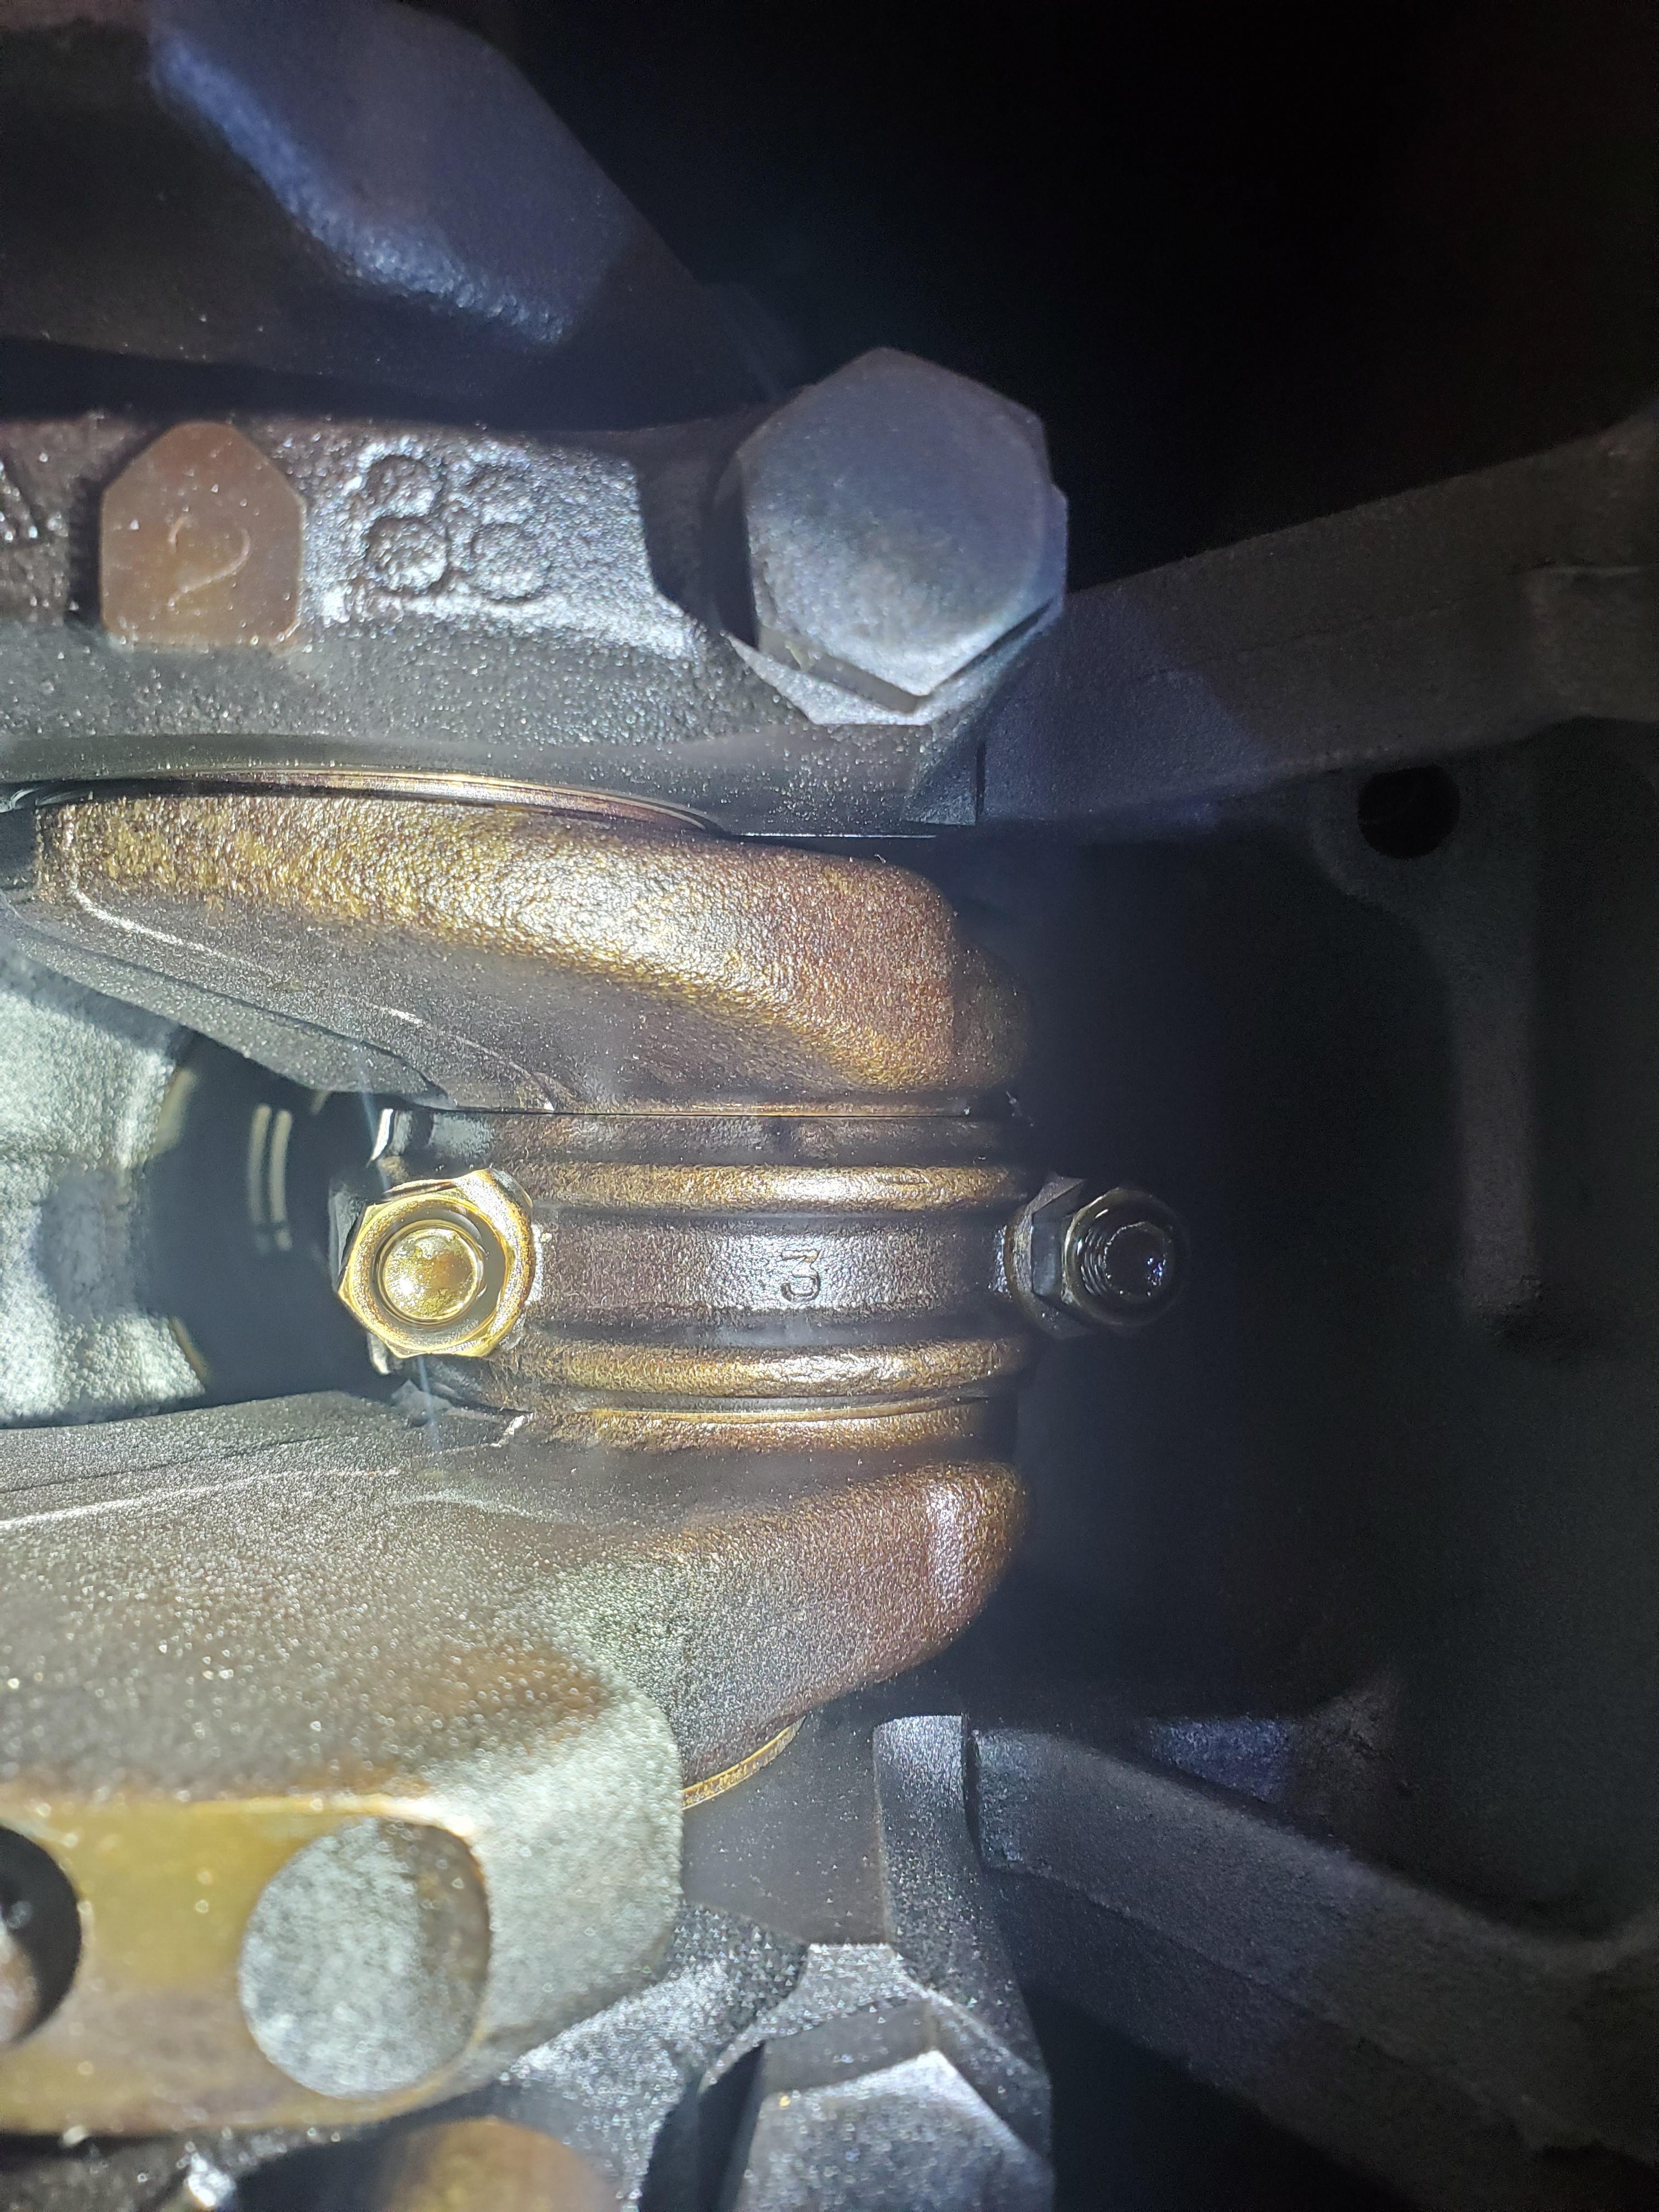
This bearing almost slipped away and fell. All the other bearings hung onto their respective connecting rods. Try not to drop anything as you may be able to reuse them.
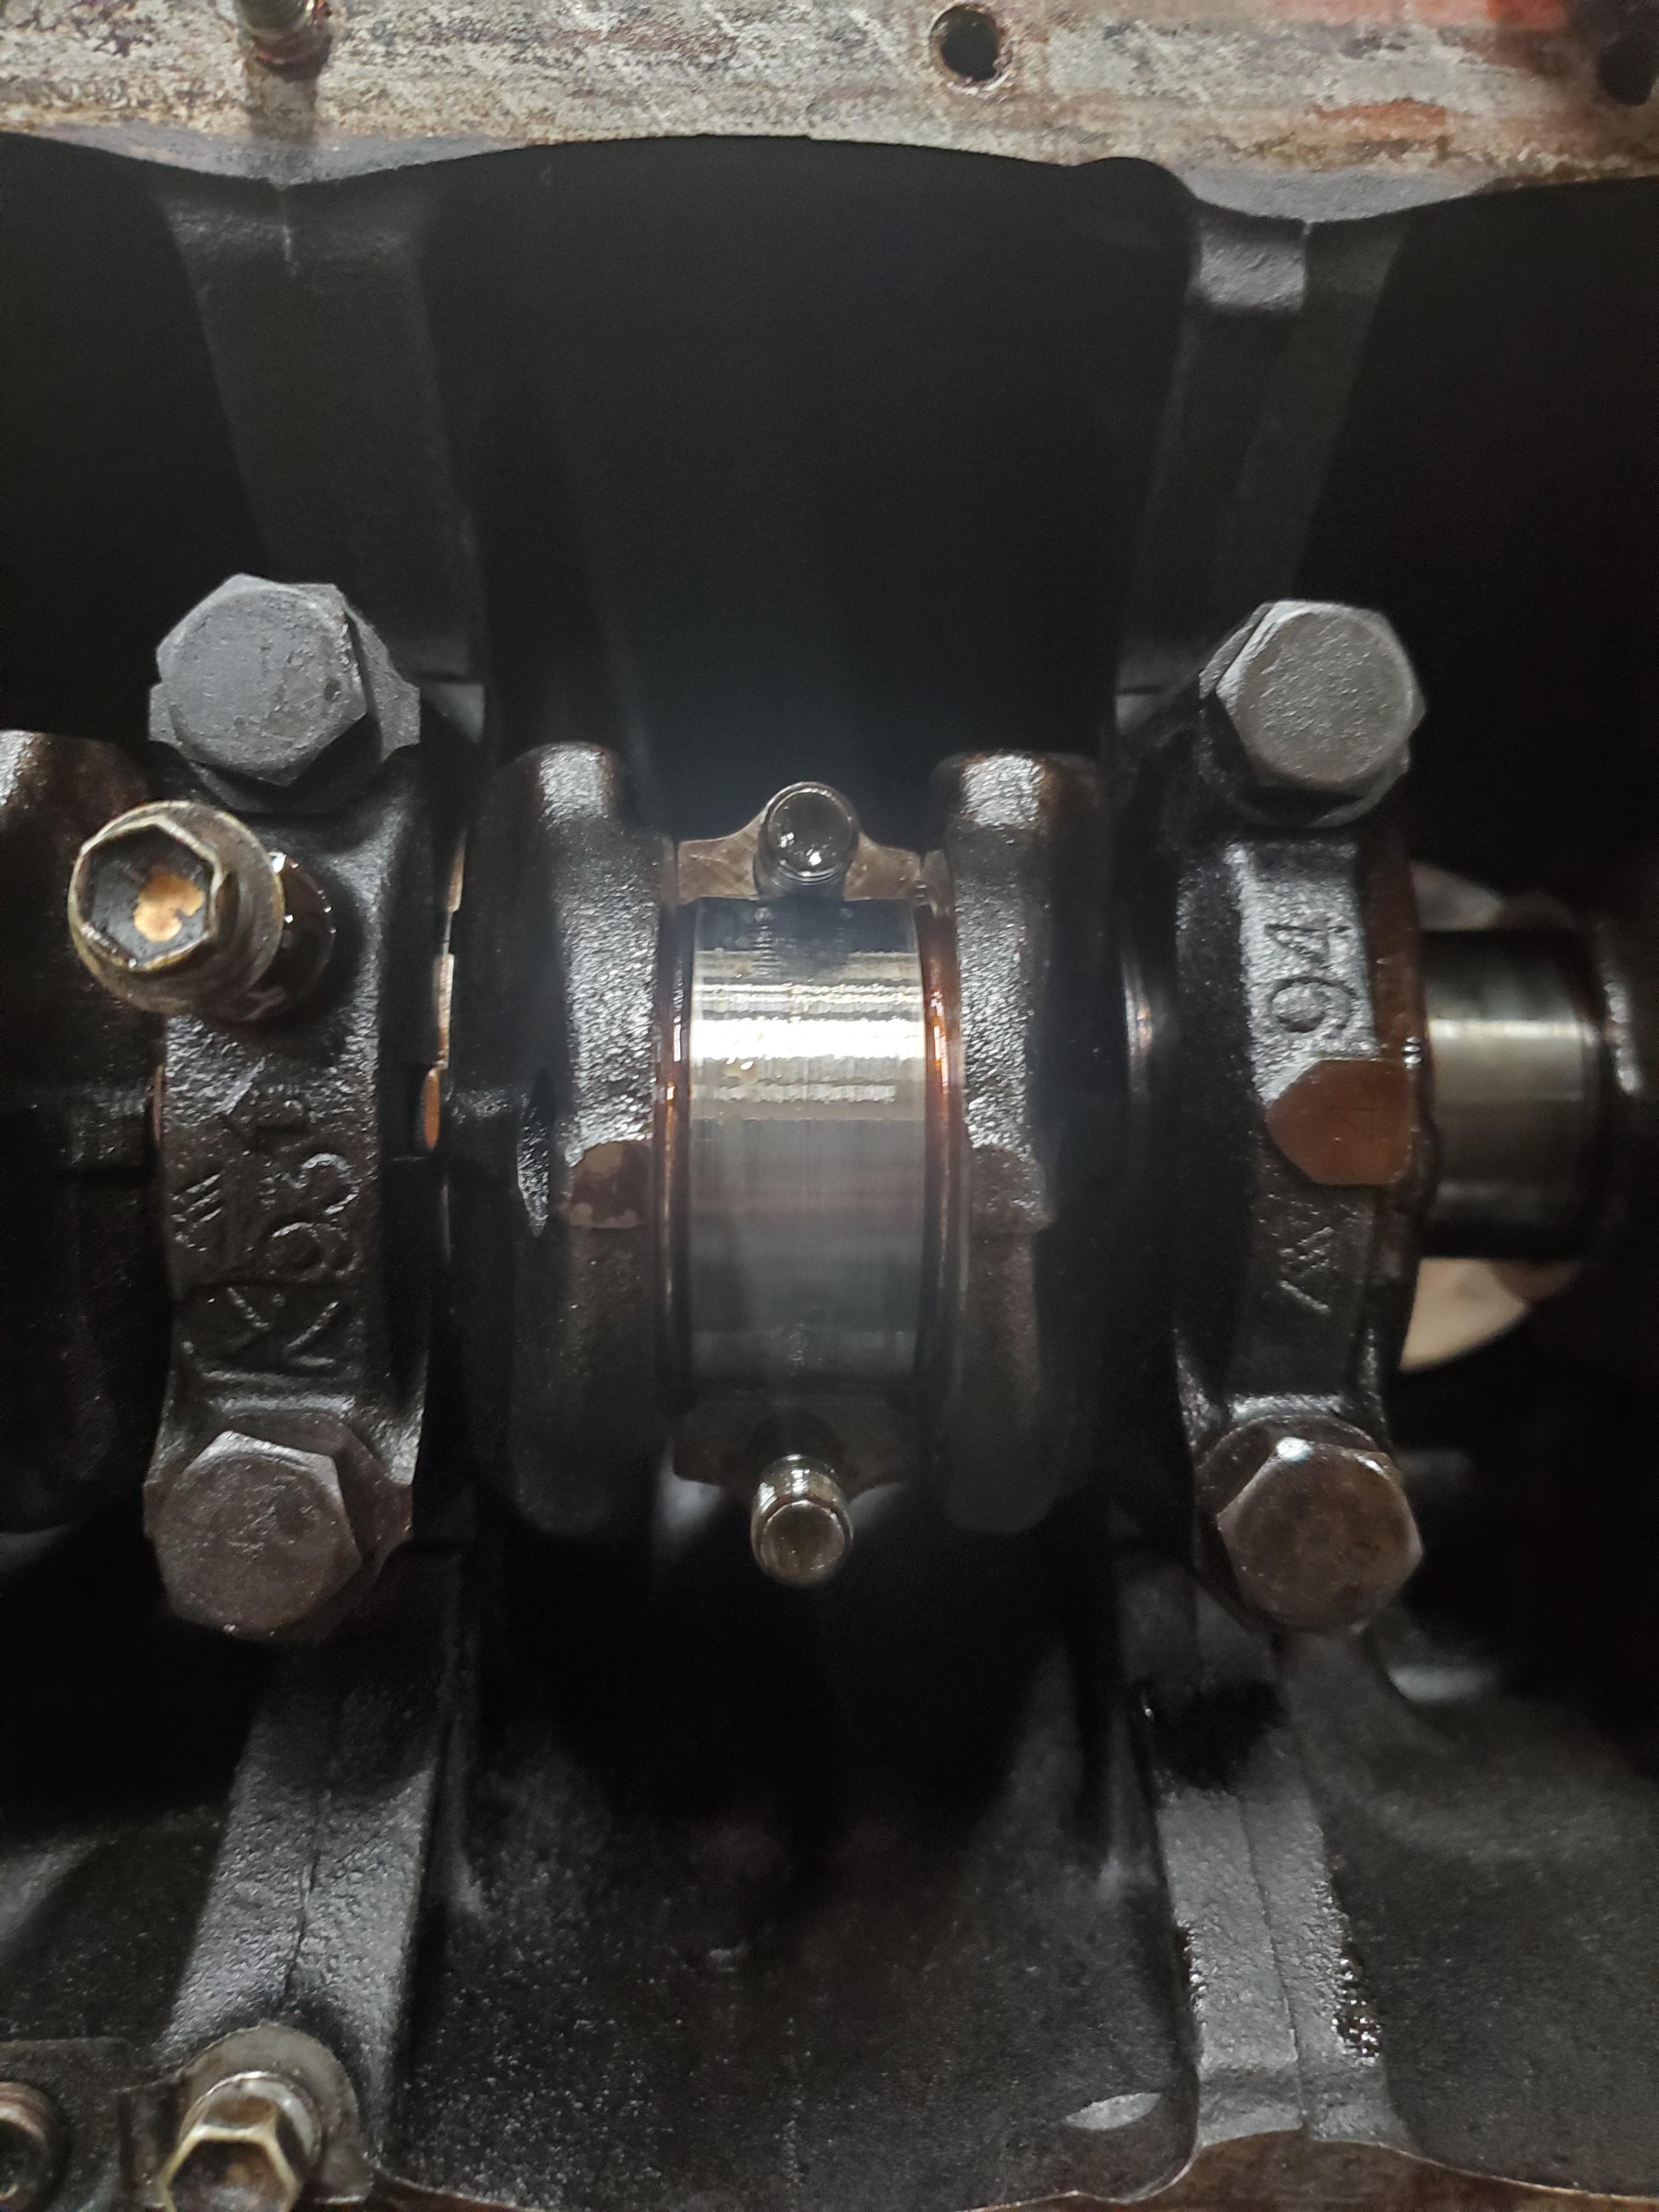
It helps to move the crankshaft over to get more room to fiddle with the connecting rod.
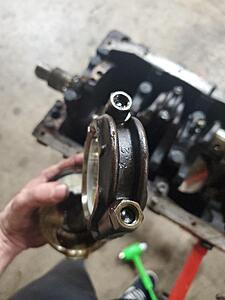
Once the connecting rod is straight up and down, all it should take is a gentle tap. I used the rubber end of this mallet. Don't forget to catch the piston.
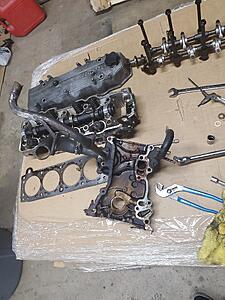
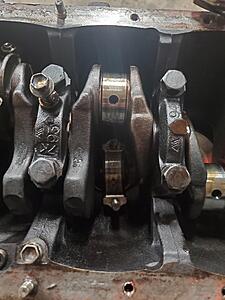
Bolt everything back together so you don mix any parts up.
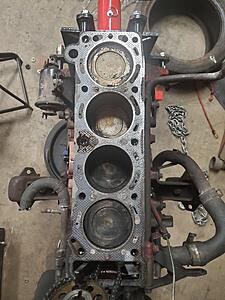
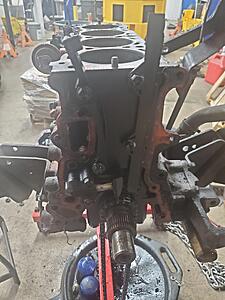
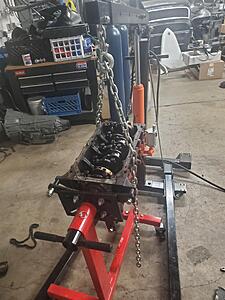
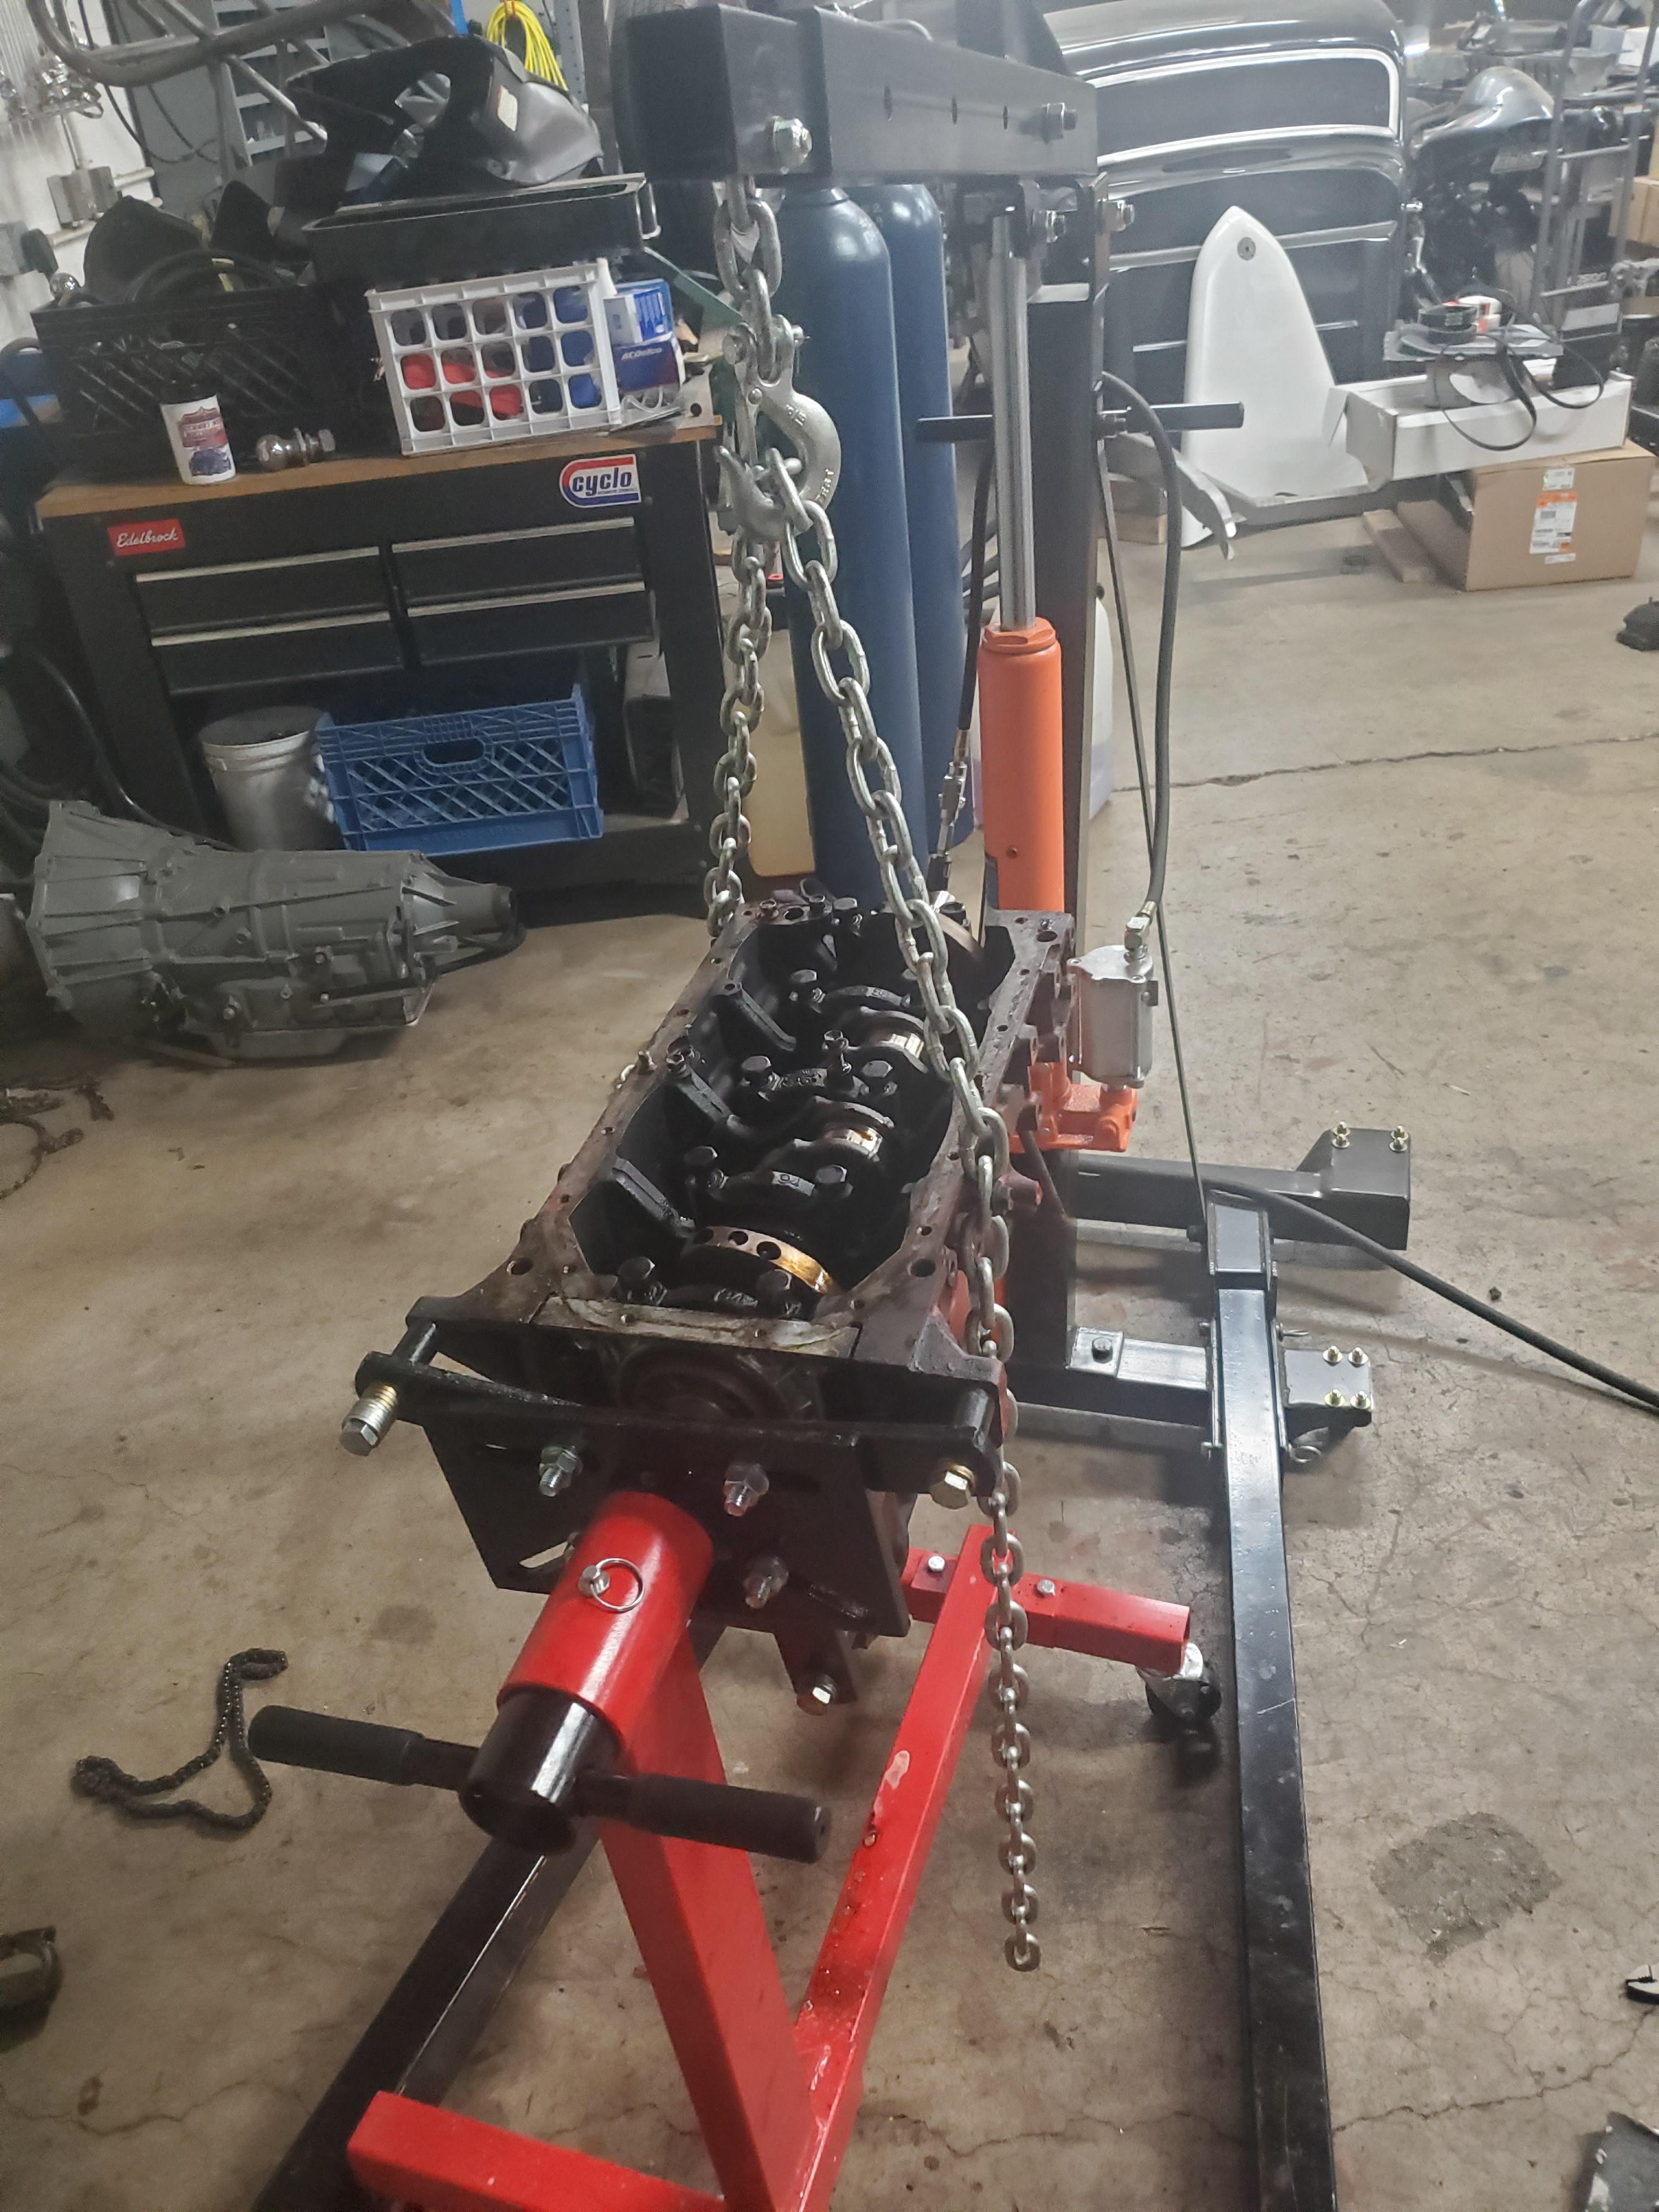
With all the pistons out, I can start on removing the crankshaft.
Loosened all these bolts. Still have to remove the rear main seal.

Putting the block on the ground so I can get better access to the rear main seal.
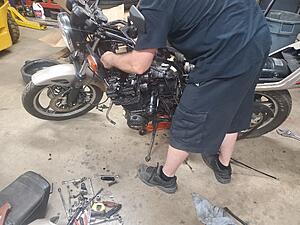
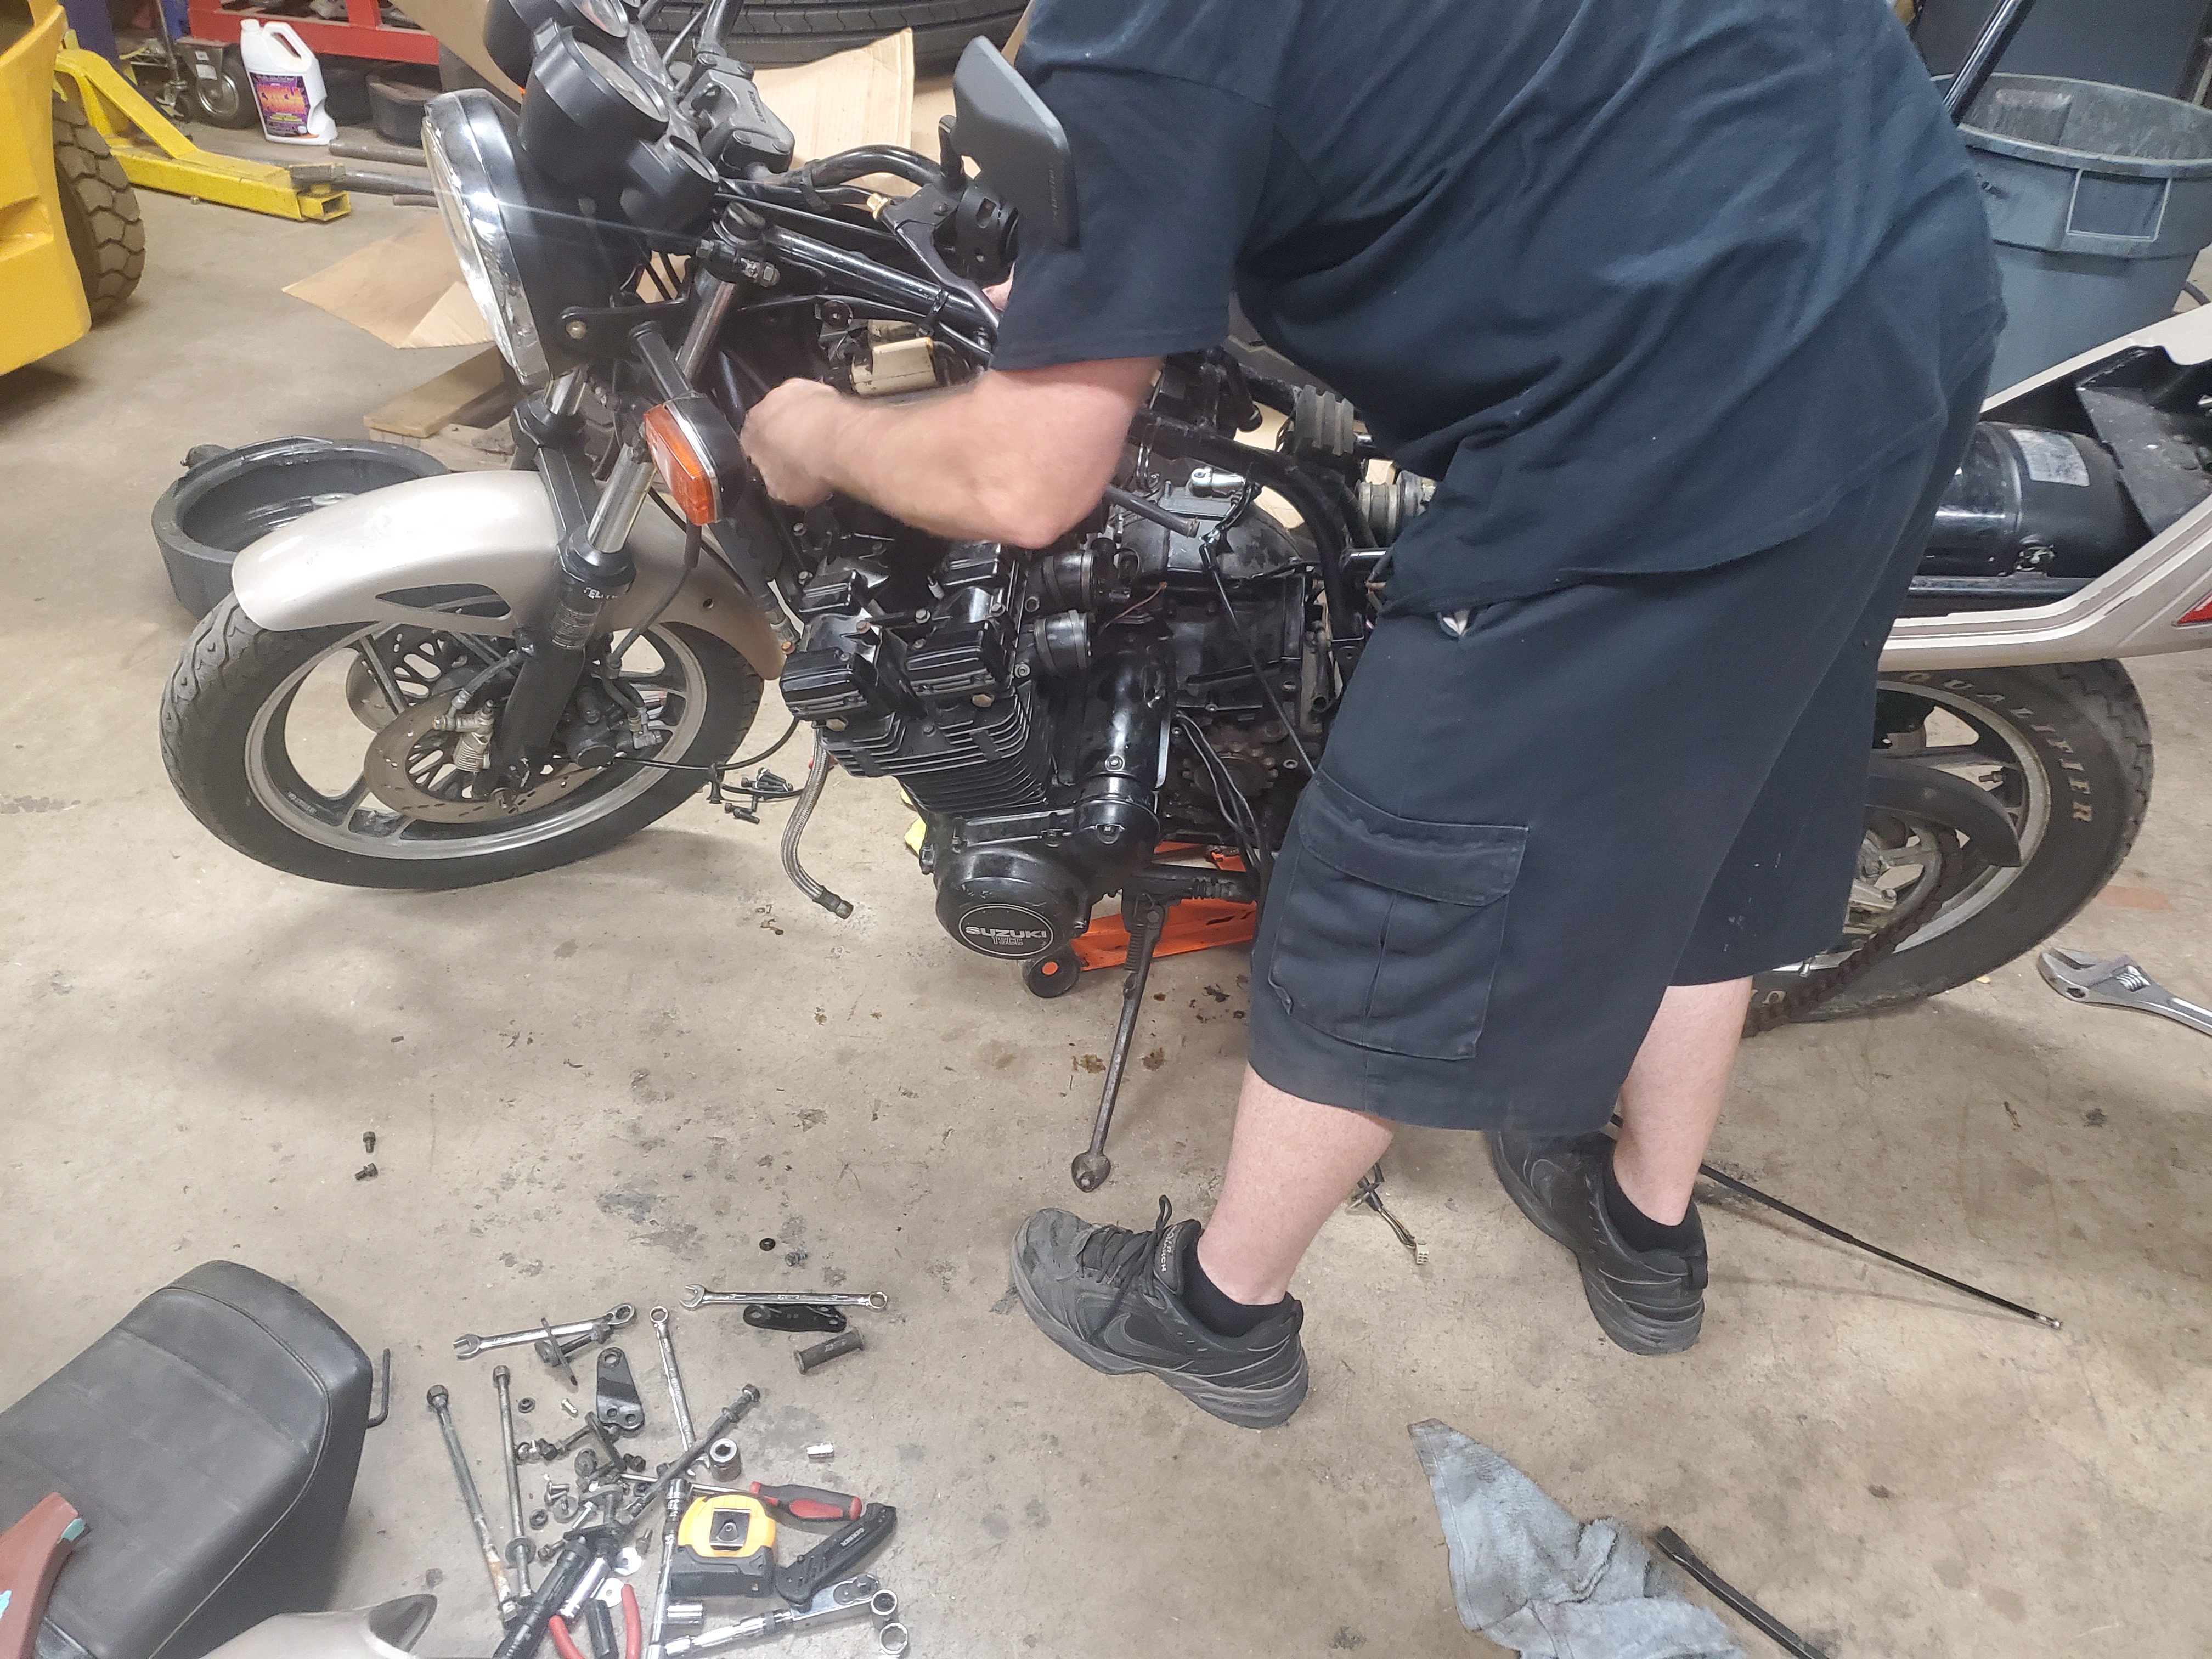
This old man is impatient and was about to pull this engine out himself. He doesn't have a bad back or anything.
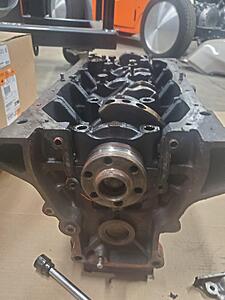
Now that his engine is out, back to this crankshaft.

The interior is in great shape minus the dash and the lame plastic steering wheel.

I will absolutely be getting rid of this cheap body lift. I have already removed the girly steps on the side.
I don't recommend using a hoist in the dirt. Ended up hooking my roommates bike up via a tow strap to get it to move under the weight of the engine.
Did I mention this is my first rebuild? I recommend pulling the wiring harness from the ECU and pulling it with the engine. Fast forward to bringing it in to my shop.
Don't forget your publications.

Check out the damage.
This is reusable, right?


The low profile timing chain guide. Saves weight.

Unless you relocated it.
Number 1 Connecting Rod
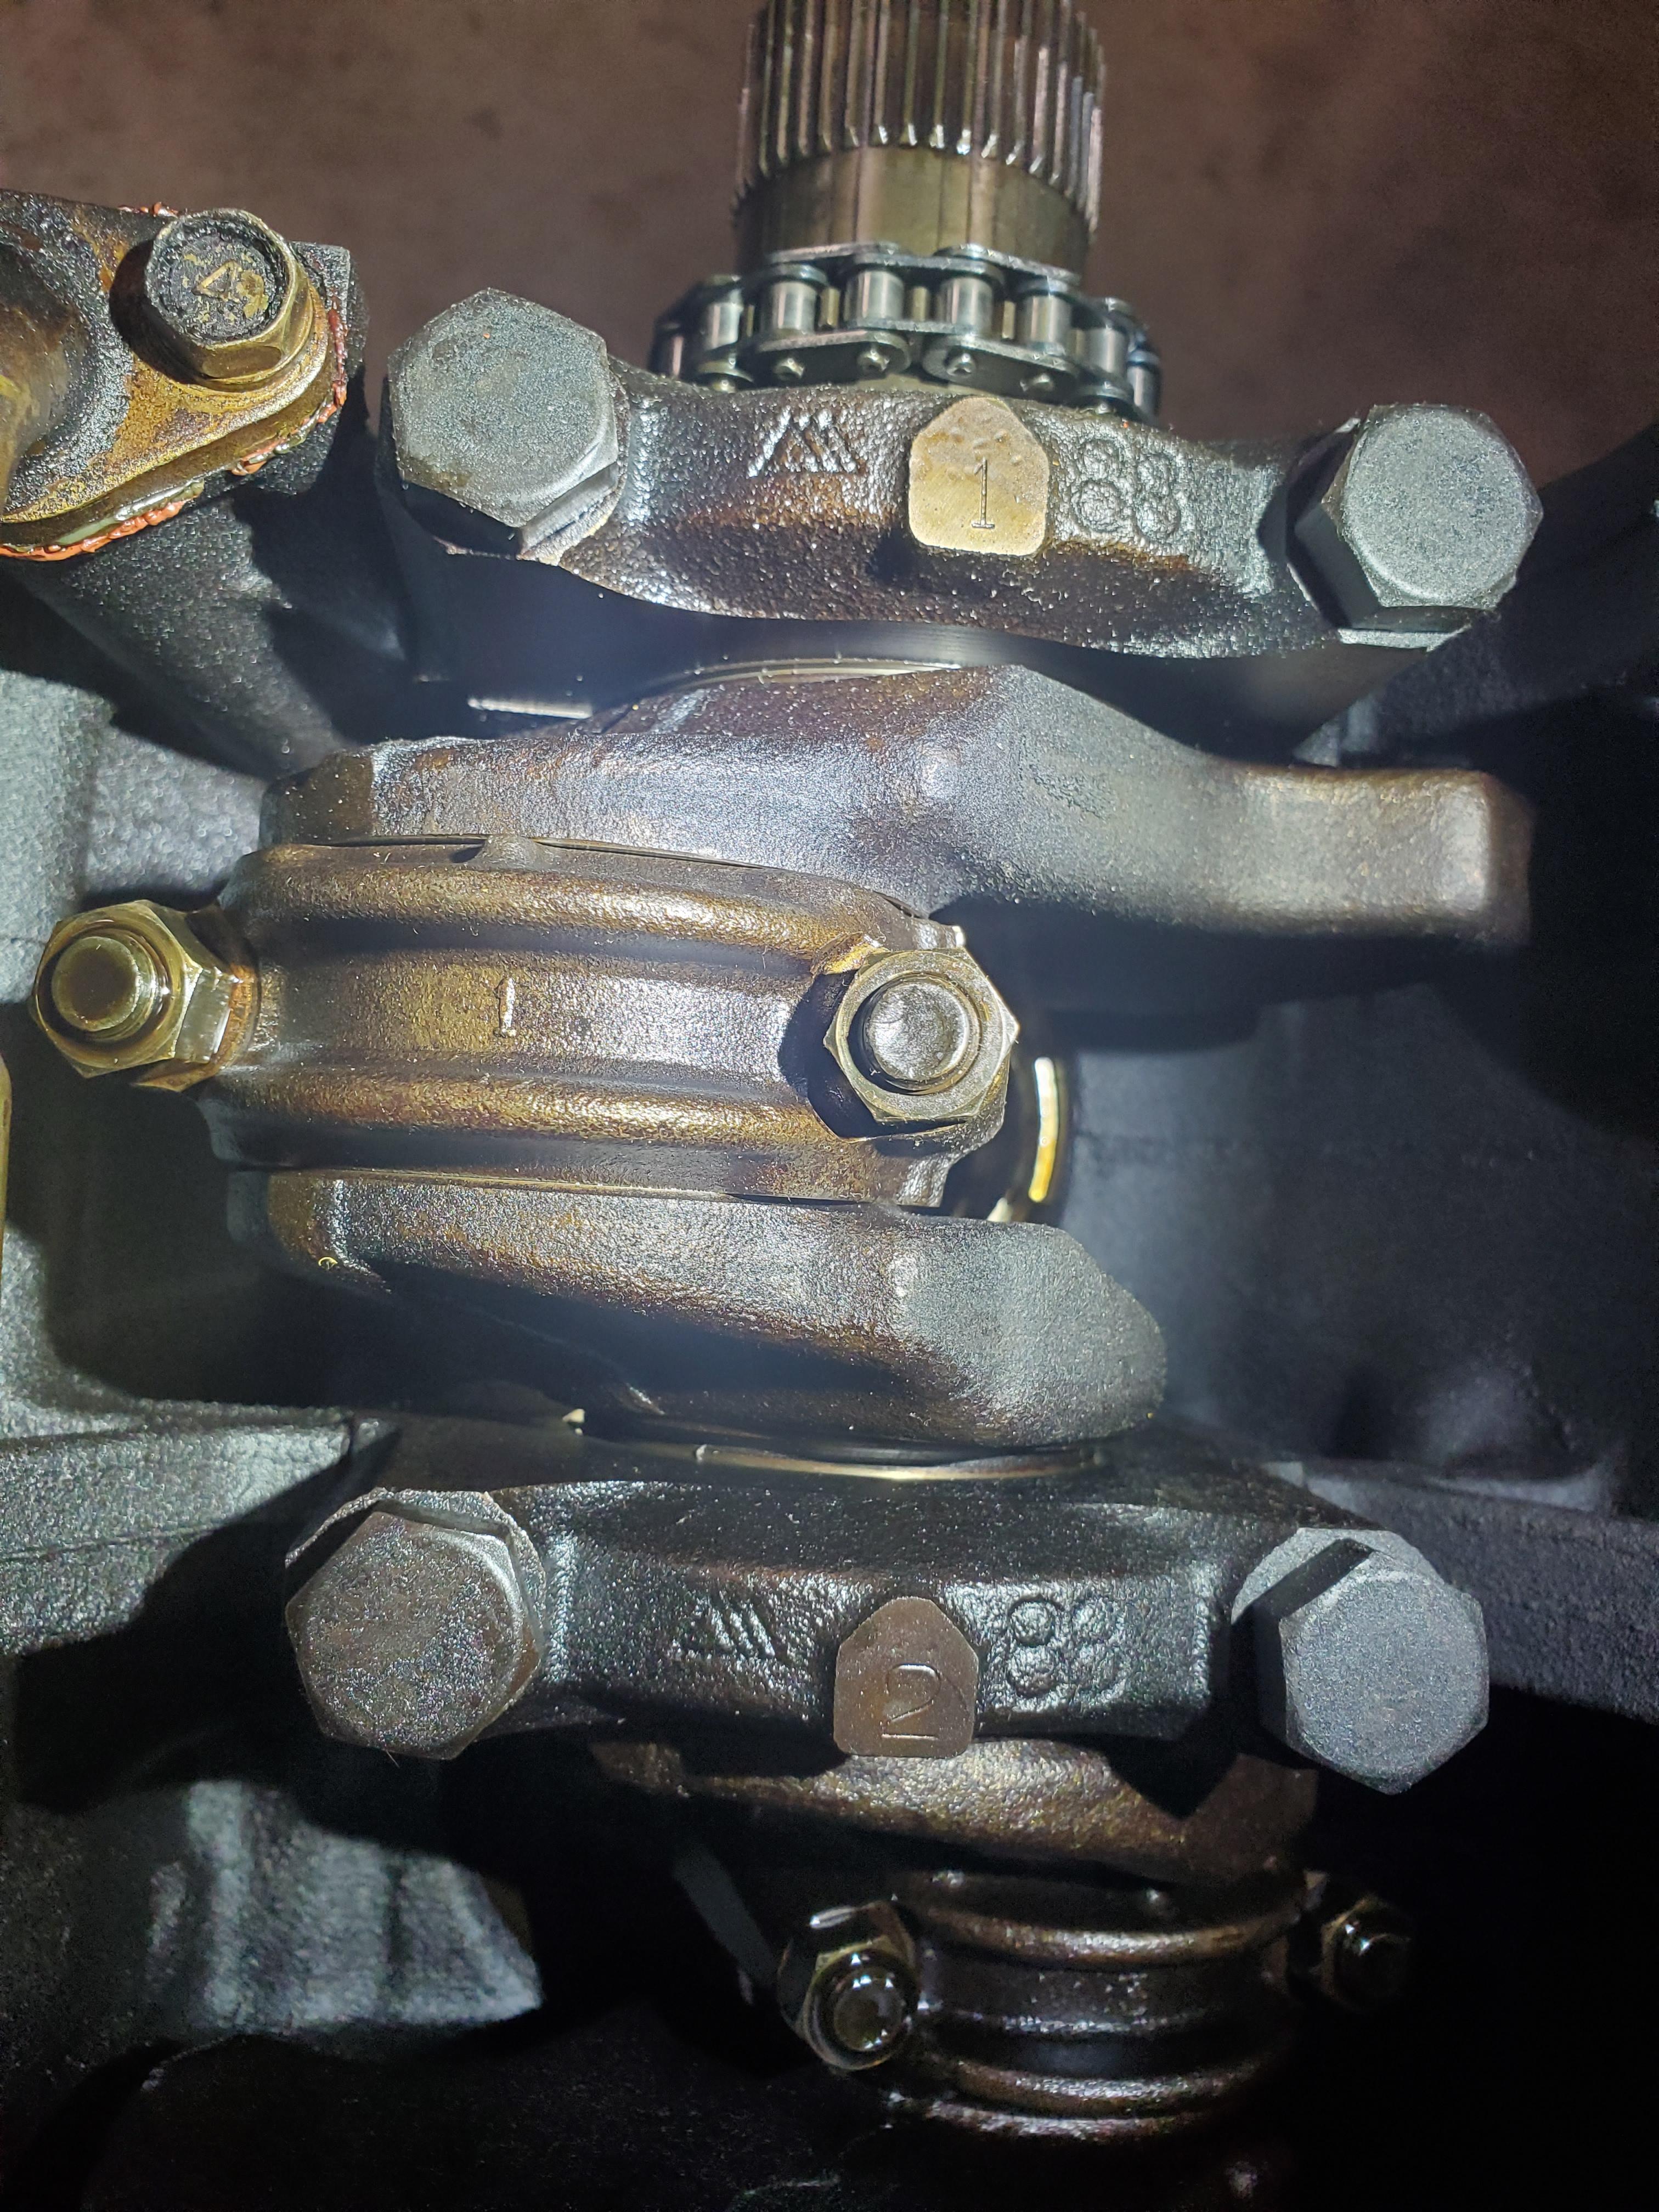
Number 3? Looks like Previous Owner doesn't know how to count. 1-3-2-1 is my pattern from front to rear.
I want to make sure I put everything back in the same spot If anything is reusable. Almost forgot to take a picture of what I did, already had one piston out.


Bumped the bolt with a rubber mallet.

This bearing almost slipped away and fell. All the other bearings hung onto their respective connecting rods. Try not to drop anything as you may be able to reuse them.

It helps to move the crankshaft over to get more room to fiddle with the connecting rod.

Once the connecting rod is straight up and down, all it should take is a gentle tap. I used the rubber end of this mallet. Don't forget to catch the piston.

Bolt everything back together so you don mix any parts up.
With all the pistons out, I can start on removing the crankshaft.

Loosened all these bolts. Still have to remove the rear main seal.
Putting the block on the ground so I can get better access to the rear main seal.
This old man is impatient and was about to pull this engine out himself. He doesn't have a bad back or anything.
Now that his engine is out, back to this crankshaft.


 09-13-2019, 04:06 PM
#3
Registered User
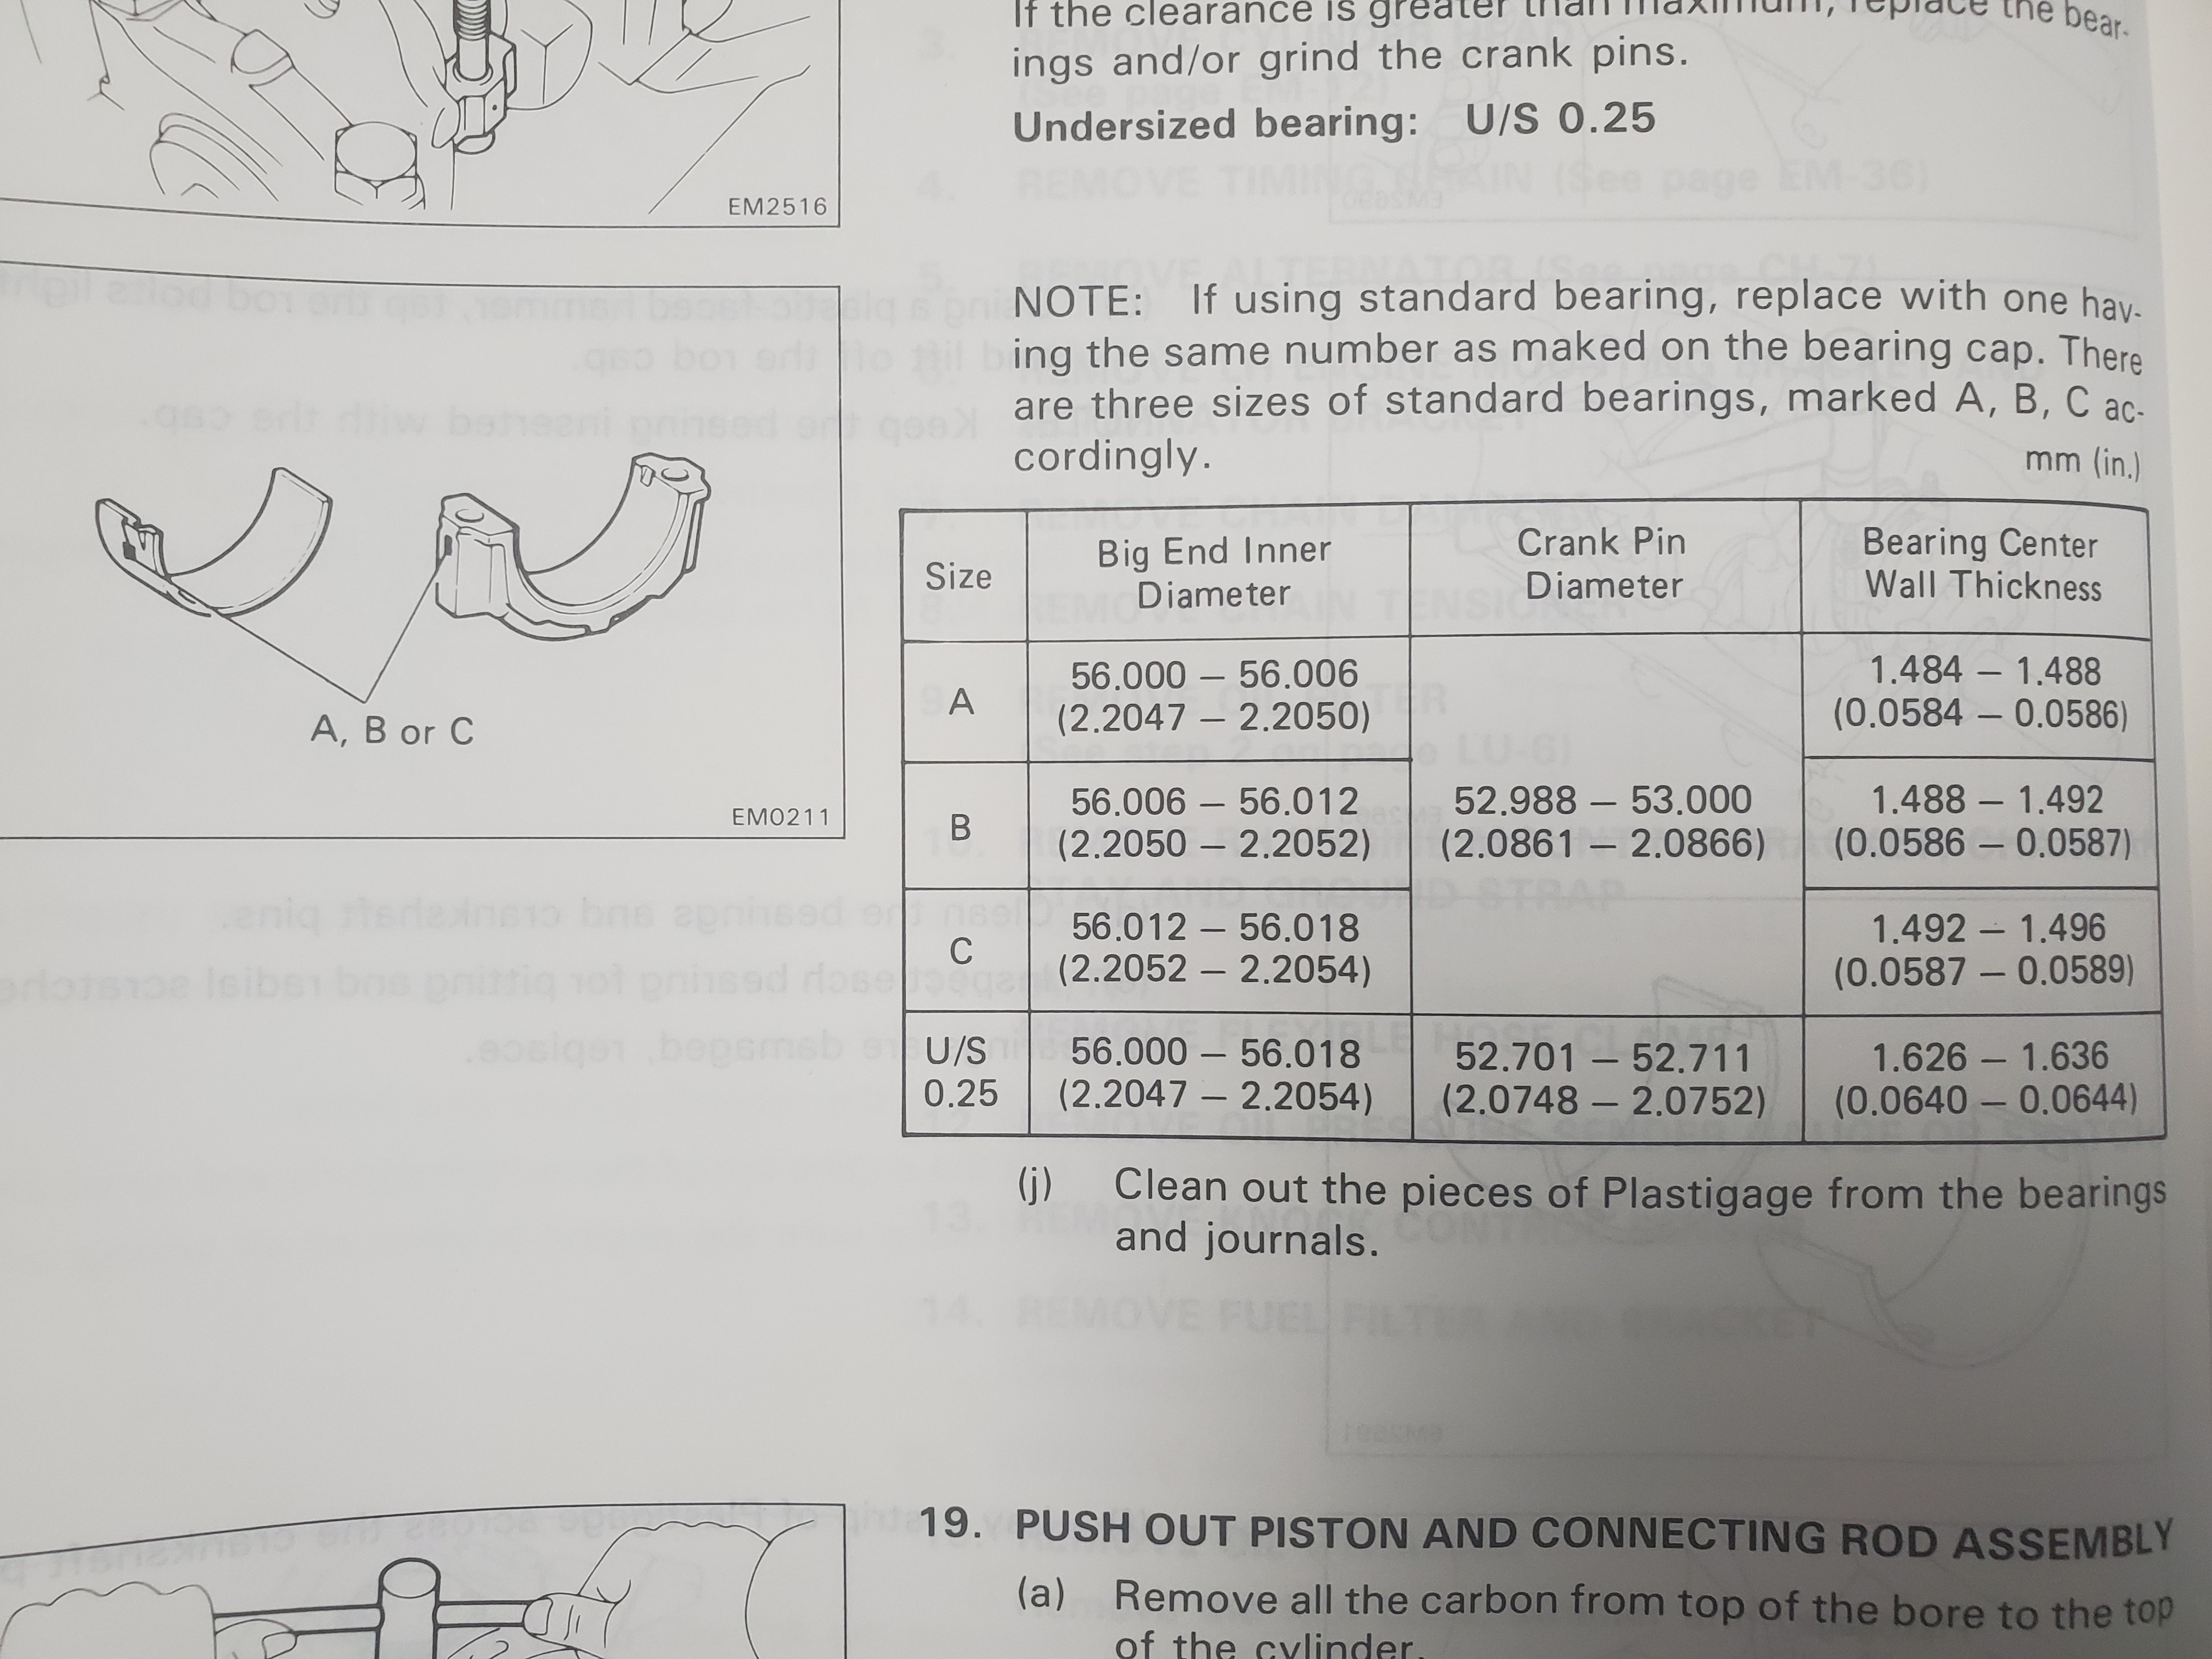
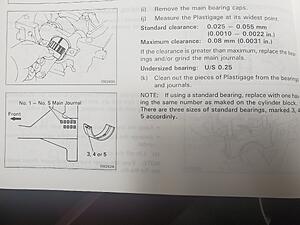
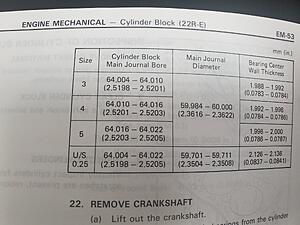
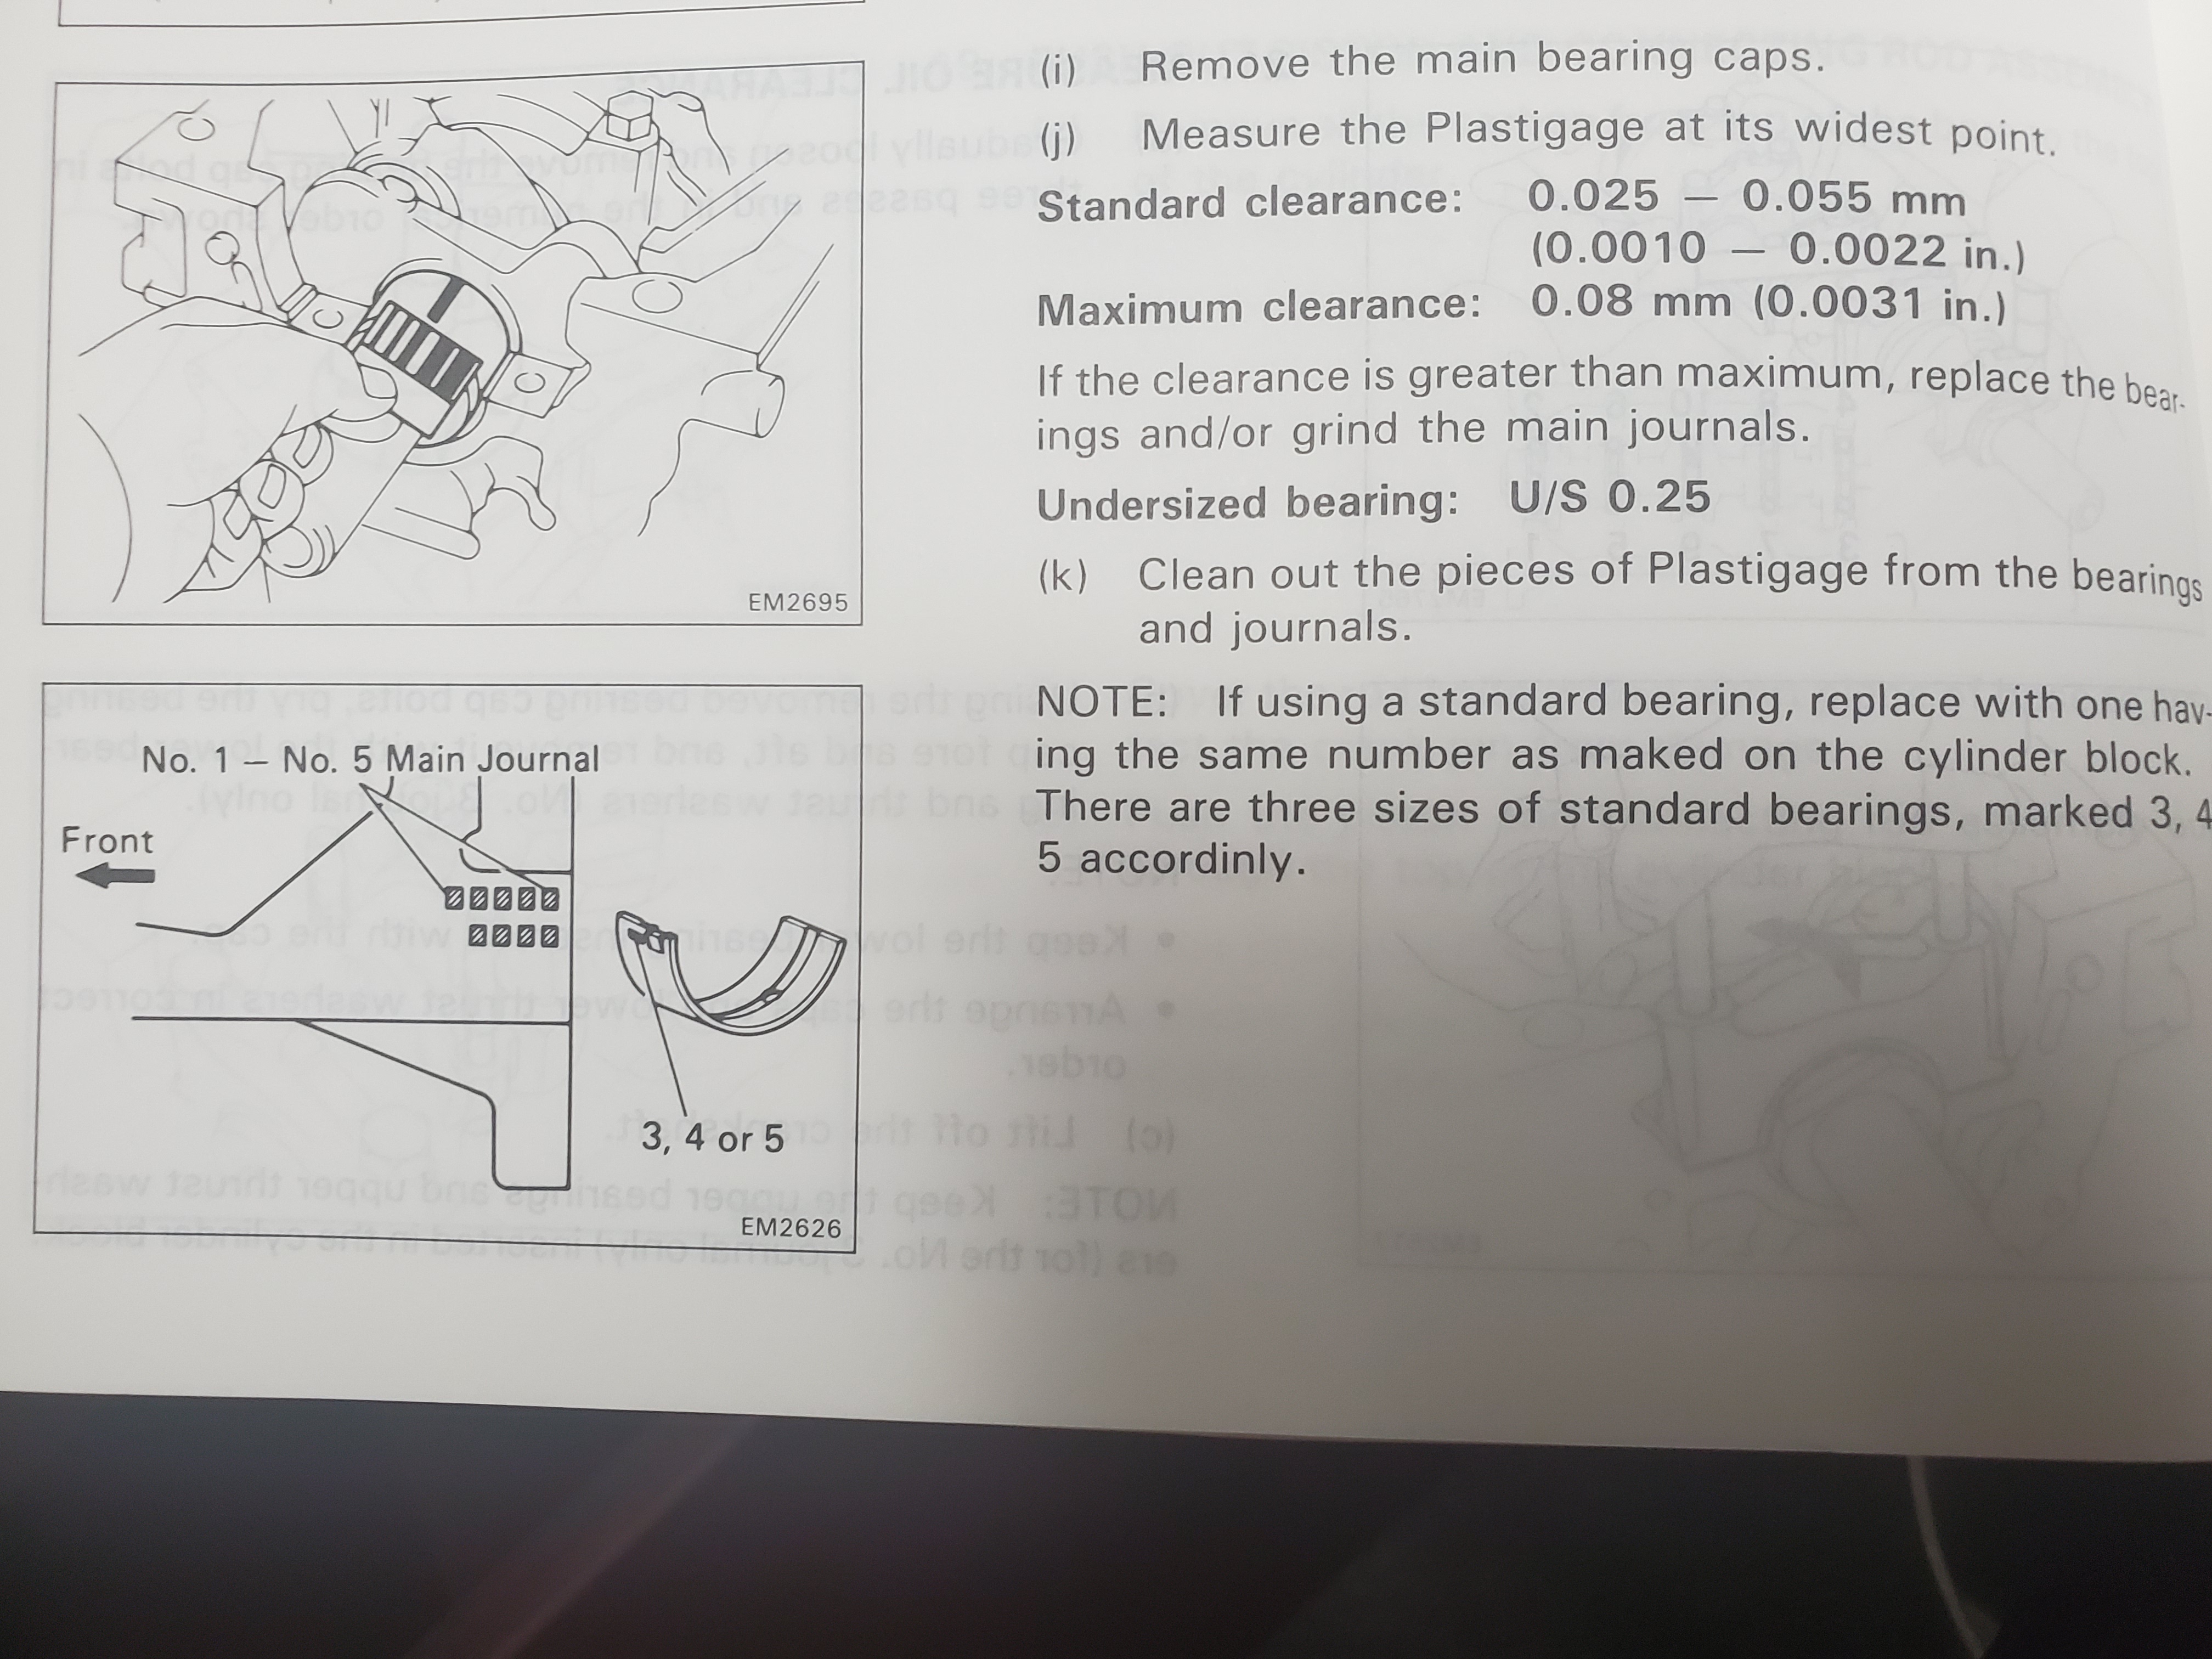
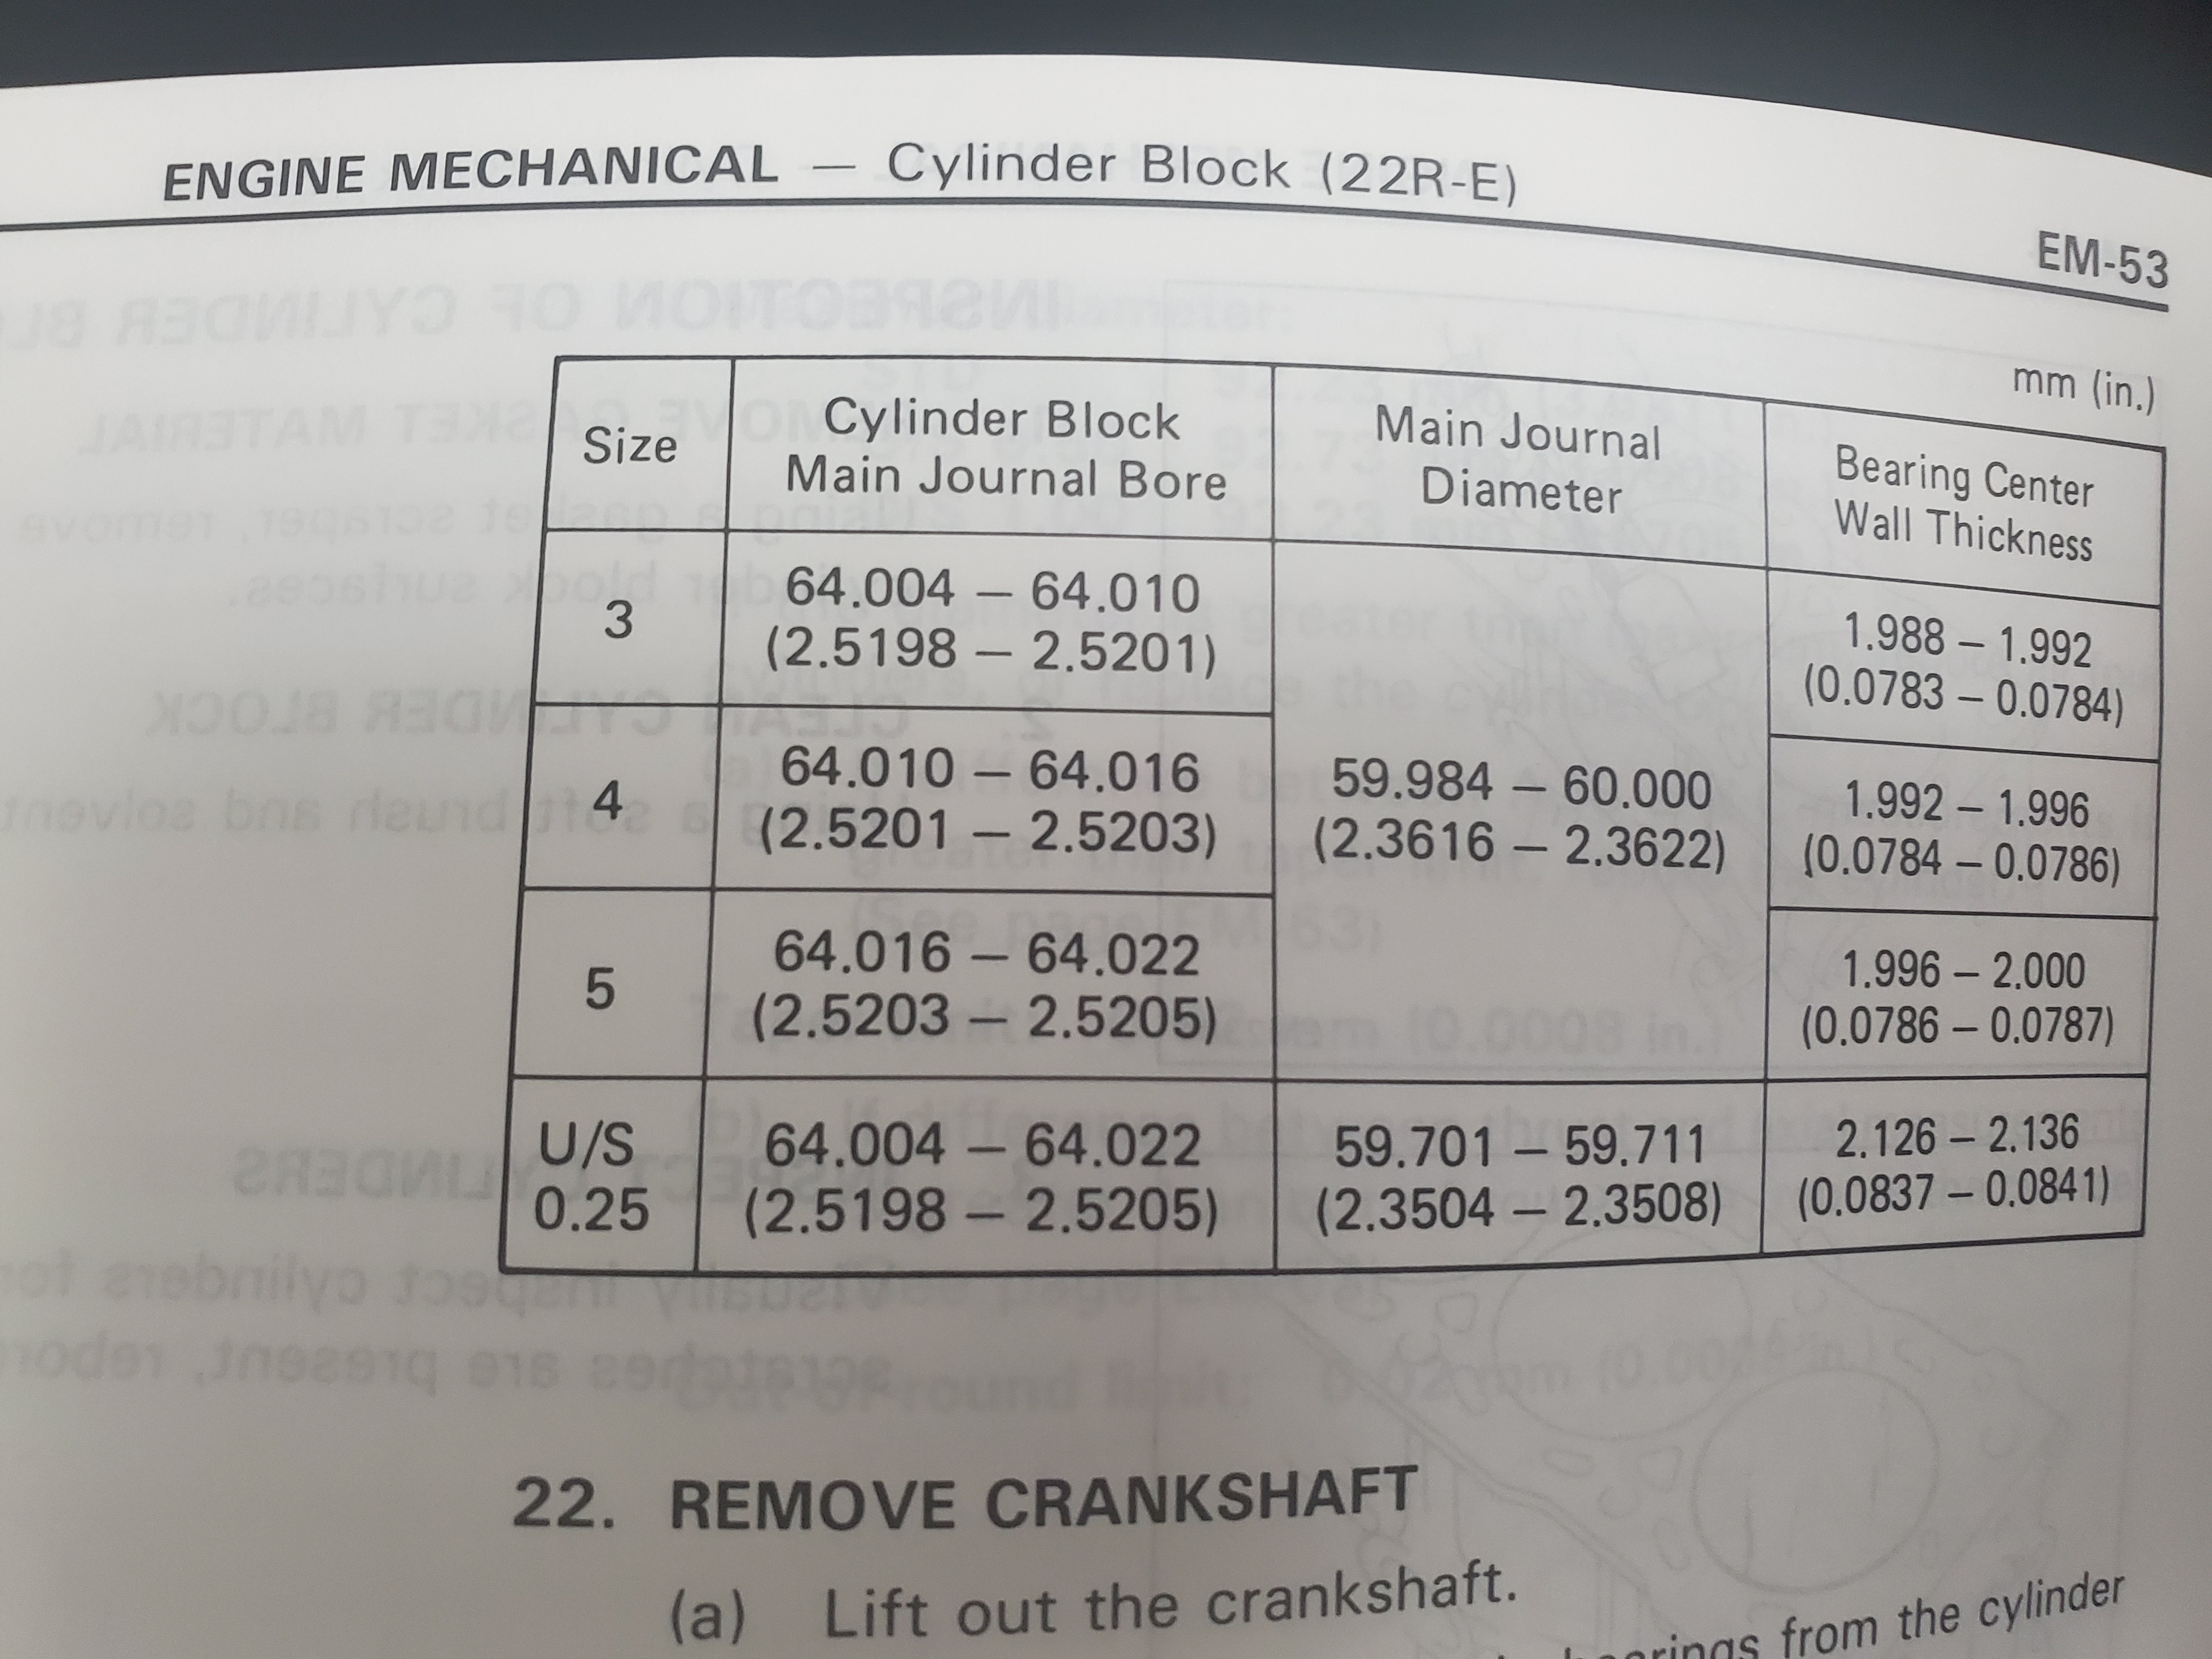
Good post! The numbers on the rod caps do not refer to the cylinder number. They refer to factory clearnces on the bearings. I have a manual that explained it.
 09-13-2019, 04:49 PM
#5
Oh wait, do you mean the numbers 3, 4, and 5? I didn't notice these numbers. I already sent the block to the machine shop so I can't double check.
Someone save me with these image sizes.
Someone save me with these image sizes.
09-13-2019, 10:04 PM
#6
Registered User
I was confused and misremembering what you show there in the manual. Sorry!
09-14-2019, 09:57 AM
#7
I picked up an SR5 cluster from a neighbor and I'm dying to see if it still works.

Thread
Thread Starter
Forum
Replies
Last Post
polycrack
86-95 Trucks & 4Runners (Build-Up Section)
34
11-28-2016 02:19 PM


