cleaning water and oil ports
 11-29-2013, 02:56 PM
#41
Registered User
Thread Starter
iTrader: (1)
Join Date: Feb 2013
Location: baton rouge,louisiana
Posts: 447
Likes: 0
Received 0 Likes
on
0 Posts
Yeah I'm doing the complete emissions delete well I already had it but some of the plugs were leaking a little so I wanted to change them out but I managed to get them out with a propane torch and wax so that went well and the triangle piece us that spacer they use from the factory for the air compressor mount you want have it unless you have factory ac. I was able to get a good bit done today got the oilpan installed changed some hoses and got my intake all clean with new plugs so tomorrow morning I'm gonna bolt the ol head on and just pray that I do it right this is my first major job so its a learning experience for me the whole way but it's went pretty good up to this point
 11-29-2013, 02:59 PM
#42
Registered User
Thread Starter
iTrader: (1)
Join Date: Feb 2013
Location: baton rouge,louisiana
Posts: 447
Likes: 0
Received 0 Likes
on
0 Posts
Yes sir I did pit the sealer in the top oil pump bolt and I've used the Toyota fipg on everything I've bolted up that calls for a gasket just a small even amount on each side I've heard different story's about when to use it and when to not use it so I just did it on everything but will find out soon enough how well I did I will keep you posted
11-29-2013, 03:02 PM
#43
Registered User
Thread Starter
iTrader: (1)
Join Date: Feb 2013
Location: baton rouge,louisiana
Posts: 447
Likes: 0
Received 0 Likes
on
0 Posts
Ohh and I havnt got to it yet but I think I'm gonna fight trying to get the cam sprocket on the cam shaft just with the tensioner and the new chain from doa racing and its a pre stretched chain so I'm worried about that part
11-29-2013, 03:32 PM
#44
Registered User
I just used the paper gaskets on mine so I'll be interested to hear how yours works out. Sounds like you're almost there!
No advice on the cam. I didn't replace my chain. I had no problem getting it back together.
No advice on the cam. I didn't replace my chain. I had no problem getting it back together.
11-29-2013, 06:52 PM
#45
Registered User
Thread Starter
iTrader: (1)
Join Date: Feb 2013
Location: baton rouge,louisiana
Posts: 447
Likes: 0
Received 0 Likes
on
0 Posts
http://s1358.photobucket.com/user/wi...438fc.jpg.html
This is all the emissions delete stuff plus some progress
http://s1358.photobucket.com/user/wi...256fb.jpg.html
http://s1358.photobucket.com/user/wi...c4afd.jpg.html
http://s1358.photobucket.com/user/wi...d73f2.jpg.html
http://s1358.photobucket.com/user/wi...11fa9.jpg.html
http://s1358.photobucket.com/user/wi...ba459.jpg.html
Last edited by catfish21; 11-29-2013 at 07:02 PM.
 11-30-2013, 09:03 AM
#47
Registered User
Open photobucket up. Select picture you want to post....click on upper right hand side menu for "links to share this photo" double click on "direct" this will copy link ....then select "insert image" from the threat tools above. Scroll over little icons above and you will see which one...."insert image".
Click on that. Paste the link you copied from photobucket into the box that appears.
Poof. You have inserted an image into the thread we can see...and dont have to click on. I dont click. I likes to sees me some yotas...nots go huntinz fer em.
Click on that. Paste the link you copied from photobucket into the box that appears.
Poof. You have inserted an image into the thread we can see...and dont have to click on. I dont click. I likes to sees me some yotas...nots go huntinz fer em.
11-30-2013, 01:10 PM
#48
Use the IMG code and post it in the text box on yotatech. Looks like this:
[U R L=http://s1358.photobucket.com/user/williamson2121/media/IMAG0472_zps94c438fc.jpg.html][I M G]http://i1358.photobucket.com/albums/q777/williamson2121/IMAG0472_zps94c438fc.jpg[/IMG][/URL]
[U R L=http://s1358.photobucket.com/user/williamson2121/media/IMAG0472_zps94c438fc.jpg.html][I M G]http://i1358.photobucket.com/albums/q777/williamson2121/IMAG0472_zps94c438fc.jpg[/IMG][/URL]
Last edited by kawazx636; 11-30-2013 at 01:12 PM.
 12-01-2013, 04:01 PM
#51
Registered User
Thread Starter
iTrader: (1)
Join Date: Feb 2013
Location: baton rouge,louisiana
Posts: 447
Likes: 0
Received 0 Likes
on
0 Posts
http://s1358.photobucket.com/user/wi...0fcdd.jpg.html
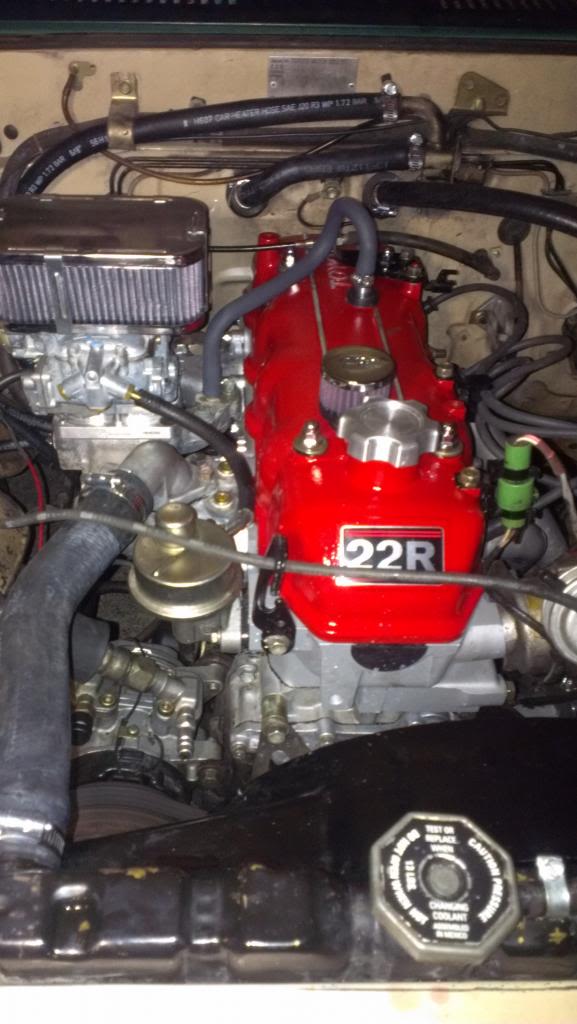
Here is a pic of the finished product and man I was nervous to start it but when I did it ran like I've never heard it run before PERFECT it is so great to know it's all new now and it is so quiet now with no ticking noise, I'm just very pleased at what I done for my first major job like this, and the 261 cam from engbuilder I can't really tell a difference from the stock one so Idk maybe I'll find out when I pull my boat if it helps with that. I do have a question though I filled the radiator with red coolant and water and ran the motor for a while then added more coolant but I'm not getting preasure on the upper hose the heat is working ok but now great, what do I need to do to get this right I'm stuck its not running hot and I did test the thermostat to make sure it work so I'm lost now with that but other than that.it's great
Here is a pic of the finished product and man I was nervous to start it but when I did it ran like I've never heard it run before PERFECT it is so great to know it's all new now and it is so quiet now with no ticking noise, I'm just very pleased at what I done for my first major job like this, and the 261 cam from engbuilder I can't really tell a difference from the stock one so Idk maybe I'll find out when I pull my boat if it helps with that. I do have a question though I filled the radiator with red coolant and water and ran the motor for a while then added more coolant but I'm not getting preasure on the upper hose the heat is working ok but now great, what do I need to do to get this right I'm stuck its not running hot and I did test the thermostat to make sure it work so I'm lost now with that but other than that.it's great
Last edited by catfish21; 12-01-2013 at 04:10 PM.
12-01-2013, 04:19 PM
#52
Registered User
get the front end high up as you can to get all air out of cooling system. Pop the cap off....run it till warm with cap off....top it off....keep doing till its full.
And GRATS. I told ya you could do it!! Feels great doesnt it?
And GRATS. I told ya you could do it!! Feels great doesnt it?
 12-01-2013, 04:27 PM
#54
The system needs to be "burped" to get the air out of the coolant system. Just let the engine cool completely (don't do this with a hot engine as it will overflow and likely burn you) and take the radiator cap off. Start the engine and let it run. You'll see some bubbles work up and out. Keep adding fluid as it burps. Should take just a few minutes to get the air out.
BTW, Engine looks great!
BTW, Engine looks great!
12-01-2013, 04:29 PM
#55
Registered User
Thread Starter
iTrader: (1)
Join Date: Feb 2013
Location: baton rouge,louisiana
Posts: 447
Likes: 0
Received 0 Likes
on
0 Posts
When I leave the cap off water wants to pour out the top I'll just keep messing.with it I guess thanks for the help through this project to
12-01-2013, 05:15 PM
#57
NEVER EVER run a tap into a bolt hole. They are for making holes....not cleaning them. You want a thread chaser. It will clean with out damaging the threads. Using a tap can ruin the hole. Make torque readings skew. If you use a tap instead of a threadchaser...you are either too cheap to buy one...uninformed (you are now) or a knucklehead. So you are doing the head gasket on your 22re. You just trying to get the block ready correct? green scotchbrite on block deck to clean up. spray some pb blaster down bolt holes....let it soak. blow them out with air (safty glasses) then run a thread chaser down the holes. spray again...blow them out again. should be good to go.
12-01-2013, 05:18 PM
#58
Registered User
Taps remove metal if even if they are not cross threaded. This enlargens threads. Skewing torque reading.
Basic machine shop class will teach you not to use a tap to chase a thread.
Just passing along common sense. Knucklehead. lol.


